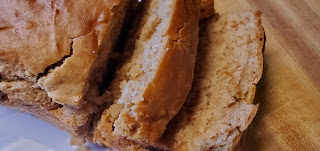
x

Showing posts with label healthy fat. Show all posts

Fall Spice Creamer and Cold Foam- Phases 1 and 3 (v)


Fall Spice Creamer
Phases 1 and 3 versions

Use your favorite plant based milk for this. Homemade or store bought. I prefer but milks for this creamer but oat and brown rice milks should work just fine

Phase 1- unsweetened oat or brown rice milk
Phase 3- unsweetened almond, coconut, cashew or oat

I do not use ground spices in this as they will not dissolve and leave the creamer with a gritty feel.

2 cups plant based milk 
3-4 cinnamon sticks
1 vanilla bean
3-4 star anise
10 whole cloves
1 whole nutmeg, crushed
2 inch piece of fresh ginger, sliced
sweetener to taste (birch xylitol, pure monk fruit or pure stevia)

Split the vanilla bean lengthwise. No need to scrape as most flavor comes from the pod and not the caviar inside. 
Place everything into a pot over medium heat and bring to a very gentle simmer. Do not boil. Reduce heat if there are lots of bubbles. Stir often. Simmer slowly for about 30 minutes. Allow to cool. Strain. 
Keep in fridge

Pro Tip. If the flavor ends up stronger than you prefer, simply add more milk to get to the intensity you prefer. 
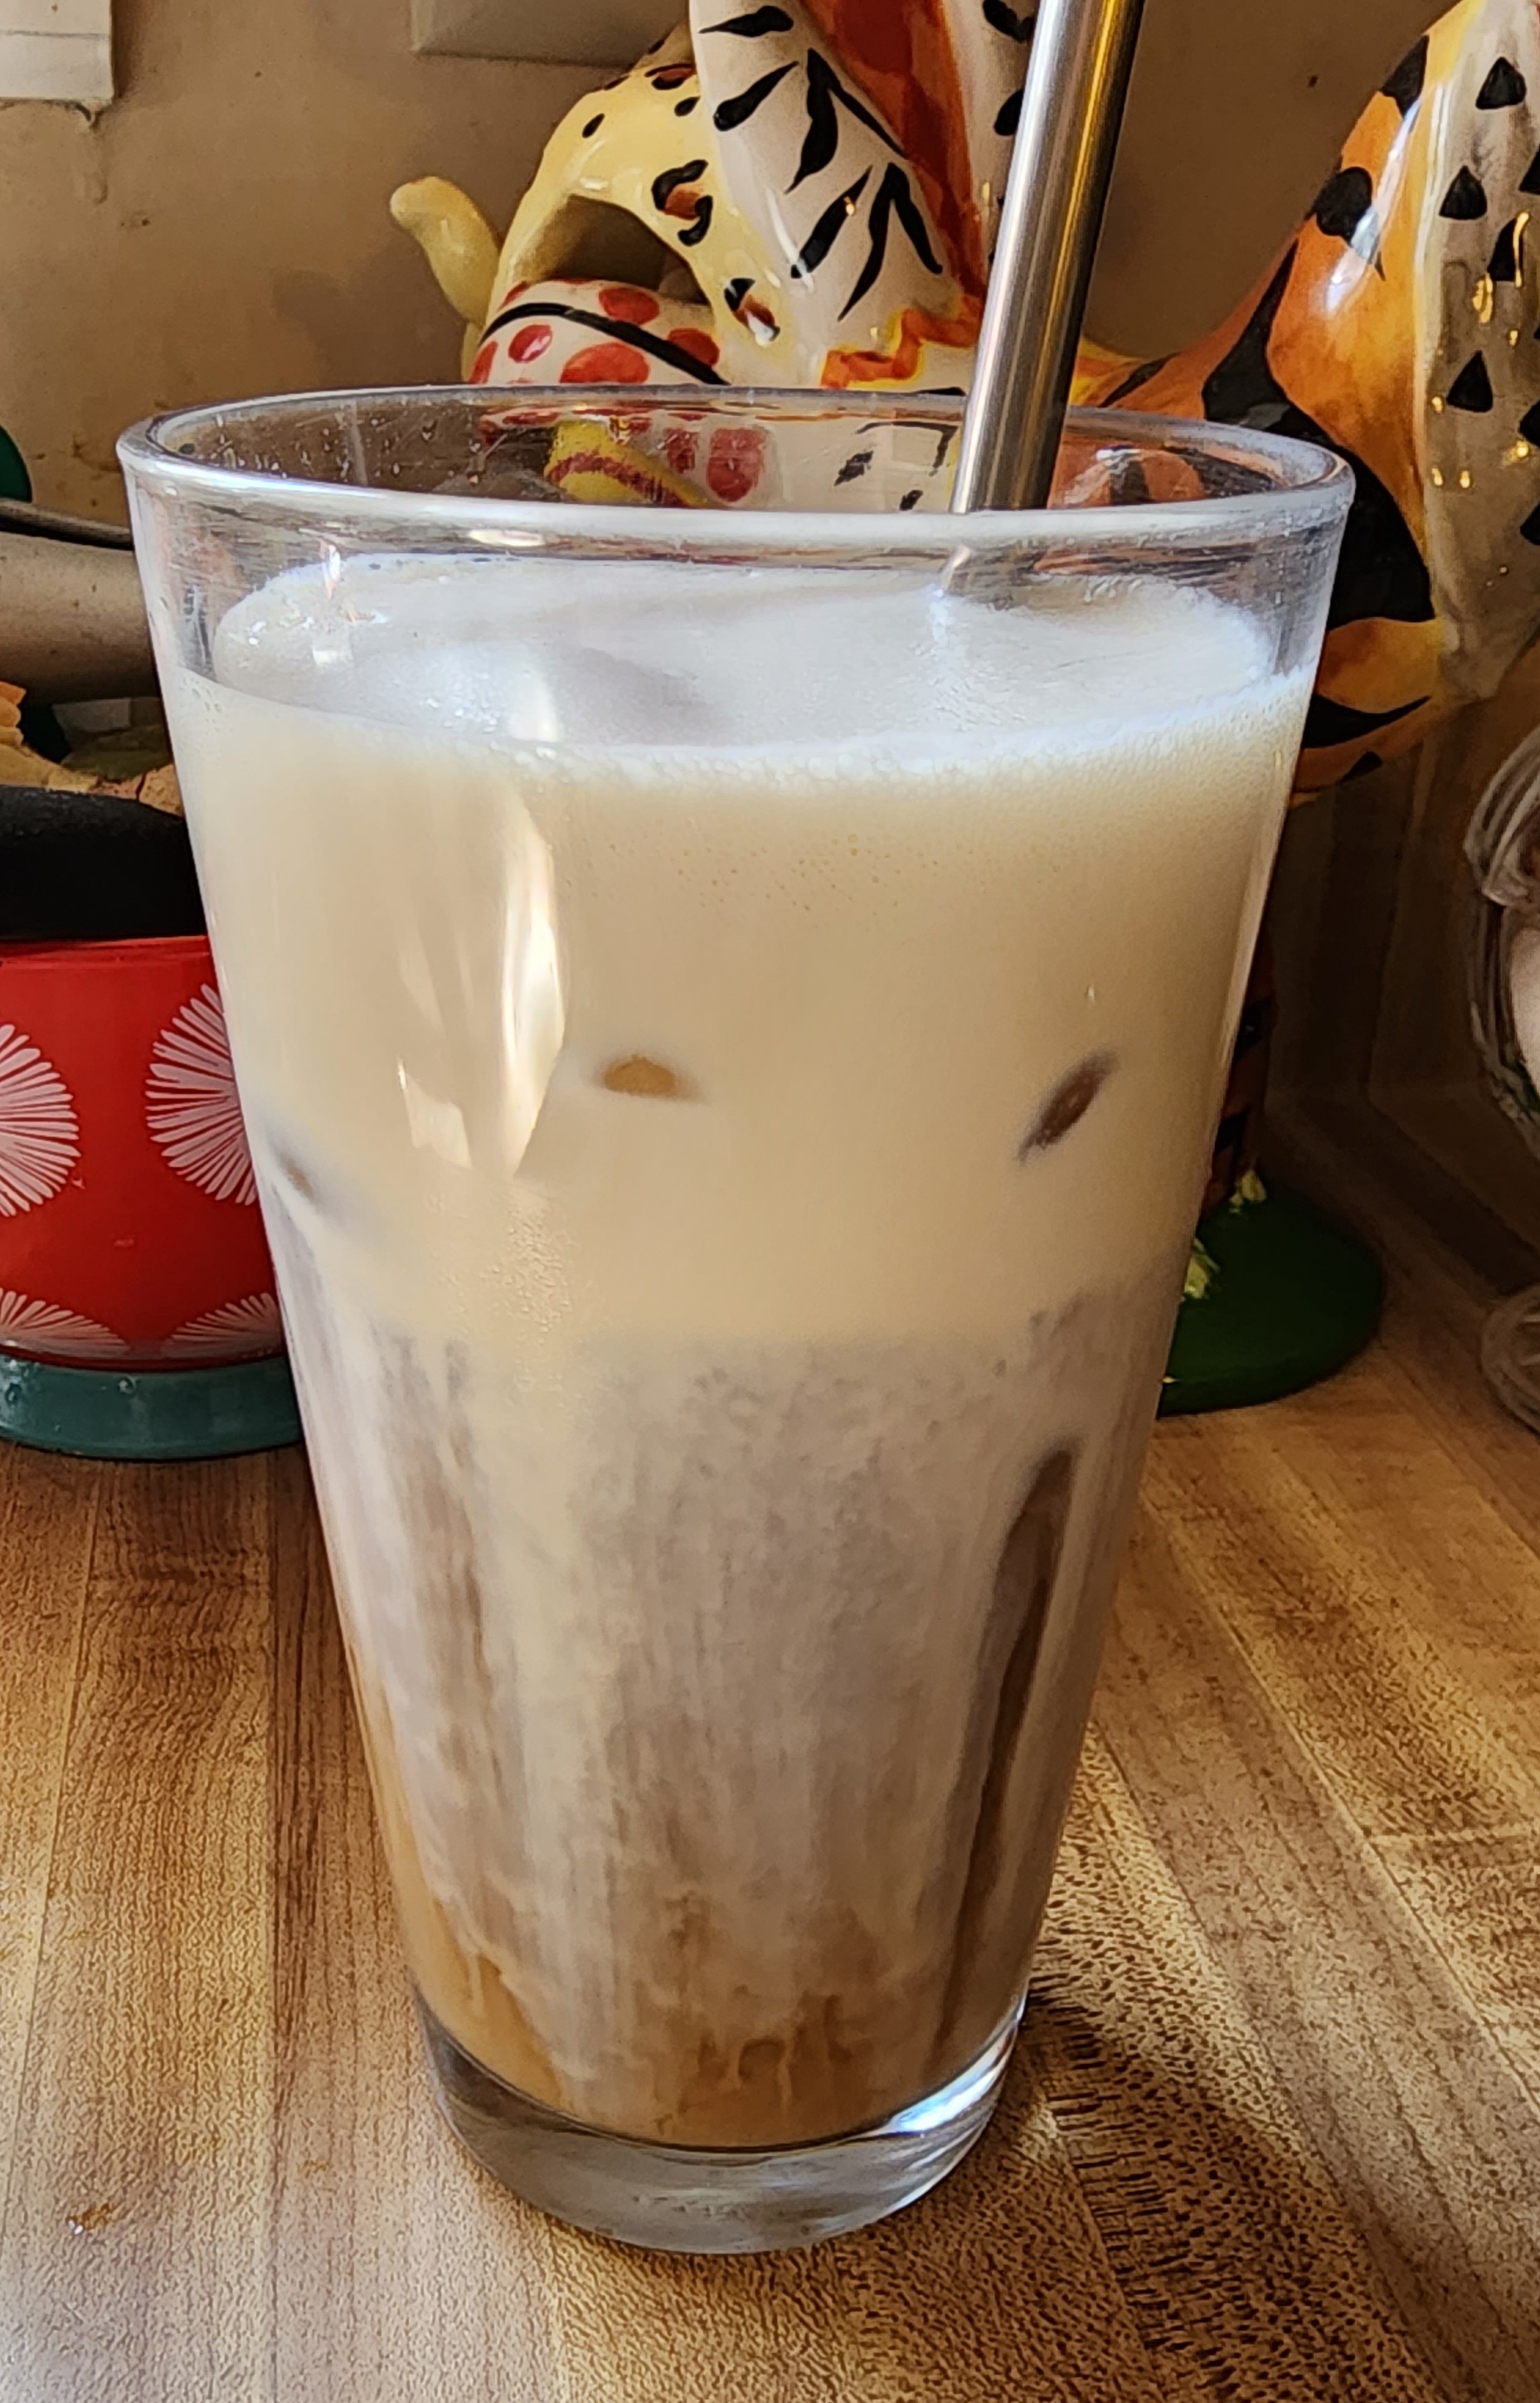
To make cold foam:
Place 3-4 tablespoons of the creamer into a tall jar or glass. Use a milk frother (you can get the link to purchase HERE) for 20-30 seconds until foamy. Pour over your iced coffee sub or herbal tea. 

Alternatively you can use a blender or shake in a jar for 1 minute


Deluxe Ranch Mix


Deluxe Ranch Mix

This mix is all phase but Ranch Dressing is phase 3

Double this mix, if you like or see this post for Bulk Mix (4x this recipe)


3 T dried chives

1 tsp dill

2 T dried chopped onion

3 tsp onion powder

1-1.5 T garlic powder

3 T dried parsley

1.5 tsp sea salt

2 tsp fresh ground black pepper


Put all spices and herbs into a glass jar. Cover and shake well to mix. 


To use:

1-2 T Deluxe Ranch Mix

3/4 cup homemade mayo

3/4 cup plant based unsweetened milk (full fat, canned coconut is the creamier, thicker option)

Squeeze of fresh lemon juice

Tiny pinch xanthan gum, if your dressing is too thin for your liking


Mix all the ingredients together in a jar with a tight fitting lid. Allow to sit for at least 2 hours before eating. 


Rhubarb Blackberry Crisp (v) - Phase 3 breakfast

Rhubarb Blackberry Crisp (v)
Phase 3
Makes 2 servings

4 cups chopped rhubarb- fresh or frozen
2 cups blackberries, fresh or frozen
3T arrowroot
½-1/2 cup xylitol or stevia/pure monk fruit equivalent
¼ tsp ground ginger
Tiny pinch of sea salt


1 cup rolled oats
½ cup chopped pecans, walnuts or almonds (raw)
¼ cups xylitol or stevia/pure monk fruit equivalent
¼ cup Vegan Butter, or raw nut butter*
½ tsp cinnamon
Pinch of sea salt

Preheat oven to 350F

Mix the first 6 ingredients in a bowl until well combined. Dump into a cast iron skillet or baking dish.

In a food processor- pulse the remaining ingredients until crumbly- sprinkle evenly over the fruit.
Bake for 30-40 minutes until bubbly. Allow to cool a bit, then enjoy.


*If you use raw nut butter in place of vegan butter, this is an all inclusive phase 3 breakfast.

If you use vegan butter in the topping, you will need to add a protein on the side.

Coconut Cookies with Chocolate Drizzle- Phase 3


These are super fast and easy to make. It is also a small batch, I made mine in my small Ninja chopper. You can have cookies for your snacks all through phase 3- just add a veggie on the side. They are soft and coconutty and delicious.

You will have extra Drizzle left over. This is nothing to be sad about- make another batch of cookies or just eat it with a spoon from the jar. Just count it as a healthy fat. 

Coconut Cookies
Phase 3
Makes 8 servings healthy fat

(there are no substitutions for these ingredients. If you make a swap, they may not turn out)

1 ¼ cups unsweetened coconut shreds
2 T coconut flour
3 T unrefined coconut oil, solid or slightly softened but still solid
¼ cup xylitol or stevia/pure monk fruit equivalent
tiny pinch of sea salt
3 T cold water
1 whole egg


Chocolate Drizzle (Hot Fudge)

3T Hershey’s regular cocoa powder or raw cacao
3T Vegan Butter (recipe here on my blog) 
3T xylitol or stevia/pure monk fruit equivalent
5T unsweetened almond milk or boxed coconut milk or cashew milk


Preheat oven to 350°F. Line a baking sheet with parchment paper.


If your coconut is larger flakes, add it to a food processor and pulse a few times to chop it into tiny pieces- but do not whiz up to a flour type consistency. Add the remaining ingredients and blend just until it comes together. It will be thick and sticky. If the dough is too dry, add a tablespoon of cold water and pulse, adding as much as you need to get a sticky dough

Using a small cookie scoop, scoop firmly packed balls of coconut mixture onto the prepared baking sheet, making sure to space balls evenly apart. Using the palm of your hand, flatten cookies to 1/3” thickness, or you can leave in the ball shape. 

Bake for 15 mins, until a darker golden around the edges and very golden on top, being careful not to burn. Remove from oven and cool on the baking sheet for 15 minutes. 

Add the Chocolate Drizzle ingredients to a small saucepan and place over medium heat. Stir and warm just until xylitol is melted and mixture is smooth. Taste and add more sweetener if you like. The Drizzle should be thin enough to drizzle, but it will thicken once cooled. This is also a hot fudge that you can put on coconut milk ice cream, or dip cherries in, or pour over pancakes. It will keep in the fridge for a couple of weeks. 

Allow the Drizzle to cool before drizzling. 

Place the cooled cookies on a plate and drizzle The Drizzle as you see fit (fo shizzle). 


No-Bake Pumpkin Bars - Phase 3 (Vegan and Gluten Free)


No-Bake Pumpkin Bars
Phase 3
Makes 12 servings of healthy fat

FOR THE CRUST:
1 cup Pecans
¼ cup Almond Flour
¼ cup shredded unsweetened coconut
½ cup xylitol
¼ tsp ground ginger
½ tsp ground cinnamon
2 T coconut oil

FOR THE FILLING:
1 ½ cup pumpkin puree
¾ cup xylitol
½ cup coconut oil
½ cup canned coconut milk, full fat
1 ½ tsp alcohol free vanilla
1 tsp pumpkin pie spice

FOR THE CRUST:

Line an 8x8 baking dish with aluminum foil or plastic wrap.

Add the pecans, almond flour, and shredded coconut to bowl of a food processor. Process until the pecans resemble small, coarse crumbs.

Add the sweetener, ginger, cinnamon, and coconut oil to the nut mixture and pulse until the dough is moist enough to hold the crust together. Scoop the dough into the prepared pan and press evenly over the bottom.

FOR THE FILLING:

Add all ingredients to a high-speed blender or food processor. Blend together until very smooth and fluffy

Spoon the mixture over the crust and smooth the top. Cover and refrigerate for 3-4 hours, or overnight.

Once chilled, cut into bars. Sprinkle with cinnamon, if desired


No-Bake Chocolate Mint Cups (Vegan and gluten free) - Phase 3

No-Bake Chocolate Mint Cups (V)
Phase 3
Makes 12 standard servings of healthy fat and each is a partial grain


1 cup rolled oats
1 cup pecan halves
1/2 cup unsweetened shredded coconut
3 T cacao powder
pinch of fine sea salt
½ cup melted and cooled coconut oil


Chocolate Filling:

½ cup raw cacao or Hershey’s regular cocoa powder
½ cup coconut milk (from a can)*
½ cup Vegan Butter (recipe on my blog)
½ cup xylitol or stevia/pure monk fruit equivalent
¾ teaspoon peppermint extract

*note about canned coconut milk: If you buy a quality coconut milk, it will be about 2/3 cream and 1/3 watery liquid. This is generally not possible to shake up to blend, so simply pour everything into a blender and blend on low until smooth. Pour into a jar to store leftover in fridge for another recipe


Line a 12-cup nonstick muffin tin with little strips of parchment paper or cupcake liners and set aside.

In the bowl of a food processor, combine the oats, pecans, coconut, cacao powder, and salt. Pulse the mixture until everything is finely chopped.

Add coconut oil to the food processor. Pulse until a sticky “dough” starts to come together. Pinch it between your fingers to make sure that it will hold together. Place the dough in the fridge for about 5 minutes, just to firm up.

In the muffin tin, drop about 3 tablespoons of the dough into each cup. Lightly spread it out with your fingers. Then, with the bottom of a shot glass (or something similarly sized), press an indent into each portion of dough to form a “cup.” Place the prepared cups in the fridge while you make the ganache.

Make the ganache. Put the cacao, milk, vegan butter, sweetener in a sauce pan and whisk until smooth. Put on medium heat and whisk until very smooth and sweetener is dissolved/melted. Carefully taste and adjust sweetener, if you wish. Whisk in the mint extract.

Retrieve the cups from the fridge. Divide the ganache evenly among the cups. Place the peppermint ganache cups in the fridge to set for at least 6 hours- overnight is better. When ready to serve, let the cups sit at room temperature for 30 minutes before carefully running a paring knife around the edges of each cup to release (unless you used a cupcake liner) Keep the ganache cups on a plate in the fridge until ready to serve. Garnish with fresh mint leaves and shredded coconut if you like!


Cherry Paletas- Phases 1 and 3


Paletas are super easy to make and super refreshing on a hot day. This is a perfect p1 snack, or can be your fruit and healthy fat for p3 lunch. You can make them sweet or sour, creamy or not. 


Cherry Paletas
Phases 1 and 3
Makes 2 servings

2 cups pitted fresh or frozen cherries
1/2 water for p1 or coconut cream for p3
1 T lemon juice
1 tsp (or more if you want) vanilla extract
Xylitol or stevia to taste

Throw everything in the blender and blend until smooth. If you would like to have chunks of cherries in your paletas, then blend 1 1/2 cups of the cherries with the other ingredients until smooth. Add remaining half cup and pulse to chop the cherries.

If you want to add sweetener, add a little, taste then add more if you want. You want the blended mixture to taste sweeter than what you want the end product to taste. 

Place your popsicle mold or paper or plastic cups onto a baking sheet. Pour the mixture into the molds, or paper or plastic cups. The molds I use are listed here in this post, Foods and Tools I Use Frequently. If you are using cups, simply cover them with foil or plastic wrap and poke the wooden or silicone sticks into the cup. Place the baking sheet into the freezer and freeze until firm. 


French Onion Dip - Phase 3


This is the easiest, most delightful dip you can make! Dip your favorite veggies in this, or use it as a sandwich spread! This could become your go to party dip! Your dairy free friends will love you! 

If you want to make it super fancy, caramelize a couple onions to mix in, to add an incredible depth of flavor. 

Dried onions are needed in this recipe- don't swap this out. They absorb some of the moisture in the coconut cream and make the dip thicker. If the dip is still too thin for your liking, add a tiny pinch of xanthan gum and stir it in well. 

If you prefer a smoother dip, once the dried onions reconstitute, whiz the mixture up in a blender or use an immersion blender to smooth it out. 


French Onion Dip
Phase 3
Makes 4 servings healthy fat

1 cup full fat canned coconut cream (not milk- just the thick stuff on top of the can when you open) You may need 2 cans of coconut milk
1 T fresh lemon juice
2 T dried chopped onions
1/4 tsp garlic powder
1/4 tsp sea salt
1 T dried parsley
1 T dried chives
1 T very finely minced spring onion- mostly the green part
Tiny pinch of black pepper (optional)
Tiny pinch xanthan gum (optional)

Whisk everything together in a bowl. Cover and let sit for 2 hours. Taste and adjust any seasoning you want.

Buffalo Chicken Dip- Phase 3

This is a quintessential dip for parties, like your Super Bowl Party, or Graduation Party, or Baby Shower. Check out the Cracker recipes I have on the blog for easy and compliant crackers that would taste great with this dip!
You can use any compliant hot sauce in place of the Frank's but I prefer the taste of Frank's for real Buffalo flavor. 
If you want to make this spicy- add some cayenne to the spices! 


Buffalo Chicken Dip
Phase 3
Makes 6 standard servings protein and healthy fat

1.5 pounds boneless, skinless chicken breast
1 T olive oil
Sea salt and Black Pepper
1 cup FMD compliant Mayo
¼ cup canned full fat coconut milk
1 cup Frank’s Hot Sauce- regular
1 T vinegar- any type except white
1 T lemon juice
1 tsp garlic powder
1 tsp onion powder
1 tsp smoked or sweet paprika
1 tsp sea salt
Green onions, for garnish
Carrot sticks, celery sticks, crackers for serving


Preheat the oven to 375 degrees. Add the chicken breast to a baking dish and drizzle with olive oil, salt, and pepper. Bake for 20-25 minutes or until the chicken is cooked to 160 degrees on instant read thermometer. When the chicken is fully cooked, remove it from the oven shred.

Put the mayo, coconut milk, hot sauce, vinegar, lemon juice, garlic powder, onion powder, paprika, and salt to a mixing bowl. Whisk all of the ingredients together until well combined.

Add the shredded chicken to the buffalo sauce mixture and stir until well combined.


Pour the dip into a 9-inch baking dish and bake at 425 degrees for 20-25 minutes until the dip is bubbly. Remove the dip from the oven. Top with chopped green onions. Let cool for a few minutes before serving with your favorite veggies and crackers. 


Easy Cashew Butter Bread - Phase 3


This is adapted from a Depression Era recipe- simple ingredients, easy to make and very delicious.

You can sub almond butter for the cashew butter, if you want. The flavor would be very mild compared to the nuttiness of cashews.

Also- this bread is not super sweet. If you want it to be sweeter, add more sweetener. Sugar was a rare commodity in the Depression.


Easy Cashew Butter Bread
Makes 16 standard grain servings and partial fat
Phase 3

2 cups sprouted wheat flour (for a lighter bread, sub 1/2 cup of this for sorghum flour)
1 tablespoon (yes, tablespoon) baking powder
Healthy pinch of sea salt
1/4 cup xylitol or stevia/monk fruit equivalent
1 1/3 cup cashew milk or almond milk
1/2 cup cashew butter
1 tsp lemon juice
Optional: 1 tsp vanilla

Mix the dry ingredients together in a bowl. Add the milk and lemon juice. Stir to combine. Add nut butter and vanilla if using. Pour into greased loaf pan and bake at 325F for 1 hour and 10-ish minutes. Let cool in the pan for 10 minutes, then remove to a rack to completely cool before slicing.


I highly recommend slicing this into 8 thick slices, then cut each slice in half. This bread will not work to cut into 16 thin slices.


Creamy Fire Roasted Chicken Skillet- Phase 3


Creamy Fire Roasted Chicken Skillet
Phase 3
Makes 4 standard servings

1 lb boneless skinless chicken breasts or thighs
2 cans fire roasted tomatoes (drained)- sugar free
1 small onion, sliced
1 T arrowroot flour
2T cold water
1/2 cup tomato sauce- sugar free
1/2 cup full fat canned coconut milk
1/2 cup chicken broth
3 cloves garlic, minced
1 T olive oil
2 handfuls fresh spinach
4 basil leaves, rolled and thinly sliced
Sea salt and black pepper to taste

Heat a skillet with 1 T of olive oil over medium high heat.

Season chicken on both sides with salt and pepper. Add the chicken to a hot skillet. Brown and cook on each side 4-5 mins. Once the chicken is cooked though, remove from the skillet.

Add the garlic and the onions to the hot skillet. Sprinkle with a pinch of salt. Stir and cook together for 2 to 3 minutes.

To the onions and garlic, add the tomato sauce, fire roasted tomatoes, coconut milk and chicken broth. Mix together and bring to a simmer. Taste and add more salt and pepper to your taste. Once it is bubbling, add the arrowroot mixed with the cold water- whisk until thickened. Stir in the spinach and cook until wilted- place the cooked chicken back into the skillet and allow to simmer together for just a minute. Top with fresh chopped basil.

Serve over steamed cauliflower rice.

Italian Dressing- Phase 3


Throw everything in a jar, pop on the lid and shake this dressing up for super easy flavor on your Phase 3 salads or veggies!

This will keep a couple weeks in the fridge. Adjust the herbs to your liking. I usually add the tiniest amount of sweetener... not much at all. It balances out the vinegar, but you can omit the sweetener if you want.

Dried herbs work best here- just let the dressing sit a couple hours before drizzling.


Italian Dressing
Phase 3

¼ cup extra-virgin olive oil
2 T apple cider vinegar
2 T fresh lemon juice
1 T finely dried parsley
Tiny pinch xylitol or stevia powder
1 tsp dried oregano
1-2 garlic clove, grated
½ tsp Dijon mustard
½ tsp dried ground thyme
¼ tsp sea salt
¼ tsp freshly ground black pepper
1/8 tsp red pepper flakes (optional)

Put everything into a jar with a lid and shake well. Let sit for a couple hours before eating. 

Sweet Potato Latkes- Phase 3


Crispy and delicious- these are super easy to make. Use a food processor with a shredding blade for quick shred of the potatoes. You can add spices to the mix, also. Chili powder is especially delicious!
Pair these with a grass fed burger on a homemade bun and you have a delicious gourmet meal!


Grapeseed oil is perfect for frying these. You can strain the oil and keep for another fry- I use my oil 3-4 times. Be sure to dispose of the oil in a proper manner when you do need to toss it.

Dip these in a garlic aoli or homemade Ranch dressing. 

Sweet Potato Latkes
Phase 3
Makes 5-6 servings

2 large sweet potatoes, peeled and coarsely grated
2 scallions, very finely chopped
1/3 cup sprouted wheat flour
2 large eggs, lightly beaten
1 tsp salt
1/2 tsp black pepper
3/4 cup grape seed oil

Stir together potatoes, scallions, flour, eggs, salt, and pepper.

Heat oil in a deep 12-inch nonstick skillet over moderately high heat until hot but not smoking. Working in batches of 4, spoon 1/8 cup potato mixture per latke into oil and flatten to 3-inch diameter with a slotted spatula. Reduce heat to moderate and cook until golden, about 1 1/2 minutes on each side. Transfer latkes with spatula to paper towels to drain.

Dairy Free Cinnamon Creamer - Phase 3 (vegan)

 In the fall and winter, cinnamon is one of my favorite flavors. There is nothing like a cup of hot chocolate or Dandy Blend (coffee substitute compliant with FMD- there are a few others including Pero and some Teechino varieties) with comforting cinnamon.

This creamer is easy to whip up. Add this to a mug of warm almond milk for a perfect winter nightcap! 

You can also use this in your pancakes, waffles- any recipe that calls for almond milk and you want a light cinnamon taste!


Dairy Free Cinnamon Creamer
Phase 3
Makes 5 standard servings of healthy fat (although you will likely use way less than a serving in a cup of Dandy Blend)

1 cup homemade almond milk (this is generally thicker than store bought)
1 cup coconut cream
1-2 T xylitol or stevia/monk fruit equivalent - or to taste
1/2 tsp alcohol free vanilla extract
4 cinnamon sticks, 3" long each
1 tsp really good cinnamon

Add the almond milk and cinnamon sticks to a sauce pan and warm over medium low heat, stirring occasionally. Add the sweetener of your choice (if using stevia liquid, wait until the creamer cools to add it). Make sure the almond milk gets pretty hot but do not boil and ensure the sweetener is dissolved. 

Remove from heat and allow to sit until it cools completely. This will allow the cinnamon sticks to infuse their flavor into the milk.

Once cooled, remove the sticks and discard them. Whisk in the remaining ingredients. Taste and adjust any flavors you want. Pour into a jar with a lid and store in fridge for 5-7 days.


Coconut Lime Muffins with Vegan Cream Cheese Frosting- Phase 3


Pretty easy to whip up. Very tasty for part of your p3 breakfast, or as part of your p3 dinner as a dessert!

I make my own almond cream cheese but you can buy it in the store- make sure it is sugar free and compliant.

Coconut Lime Muffins
Phase 3
Makes 14 standard servings of grain and half a healthy fat serving each

1 cup sprouted wheat flour 
3/4 cup sorghum flour 
1 cup xylitol, or the equivalent in pure monk fruit or stevia
1/4 tsp sea salt
1 tsp baking powder
1/2 tsp baking soda
1 whole egg, lightly beaten
1/2 cup coconut milk
1/4 cup unrefined coconut oil
2 large fresh limes


Heat oven to 425 degrees. Line muffin pan with papers


Zest the 2 limes and add zest to a blender. Peel the limes with a knife, and add peeled limes to blender. Add in the sweetener, coconut milk and coconut oil. Blend until smooth.

In a large bowl, lightly beat the egg. Add the liquid from the blender and whisk. Add the remaining ingredients to a small bowl and stir well to combine. Add to large bowl and stir just until the flour is incorporated.
Fill muffin cups to 3/4 full.
Place into the oven, close the door and immediately reduce temp to 350


Bake 15-20 minutes, until a toothpick comes out clean. Let cool.


Vegan Cream Cheese Frosting
Phase 3
Makes 4 standard servings of healthy fat

1 cup almond or cashew cream cheese
1/4 cup powdered xylitol (whiz up in blender) or equivalent of another sweetener
Tiny pinch of sea salt
1-2 T unrefined coconut oil
1-2 T canned coconut cream

Whisk everything together. Liquid stevia works best here. Taste and add more sweetener if you need. 
Spread onto muffins as you like- just before serving. 


Veggie White Bean Tray Bake (Vegan/Vegetarian)- Phase 3


Veggie White Bean Tray Bake
Phase 3
Vegan/Vegetarian
Makes 4 standard servings protein, veggie and healthy fat


2 small fennels, quartered, fronds reserved
1 eggplant, coarsely chopped
2 large zucchini, halved lengthways, thickly sliced
1 red onion, cut into wedges
1 yellow bell pepper, seeded, coarsely chopped
1 red bell pepper, seeded, coarsely chopped
1 green bell pepper, seeded, coarsely chopped
3 T olive oil
2 cups cherry or grape tomatoes
3-4 garlic cloves, thinly sliced
2 large rosemary sprigs
2 cups cannellini beans, rinsed, drained
2 T red wine vinegar
1/2 cup almond cheese, the crumbly type
3 T raw pine nuts or sunflower seeds or rough chopped almonds
1/2 cup basil leaves

Preheat oven to 400°F. Lightly grease a large roasting pan. Place the fennel, eggplant, zucchini, onion and combined blee peppers in prepared pan. Drizzle with the oil and toss to coat. Roast for 10-15 mins or until the vegetables are tender. Add the tomatoes, garlic and rosemary and roast for 10 mins more.

Add the beans and vinegar to the vegetable mixture in the pan and toss to combine. Season. Sprinkle with the almond cheese, nuts, basil and reserved fennel fronds to serve.


Bang Bang Chicken- Phase 3 - (Sauce can be Vegan)


 If you have been paying ANY attention to me on social media, you should know by now how much I LOVE my Sweet Chili Sauce.

Well- I have used it to make this BANGIN' sauce-
I put chicken on the recipe- use it on anything. Cauliflower. Pork. Salad. Roasted veggies. Whatever you want. 

This is totally customizable- mix the recipe then taste and add to it if you want. 

Cook the chicken however you want. I have grilled it, then diced it. I have cut it into cubes and cooked in a skillet. You could bake some chicken breasts- whatever you want. Just add the sauce AFTER the chicken is cooked- you don't want to cook the chicken in this. 

Note: You can find compliant sriracha in the store- read ingredients. Some brands add SUGAR. Same with the mayo- check ingredients.

If you want to make this Vegan, you can- just use my Vegan Mayo recipe. 


Bang Bang Chicken
Phase 3
Makes 4 servings

Sauce:

1/2 cup my Sweet Chili Sauce (recipe HERE)
1 cup homemade mayo (recipe MAYO)
Couple squirts of compliant sriracha (recipe SRIRACHA)


Whisk everything together in a bowl. Pour into a jar and cover. Let this sit for an hour before using.

1lb chicken breast or thighs
Salt
Pepper
Garlic powder

Season both sides of the chicken generously with the seasonings. Feel free to add others if you want, like chili powder. Cook chicken on the grill or in a skillet with some olive oil. Cook just until done. Let rest for 5 minutes. Cut chicken into chunks if you have not already and toss in the Bang Bang Sauce. Serve over my Spicy Fried Cauliflower Rice, or Fried Quinoa, or in a lettuce wrap. Be sure to make enough for lunch tomorrow, because you WILL want it!


Garlic Butter Burger- Phase 3


Garlic is good for the soul. 

I am sure of it. 

I use copious amounts in a lot of my cooking. I will never have to worry about vampires.

Garlic is also healthy and aids in digestion. It is super cheap to buy fresh- a bulb of garlic costs around 50 cents. That bulb can flavor a dozen dishes.

I have spoken before about roasting a few heads and keep thing them in the fridge to use in all types of dishes and sauces.

For this dish, you can will use some of that roasted garlic to make the compound butter.

This works with beef burgers, turkey burgers, chicken burgers... your choice.


Compound Garlic Vegan Butter


1/2 cup Vegan Butter (recipe HERE)
2 T roasted garlic
2 fresh garlic cloves, finely minced
Pinch of salt
1/4 tsp black pepper

(Make sure the butter is set up- you want it to be firm)

Mix everything together in a small bowl. Scoop into a jar with a lid, and keep in fridge.


Garlic Butter Burger
Phase 3
Makes 4 standard serving

1lb grass fed ground beef
Sea salt
Fresh ground black pepper
Compound Garlic Vegan Butter
1 tsp olive oil

Divide the meat into 4 equal portions. Shape into patties. Season both sides liberally with salt and pepper.

Heat a cast iron skillet over medium high heat. Add a tablespoon of the garlic butter and the olive oil to the skillet. Add the patties and let cook for 3-4 minutes. Flip burgers. Add a teaspoon if the garlic butter to the top of each patty and cover. Cook until patties reach your desired temperature. Put a teaspoon of the butter on top every time you flip. Enjoy these hot from the skillet, on homemade sprouted wheat buns with the toppings of your choice.


Spicy Egg Fried (Cauliflower) Rice- Phase 3

 This dish is super easy to make, quick to make and totally customizable to your tongue. Use up those tidbits of veggies and make a tasty phase 3 lunch. 

I love ginger. I have a lot of ginger listed. If you don't like it as much as me, use less. Use the flavors you love. Same with the spice- red pepper flakes. Use less if you want it less spicy. Leave it out if you do not like it.

Be sure to cut and prep everything before you start cooking because it cooks fast. Use as many eggs as your goal calls for.

We eat this with my Yum Yum Sauce. The creaminess of the sauce really pairs nicely with the crunchy veggies and the heat of the red pepper flakes. 


Spicy Egg Fried Cauliflower Rice

Phase 3
Makes 2 standard servings


2 whole eggs
1 tsp olive oil
2 cups riced cauliflower
2T minced fresh ginger, or less if you want
3 cloves garlic minced, or less if you want
3T sesame oil
3T tamari
1/2 tsp red pepper flakes, or less if you want
1 tsp black pepper
1 carrot, diced
1/2 onion, diced
1 zucchini, chopped
1 red bell pepper, chopped


3 green onions, chopped, for garnish

optional: Sugar Free Sriracha, chopped cilantro

Heat a skillet over medium heat and scramble the eggs in the olive oil. Season with salt and pepper. Remove from the skillet. Set aside. 

Heat the skillet again and add 1T sesame oil. Cook the carrots for 3-4 minutes. Add the ginger and garlic, then the other veggies, except the cauliflower. Add another T sesame oil. Stir and cook until the onions get just barely soft. Add black pepper and stir. Add the remaining sesame oil, cauliflower and tamari- stir and put a lid on the pan. Let it cook for 1 minute. Remove lid, add red pepper flakes, and scrambled eggs. Stir to re-warm eggs. Taste and adjust seasoning. Top with green onions and what ever other garnish you like- serve immediately. 


Classic Rye Bread- Phase 3

If you have a stand mixer, use it to knead. If not, stir by hand and spend at least 10 minutes kneading this dough. You can get some frustration out. Put on some music and dance in place while you push and pull and fold the dough. Try not to use too much flour to knead. If the dough is sticky, oil your counter, and use oiled hands or an oiled bench scraper to fold the dough over. The more you knead it, the less sticky it will be.

For the first rise- do not let it double. Just let it get puffy. Take a picture of the dough when you set it to proof, if you need a reference. You want it about halfway between freshly mixed and doubled.


Be sure to follow the tenting instructions, or the bread will brown too much. 

If you on maintenance, add 3T honey to the warm water and yeast. 


Classic Rye Bread
Phase 3
Makes 14 standard slices

1 1/4 cup warm spring water (105-110 degrees)
1/4 cup olive oil
3 1/2 cups rye flour
2 1/2 tsp yeast (or 1 packet)
1 1/2 tsp salt

Put the water and yeast in a bowl for the stand mixer and stir to dissolve. If you are using the honey- add it now and let the yeast get bubbly. Add everything else except the salt. Turn the mixer on low and let it go for 2 minutes. Once the dough is stirred, add the salt and turn mixer to a medium speed. Let it knead and mix the dough for 5 minutes.

Alternatively you can stir everything but the salt together in a large bowl using your hands or wooden spoon. Add the salt when the dough ball starts to form. Mix then turn onto oiled counter. Keep a plate with a tablespoon of olive oil on it nearby. Oil your hands and knead the dough for 10 minutes. Fold it over towards you, push it away with the heels of your hands, rotate and pull the far side over the top, push with the heel of your hands. Oil you hands and counter as needed.


Place the dough in an oiled bowl and cover with damp towel. Let get puffy but not double in size. Turn dough out onto counter. Press into a circle, then roll up into log. Tuck ends under and place seem side down in oiled loaf pan. Cover with damp towel and place in warm spot until the dough has risen 1-2 inches above the pan. Place in preheated 350 degree oven for 20 minutes. Take a piece of foil, crease the middle and place tent over the bread and bake another 10-12 minutes, until an instant read thermometer reaches 190 degrees in the middle of the loaf.

Remove from pan and set on cooling rack. Cool completely before slicing.