x

Showing posts with label Holidays. Show all posts

No-Bake Pumpkin Bars - Phase 3 (Vegan and Gluten Free)


No-Bake Pumpkin Bars
Phase 3
Makes 12 servings of healthy fat

FOR THE CRUST:
1 cup Pecans
¼ cup Almond Flour
¼ cup shredded unsweetened coconut
½ cup xylitol
¼ tsp ground ginger
½ tsp ground cinnamon
2 T coconut oil

FOR THE FILLING:
1 ½ cup pumpkin puree
¾ cup xylitol
½ cup coconut oil
½ cup canned coconut milk, full fat
1 ½ tsp alcohol free vanilla
1 tsp pumpkin pie spice

FOR THE CRUST:

Line an 8x8 baking dish with aluminum foil or plastic wrap.

Add the pecans, almond flour, and shredded coconut to bowl of a food processor. Process until the pecans resemble small, coarse crumbs.

Add the sweetener, ginger, cinnamon, and coconut oil to the nut mixture and pulse until the dough is moist enough to hold the crust together. Scoop the dough into the prepared pan and press evenly over the bottom.

FOR THE FILLING:

Add all ingredients to a high-speed blender or food processor. Blend together until very smooth and fluffy

Spoon the mixture over the crust and smooth the top. Cover and refrigerate for 3-4 hours, or overnight.

Once chilled, cut into bars. Sprinkle with cinnamon, if desired


No-Bake Chocolate Mint Cups (Vegan and gluten free) - Phase 3

No-Bake Chocolate Mint Cups (V)
Phase 3
Makes 12 standard servings of healthy fat and each is a partial grain


1 cup rolled oats
1 cup pecan halves
1/2 cup unsweetened shredded coconut
3 T cacao powder
pinch of fine sea salt
½ cup melted and cooled coconut oil


Chocolate Filling:

½ cup raw cacao or Hershey’s regular cocoa powder
½ cup coconut milk (from a can)*
½ cup Vegan Butter (recipe on my blog)
½ cup xylitol or stevia/pure monk fruit equivalent
¾ teaspoon peppermint extract

*note about canned coconut milk: If you buy a quality coconut milk, it will be about 2/3 cream and 1/3 watery liquid. This is generally not possible to shake up to blend, so simply pour everything into a blender and blend on low until smooth. Pour into a jar to store leftover in fridge for another recipe


Line a 12-cup nonstick muffin tin with little strips of parchment paper or cupcake liners and set aside.

In the bowl of a food processor, combine the oats, pecans, coconut, cacao powder, and salt. Pulse the mixture until everything is finely chopped.

Add coconut oil to the food processor. Pulse until a sticky “dough” starts to come together. Pinch it between your fingers to make sure that it will hold together. Place the dough in the fridge for about 5 minutes, just to firm up.

In the muffin tin, drop about 3 tablespoons of the dough into each cup. Lightly spread it out with your fingers. Then, with the bottom of a shot glass (or something similarly sized), press an indent into each portion of dough to form a “cup.” Place the prepared cups in the fridge while you make the ganache.

Make the ganache. Put the cacao, milk, vegan butter, sweetener in a sauce pan and whisk until smooth. Put on medium heat and whisk until very smooth and sweetener is dissolved/melted. Carefully taste and adjust sweetener, if you wish. Whisk in the mint extract.

Retrieve the cups from the fridge. Divide the ganache evenly among the cups. Place the peppermint ganache cups in the fridge to set for at least 6 hours- overnight is better. When ready to serve, let the cups sit at room temperature for 30 minutes before carefully running a paring knife around the edges of each cup to release (unless you used a cupcake liner) Keep the ganache cups on a plate in the fridge until ready to serve. Garnish with fresh mint leaves and shredded coconut if you like!


Mushroom Gravy - All Phases (Vegan)

Mushroom Gravy
All Phases
Vegan

1 tablespoon olive oil (phase 3 only)
3 medium shallots, finely minced
1 T fresh thyme leaves, minced
5 fresh sage leaves, minced
2 lbs mushrooms (cremini, Portobello, or your favorite), stems removed
Sea salt and ground black pepper,
3 cloves garlic, finely minced or grated
2 T tamari
1 T balsamic vinegar
1 T mellow miso (optional)
3 ½ cups sugar and soy free vegetable stock
2 tsp arrowroot mixed with 2 tsp cold water


Optional for p3: Vegan Butter and Coconut Milk


Slice mushroom caps

Place mushroom stems along with the stock, in a sauce pan and bring to a simmer. Simmer for 15 minutes. Cool a bit and strain. Discard stems.

If you are on phase 3, heat the oil in a large wide bottom pan and add shallots. If you are on another phase, use a non stick pan. Sprinkle a pinch of salt over the shallots. Cook the shallots, stirring frequently, until translucent and softened, about 2 minutes. Add the thyme and sage to the pot and stir.

Add the sliced mushrooms to the pot and let them sit for one minute. Stir the mushrooms up, coating them in the shallots and herbs. Let the mushrooms sit for another full minute. Then, stir the mushrooms and season with pepper. Keep stirring the mushrooms here and there as they cook. Once the mushrooms are glistening, after about 3 minutes, season them with salt. Keep stirring the mushrooms until they are deep brown and slightly soft, about 2 more minutes.

Add the garlic to the pot and stir. Then, add the tamari, balsamic vinegar, and miso to the pot as well. Stir everything and scrape up any brown bits at the bottom of the pot. Add the vegetable stock to the pot and stir to combine. Bring the mushroom mixture up to a boil.

Lower to a simmer and reduce the liquid by about ¼. Taste and adjust the salt and pepper if needed.

If you want a smooth gravy, carefully puree the mixture with a stick blender. Or allow to cool and puree in a blender until smooth. Add back to the pot and bring back to a simmer, if using right away.

You can make this mixture a couple of days ahead- just reheat and thicken.

Add half of the arrowroot slurry to the simmering gravy and whisk for at least a minute. If you want the gravy thicker, add the other half of the slurry. If it gets too thick, add more stock.

OPTIONAL: For a very rich gravy on phase three, add a tablespoon or two of Vegan Butter to the gravy after it gets thick. You can also add a splash of coconut milk if you like a creamier gravy.

French Onion Dip - Phase 3


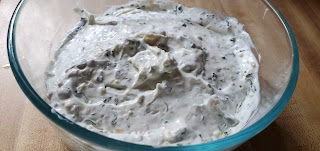
This is the easiest, most delightful dip you can make! Dip your favorite veggies in this, or use it as a sandwich spread! This could become your go to party dip! Your dairy free friends will love you! 

If you want to make it super fancy, caramelize a couple onions to mix in, to add an incredible depth of flavor. 

Dried onions are needed in this recipe- don't swap this out. They absorb some of the moisture in the coconut cream and make the dip thicker. If the dip is still too thin for your liking, add a tiny pinch of xanthan gum and stir it in well. 

If you prefer a smoother dip, once the dried onions reconstitute, whiz the mixture up in a blender or use an immersion blender to smooth it out. 


French Onion Dip
Phase 3
Makes 4 servings healthy fat

1 cup full fat canned coconut cream (not milk- just the thick stuff on top of the can when you open) You may need 2 cans of coconut milk
1 T fresh lemon juice
2 T dried chopped onions
1/4 tsp garlic powder
1/4 tsp sea salt
1 T dried parsley
1 T dried chives
1 T very finely minced spring onion- mostly the green part
Tiny pinch of black pepper (optional)
Tiny pinch xanthan gum (optional)

Whisk everything together in a bowl. Cover and let sit for 2 hours. Taste and adjust any seasoning you want.

Gingerbread Spice- All Phase (vegan)


Stir up this spice mix and use it in your muffins, pancakes, biscuits, homemade creamer, or wherever you want a warm spicy flavor!

Use the freshest spices for maximum flavor.


Ginger Spice
All Phases

2 T ground allspice
2 T ground cinnamon
2 T ground ginger
1 T ground cloves
1 T ground nutmeg
Pinch ground black pepper


Mix together and store in a jar.

Sweet Potato Latkes- Phase 3


Crispy and delicious- these are super easy to make. Use a food processor with a shredding blade for quick shred of the potatoes. You can add spices to the mix, also. Chili powder is especially delicious!
Pair these with a grass fed burger on a homemade bun and you have a delicious gourmet meal!


Grapeseed oil is perfect for frying these. You can strain the oil and keep for another fry- I use my oil 3-4 times. Be sure to dispose of the oil in a proper manner when you do need to toss it.

Dip these in a garlic aoli or homemade Ranch dressing. 

Sweet Potato Latkes
Phase 3
Makes 5-6 servings

2 large sweet potatoes, peeled and coarsely grated
2 scallions, very finely chopped
1/3 cup sprouted wheat flour
2 large eggs, lightly beaten
1 tsp salt
1/2 tsp black pepper
3/4 cup grape seed oil

Stir together potatoes, scallions, flour, eggs, salt, and pepper.

Heat oil in a deep 12-inch nonstick skillet over moderately high heat until hot but not smoking. Working in batches of 4, spoon 1/8 cup potato mixture per latke into oil and flatten to 3-inch diameter with a slotted spatula. Reduce heat to moderate and cook until golden, about 1 1/2 minutes on each side. Transfer latkes with spatula to paper towels to drain.

Dairy Free Cinnamon Creamer - Phase 3 (vegan)

 In the fall and winter, cinnamon is one of my favorite flavors. There is nothing like a cup of hot chocolate or Dandy Blend (coffee substitute compliant with FMD- there are a few others including Pero and some Teechino varieties) with comforting cinnamon.

This creamer is easy to whip up. Add this to a mug of warm almond milk for a perfect winter nightcap! 

You can also use this in your pancakes, waffles- any recipe that calls for almond milk and you want a light cinnamon taste!


Dairy Free Cinnamon Creamer
Phase 3
Makes 5 standard servings of healthy fat (although you will likely use way less than a serving in a cup of Dandy Blend)

1 cup homemade almond milk (this is generally thicker than store bought)
1 cup coconut cream
1-2 T xylitol or stevia/monk fruit equivalent - or to taste
1/2 tsp alcohol free vanilla extract
4 cinnamon sticks, 3" long each
1 tsp really good cinnamon

Add the almond milk and cinnamon sticks to a sauce pan and warm over medium low heat, stirring occasionally. Add the sweetener of your choice (if using stevia liquid, wait until the creamer cools to add it). Make sure the almond milk gets pretty hot but do not boil and ensure the sweetener is dissolved. 

Remove from heat and allow to sit until it cools completely. This will allow the cinnamon sticks to infuse their flavor into the milk.

Once cooled, remove the sticks and discard them. Whisk in the remaining ingredients. Taste and adjust any flavors you want. Pour into a jar with a lid and store in fridge for 5-7 days.


Turkey Brine-All Phase

Normally, I do not brine a turkey because I like to use the drippings to make gravy. For T-Day 2020, we are doing a more low key meal and I bought a turkey breast. And this year, I am goin to brine it. 

Brining is pretty simple. Super salty water, with some herbs and ice, and soak your turkey for at least 8 hours. I am going to brine my turkey breast for about 12 hours. I will put it into the brine before bed the night before. 

Make sure you keep the turkey and brine cold the entire time- you don't want to risk getting sick. You can use a very clean cooler if the turkey can be completely submerged in it. If it is very cold in your region, you can use a clean bucket with a lid and set it in your garage to brine. 

If you are using a very large bird, you may need to double the recipe

Make your veggie stock for free the week before T-Day. Just save up your carrot/onion/celery/herb scraps, cover with water and simmer on low for a couple hours. Strain and BAM! You have veggie stock. 


Turkey Brine

1 gallon veggie stock
1 cup sea salt
2T xylitol or stevia/pure monk fruit equivalent
3 shallots, rough chopped
6 garlic cloves, smashed
4T whole black peppercorns
2 sprigs fresh rosemary
Small bunch of fresh thyme
1 sprig of fresh sage
Half a lemon or orange, sliced
1 gallon cold spring water

Bring 4 cups of the veggie stock to a boil and add salt and everything else to the pot and stir until salt is dissolved. Remove from the heat and allow to cool completely. Add the remaining stock and stir. 

Place the turkey in a clean bucket, cooler or stock pot. You need a vessel large enough for the bird to be submerged. Pour the brine over your bird. You may need to weigh it down with a heavy place or bowl. Cover and keep cold in fridge for 8-24 hours. If you use a cooler, add enough ice to cover and keep turkey cold. 
Remove from the brine, and discard the brine. 
Pat your bird dry, rub with olive oil, and roast or smoke as you like. 

Salmon Dip- Phase 3

Are you hosting a New Year's Eve party and looking for a delicious and healthy dip? Here you go! This will be a crowd-pleaser for sure!


Salmon Dip
Phase 3
Makes 6 standard servings healthy fat, each is a partial protein

8oz Kite Hill or homemade almond cream cheese, at room temperature
1/2 cup coconut cream
1T freshly squeezed lemon juice
1T minced fresh dill
1 teaspoon prepared horseradish, drained (or grate fresh)
1/2 teaspoon kosher salt
1/4 teaspoon freshly ground black pepper
8 oz smoked salmon, minced

Cream the cheese in an electric mixer fitted with a paddle attachment until just smooth. Add the coconut cream, lemon juice, dill, horseradish, salt and pepper, and mix. Add the smoked salmon and mix well. Chill and serve with crudités or crackers.

Eggs Benedict Casserole - Phase 3

Eggs Benedict Casserole
Phase 3
Makes 4 standard servings of grain, protein, hf

Vegan Butter
2 sprouted wheat English muffins, OR 4 slices sprouted wheat bread, torn into small pieces
4 oz compliant ham, sliced and chopped
3 large eggs
1 c almond milk
1 tsp garlic powder
Sea salt
Freshly ground black pepper

For the Hollandaise:
2 large egg yolks
Juice of 1/2 lemon
1/2 c melted vegan butter
Pinch cayenne pepper
Paprika, for garnish

Grease a large oven-safe skillet or baking dish with vegan butter. Alternate layers of English muffins and ham in skillet. 
In a large bowl, whisk together eggs, almond milk, and garlic powder and season generously with salt and pepper. Pour mixture over ingredients in skillet and cover with plastic wrap. Refrigerate at least 1 hour or overnight. 
When ready to bake, preheat oven to 375°. Bake until bread is golden and eggs are cooked through, 1 hour. Cover with foil if top is getting too brown. Let cool slightly. 
Bring 2 inches of water to a simmer in a small saucepan. In a medium heatproof bowl, whisk together egg yolks with lemon juice. Place over saucepan (be sure bottom of bowl doesn’t touch water) and, while whisking vigorously, slowly add melted vegan butter and whisk until thickened, about 2 minutes. Remove from heat and season with cayenne and salt. 
Drizzle hollandaise over bake and sprinkle with paprika before serving.

Holiday Recipes 2019- Chicken Cacciatore - Phase 3

This delicious chicken dish is a winner any time of year, but especially good for the holidays! You can serve this with pasta or zoodles, or just as it is. Loads of veggies and healthy fats and delicious flavor!

Chicken Cacciatore
Phase 3
Makes 6 standard servings


2T olive oil
6 boneless chicken breasts or thighs- 4oz each
Sea salt
Black pepper
10 oz cremini mushrooms, quartered
1 small onion, thinly sliced
1 red pepper, thinly sliced
2 cloves garlic, finely chopped
2 tsp fresh rosemary, finely chopped
1 bay leaf
3/4 cup apple cider vinegar
1 (28-ounce) can diced tomatoes
8 oz kale, stems discarded and leaves chopped
1/2 cup pitted green olives
1/4 cup flat-leaf parsley, chopped

Heat oil in large deep skillet on medium-high. Season chicken with 1/2 teaspoon each salt and pepper and cook until golden brown, 3 to 4 minutes per side; transfer to plate.
Add the mushrooms and cook, tossing occasionally, until golden brown and tender, about 4 minutes. Transfer to plate with chicken.
Lower heat to medium and add onion, red pepper, garlic, rosemary and bay leaf and cook, stirring occasionally, until tender, 8 to 10 minutes. Add vinegar and cook, stirring and scraping up browned bits, until reduced by half, about 3 minutes. Stir in tomatoes (and their juices).
Return chicken and mushrooms to skillet, nestling chicken in tomatoes, and simmer covered for 15 minutes. Fold in kale and cook, covered, 10 to 12 minutes more. Uncover, discard bay leaf and stir in olives and parsley.

Salsa - Phases 1 and 3


It is the end of summer and the tomatoes are starting to wind down their growing season. I found a farmer in Nashville that sells 25lb boxes of Roma tomatoes for 10.00! I picked up a box last Sunday and here we are- making salsa. 

I have used this recipe for years. I tweaked from the original so you feel free to tweak too. 

This is the canning version. If you want to make a small batch that will keep a couple weeks in the fridge, scroll down. 

Use jalapenos for a mild or medium salsa. Feel fee to use hotter peppers if you like it hot.

This is a good way to use up the cilantro stems. They have tons of flavor!

A food processor works better than a blender, in my opinion.

This is a giant batch. If you do not have a giant stock pot, use 2 smaller pots. I put half the ingredients in each. 


Be sure to read my instructions for the garlic and hot peppers.

Salsa
P1 and P3

13 cups pulsed tomatoes (peel if you want)- about 8lbs
5 bell peppers, quartered and de-seeded
5 large onions, peeled and quartered
5 jalapenos- remove seeds and membrane if you want mild salsa
2 bunches fresh cilantro, leaves and stems
6-8 garlic cloves, peeled
1 cup apple cider vinegar
3 tsp salt

If you want to peel the tomatoes- bring a large pot of water to a boil. Have a large bowl about halfway full of ice water ready. Cut an X on the bottom of each tomato and pop into boiling water for 60 seconds. Remove with slotted spoon to ice bath for 1 minute. Skins will slip right off. 

Pulse the veggies in the food processor to the desired chunkiness you prefer. You may need to do this in batches. If you are using 2 large pots like I do, do the tomatoes first and measure out 6.5 cups into each pan. Then pulse half the peppers, half the onions, cilantro, etc and pour into one pot. Then finish with the other half of the veggies.

When you get to the last of the veggies, reserve some in your food processor (or put about a cup back in) and add the garlic and jalapenos or other hot peppers. Whiz it up until almost smooth. This prevents someone getting a giant chunk of hot pepper or garlic on one bite. Add to the pot(s).


Add the vinegar and salt to each pot- half in each if using 2 pots. 

Bring to gentle boil then reduce heat and simmer until reduced and thickened a bit. This takes 1 to 1.5 hours. Stir often. Taste and add more salt or more garlic or more hot peppers. 


Fill hot sterile jars leaving 1/4 inch head space. Process in hot water bath (boiling water covering jars by 2 inches) for 15 minutes. Let cool. Endure each jar is sealed. 


For a small batch:
Follow same instructions for chopping and cooking. When the salsa is cooked, cool and pour into a jar with a good lid and keep in fridge.

1.5 cups chopped tomatoes (peel if you want)
1/2 bell pepper, chopped
1 small onion
1 garlic clove, peeled
1/4 cup chopped cilantro
1 jalapeno or other hot pepper
1/4 cup vinegar
1/4 tsp salt

French Bread - Phase 1 and Phase 3


This bread is pretty easy to make- it just takes a while for both rises. The oil is minimal so I do not worry about it in phase 1- the recipe makes 26 phase 1 servings. 

I have not tried this with other flours- but from experience, I am not sure others flours would work.

This bread makes fantastic French Toast!!


French Bread
P1 and P3
Makes 26 p1 servings

2 1/4 cups warm water
1T instant yeast
3 tsp sea salt
5 1/2 cups spelt or sprouted wheat flour
1/4 cup tapioca flour
1/2 tsp xanthan gum

Stir together the yeast and the warm water in a large mixing bowl. Add 5 cups flour, the tapioca flour and the xanthan gum and mix well. Once everything is mixed together, add the salt by sprinkling it around the dough and mixing in. (Do not just dump it in one spot) 
You want a pretty smooth ball of dough, so add enough of the remaining half cup flour to get this. If you have a stand mixer, use the dough hook and let it do the kneading. 
Cover the bowl with a damp towel and put in a warm place until doubled in size. 


Punch it down and let it rest 10 minutes. 

Put the dough on a well floured counter and knead a couple times. Divide into 4 equal portions. 
Roll each piece into a rectangle. Starting on the long side, roll tightly and place the log with the seam side down on a baking sheet lined with parchment or silicone mat. Repeat for the other 3 pieces of dough. Use 2 baking sheets- 2 loaves per sheet.

Cover with damp cloth and let rise again until double. 

Preheat oven to 375.


Just before baking, score the tops of the loaves with a very sharp knife. Do not cut too deep or you will deflate the loaf.

Baking option 1: Put the sheets in the hot oven, and immediately toss a couple ice cubes into the bottom of your oven and quickly close the door. The steam is needed to help form the crust.

Baking option 2: Bake one sheet at a time, placing on the top rack. On the bottom rack place an empty baking sheet and put the ice cubes on it. Repeat for the 2nd pan with the other 2 loaves.

Bake 15-20 minutes, until golden brown. Brush the top with olive oil or my vegan butter (p3 only) if you like. Let cool before slicing. 


Aebleskiver (Danish Pancakes) - Phase 3


I ran across these in Instagram, and when I showed my husband how delicious they looked, he said I needed to make them. I ordered the pan (link below) and looked up recipes. The recipe is very similar to my Waffle recipe, so I was familiar with the technique. 

I will say, it takes a bit of practice to flip these. Traditionally, a knitting needle is used, but I only crochet, so I used a metal skewer. There are videos on YouTube that show the technique. I found that letting them cook quite a bit before flipping made it easier. And if you are feeding a crowd, get more than one pan! 

Next time, I will fill with jam or cashew butter or even just berries. They will be even more delicious!

Note: I have not used store bought vegan butter and I am not sure how it melts or will work to grease the pan. I have only used my recipe for Vegan Butter. If you do not have it, use any FMD approved oil.

Aebleskiver
Phase 3
Makes 16 servings

1 1/4 cups sprouted wheat flour
1/2 cup sorghum flour
1/4 cup tapioca flour
2 cups almond milk
1/4 cup melted vegan butter (see my recipe on the blog)
2 egg yolks
2 egg whites
2 tsp baking powder
1/2 tsp baking soda
1/2 tsp xanthan gum
1T powdered xylitol
1/2 tsp salt
1 tsp vanilla
1 tsp lemon juice


Heat up your pan on a burner set on medium heat. 
Add lemon juice to almond milk in a glass or jar. Let sit for 10 minutes. 

Beat egg whites until very stiff- set aside.

In another bowl, mix everything but the flour together, add flour and stir just until combined. Gently fold in egg whites until almost smooth. 


Brush each cup in the pan with vegan butter. Add a spoonful of batter- to almost fill each cup. Let cook until you see bubbles around the edges. Use a wooden or metal skewer or chopstick to turn each one and finish cooking for another couple of minutes. 


If you want to add filling, fill the cups about 1/4 full, add a tiny bit of jam or nut butter or mashed fruit, then fill the cup to almost full. Cook as instructed above.


Serve with fruit compote and other components of P3 breakfast.

Here is the pan I use: https://amzn.to/2ljFrTB (this is an affiliate link- I get a tiny percentage when you purchase, at no cost to you)


Lemon Cake - Phase 3

This cake works best in phase 3 where we can have cashew milk to help make this moist. Use fresh lemons for best results. Cake will stay fresh for about 2 days. 

Lemon Cake
Phase 3
Makes 10 standard serving of grain and each is a partial healthy fat

Grease a 9" square pan with grapeseed oil, then cut a piece of parchment paper to fit the bottom. Brush a tiny bit of oil over the paper.

Preheat oven to 400 degrees

3/4 cup sprouted wheat flour
1/4 cup tapioca flour
1/3 cup sorghum flour
2 tsp baking powder
1/2 tsp baking soda
1/2 tsp salt
1/3 cup grapeseed oil
2/3 cup cashew milk
1 1/4 cups xylitol
zest of 1 lemon
1 peeled lemon, seeds removed
1 egg, slightly beaten

Glaze
Juice of 1 lemon
Zest of 1 lemon
2T xylitol
1/4 cup water

Place the cashew milk, peeled lemon, zest from 1 lemon and the xylitol into a blender container and blend for 30 seconds. Pour into a large bowl (I use a stand mixer). Add the egg and oil, whisk to combine. Add the baking powder, soda and salt. Whisk again.

Add the flours and beat with hand mixer or stand mixer for 2 minutes until smooth. 

Pour into pan and place into hot oven. Close door and IMMEDIATELY reduce heat to 350.
Bake for 25-30 minutes, until toothpick comes out clean.

While the cake bakes, put glaze ingredients into small sauce pan and place on medium heat. Cook just until xylitol is dissolved.

Immediately after cake comes from the oven, poke the top with a fork. Pour warm glaze over and let it soak in. Let cake cool before cutting. 


Chocolate Cherry Crisp - Phase 3


This will make a perfect Valentine's breakfast for your sweetheart!

Chocolate Cherry Crisp
Phase 3
Makes 2 standard servings grain, fruit and healthy fat

2 cups cherries, fresh or frozen
1/4 cup water
1/4 cup xylitol or stevia equivalent
Pinch of salt
1 tsp alcohol free vanilla
1T arrowroot powder
1T cold water

Topping:
1/2 cup dry rolled oats
1/4 cup pecans, walnuts or raw almonds
2T raw cashew or raw almond butter
1T cocoa
1T xylitol or stevia equivalent

Heat oven to 350 degrees. 

Put the cherries and water into a saucepan and place on medium heat. Add a pinch of salt. Bring just to simmer. Mix arrowroot and cold water to make a slurry. Add to hot cherries and stir until thick. Stir in vanilla. Pour this into a baking dish. 


Place topping ingredients in a food processor and pulse a few times. Spread this topping on the hot cherries in the baking dish. 


Place in oven and bake 20-25 minutes.


Pumpkin Pie - Phase 3


This Thanksgiving tradition is so easy to make healthy and it tastes better than the "other" version!

If you want to use fresh pumpkins, just get a couple small sugar pumpkins from the store. 

Wash them, cut in half. Scoop out the seeds and pulp. Lay them cut side down on a lined baking sheet (use foil, parchment or silicone mat) and roast at 350 until a fork pokes in easily. 


Let cool. Scoop out the flesh and mash with a fork. 


This pulp will freeze nicely to use later for smoothies or Pumpkin Spice Ice cream or Pumpkin Bread. 
You can do this a few days ahead of time.

For your pie- you want to make this the day before so it sets up.


Pumpkin Pie
Phase 3
Makes 12 servings of healthy fat

Crust:
1 ½ cups almond meal or ground pecans or walnuts 
2 tsp xylitol
½ tsp salt
6T coconut oil
3T cold water

Filling:
¾ cup xylitol
1 tsp cinnamon
¼ tsp ground ginger
¼ tsp ground nutmeg
¼ tsp ground cloves
½ tsp salt
1 15oz can pumpkin puree or 1 3/4 cups of your roasted pumpkin
1 tsp vanilla
1 cup full fat canned coconut milk
2 eggs


Combine all crust ingredients and press into 9” pie plate

Preheat the oven to 425 degrees


Combine the xylitol, cinnamon, ginger, nutmeg, cloves and salt in a large bowl. Add eggs, beat. Add pumpkin, and vanilla, beat until smooth. Add coconut milk and beat again until smooth. Pour into unbaked pie crust and bake for 15 minutes. Reduce oven temperature to 350 degrees and bake for another 50-60 minutes or until knife comes out clean. It may be a bit wobbly still but will firm up. 
Allow pie to cool for 2 hours- this is very important. Top with whipped coconut cream (this adds more health fat)

Roast Turkey and Gravy - Cranberry Sauce - Stuffing -- Phase 3

Happy Holidays! Here is part of my Thanksgiving meal!


Roast Turkey and Gravy

1 thawed turkey
2-3 sprigs fresh thyme
3-4 fresh sage leaves
3-4 peeled garlic cloves
Half a lemon 
3-4 stems of fresh parsley
4-6 carrots
1 large onion, peeled and quartered
4-6 celery stalks

Rinse the turkey inside and out, remove giblets, and pat the outside dry. Stuff the thyme, sage, lemon, garlic and parsley inside the cavity. Lay the celery, carrots and onion in the bottom of a large baking pan that the bird easily fits in. Put the bird on top. Rub or brush the top of the turkey with olive oil, then sprinkle generously with salt and pepper. Pour about half a cup of water in the bottom of the pan. Take a piece of aluminum foil and mold it to the breast of the bird. Remove and set aside. 

Put the turkey in a 475 degree oven for 15-30 minutes, until the skin is starting to turn golden. Put the foil hat on the bird and turn oven to 350. Continue to cook the turkey until the internal temp of the thigh reaches 165 degrees. Let turkey rest for 20-30 minutes before carving. 

Once you remove the bird from the pan, scrape any bits from the bottom, remove veggies and put the remaining liquid and bits in a skillet or wide shallow pan. If you have a lot of broth, cook over high heat and reduce by half. If you don’t have a lot of liquid add chicken stock or turkey stock, then cook and reduce by half. Strain at this point if you want. Stir a couple tablespoons of arrowroot into a small amount of cold water to make a paste. Add to hot stock and whisk until thick. Taste and add salt and pepper as needed. Serve immediately. 


Cranberry Sauce

2 cups fresh or frozen cranberries
2 tsp orange zest
½ cup xylitol
½ tsp salt
¼ tsp ground cloves
½ cup water

Cook cranberries and water over medium heat until cranberries pop and mixture becomes thick. Add remaining ingredients and taste- add more xylitol if your taste buds require. Let cool. Store this covered in fridge. Serve with roast turkey.

Stuffing

2T olive oil
1 large onion, finely diced
2 stalks celery, finely diced
4 cloves garlic, minced
6 fresh sage leaves, finely chopped
1 large egg, beaten
4 cups stale bread- use Ezekiel Bread, or homemade sprouted grain bread, cut into 1 inch dice
1 tsp each salt and black pepper
1 ½ - 2 cups warm chicken or turkey stock

Heat a large skillet over high heat; add olive oil, onions and celery. Cook until soft. Add garlic and cook 1 minute. Remove from heat, stir in sage and let the mixture cool. Put mixture in large bowl. Preheat oven to 425 degrees
Add egg and bread and mix together. Add chicken stock and stir until bread is moist. Grease a baking dish with olive oil. Scrape stuffing mixture into dish and bake for 25-30 minutes. Cover with foil if it browns too quickly. 

Cinnamon Rolls - Phase 3


These are a treat! It looks complicated but it is really an easy recipe.
This also makes a GIANT batch! You can freeze them after you slice them and just thaw and bake as you need them. You can make this recipe for Thanksgiving and put into 2 pans- then Christmas breakfast is almost done!

I have not tried stevia or monk fruit with this recipe. I cannot say how they will work. You can use my gluten free flour mix instead of sprouted wheat. 

If you are making these to share, you can sub coconut sugar for the xylitol.


Cinnamon Rolls
Phase 3
Makes 36 standard grain servings- each one us partial fat

Dough:
2 cups almond milk
½ cup safflower or coconut oil
½ cup xylitol
1 package yeast (or 2 1/2 tsp)
4 1/4 cups sprouted wheat flour
1/4 cup tapioca flour
1 tsp baking powder
¾ tsp baking soda
½ tsp xantham gum
2 tsp salt


Filling:
1 cup of my vegan butter OR coconut oil
2T ground cinnamon
½ tsp ground nutmeg (freshly grated tastes SO much better here)
1/8 tsp ground cloves
1 cup xylitol (or coconut sugar, if you are on maintenance)

For the dough, heat the milk, oil and xylitol in a large saucepan over medium heat; do not boil. Set aside to cool to lukewarm. Combine the flours very well in a large bowl- set aside. Pour cooled milk mixture into large bowl. Add 4 cups sprouted wheat flour mixture, yeast, and xantham gum. Stir until just combined, cover with a clean kitchen towel and set aside in a relatively warm place for 1 hour or longer, until doubled. 

Remove the towel and add the baking powder, baking soda, salt and the remaining 1/2 cup flour. Stir thoroughly to combine. Use the dough right away or place in a mixing bowl and refrigerate for up to 3 days, punching down the dough if it rises to the top of the bowl.

On a floured surface, roll out the dough into a large rectangle, about 30 by 10 inches, with a long side facing you.
To make the filling, pour vegan butter or melted coconut oil over the surface of the dough. Use your fingers to spread the oil evenly. Generously sprinkle spices and xylitol or coconut sugar over the butter. 

Beginning at the end farthest from you, roll the rectangle tightly toward you. Use both hands and work slowly, being careful to keep the roll tight. Don't worry if the filling oozes as you work. When you reach the end, pinch the seam together.

With a sharp knife, cut the log in half, then each section in half again, until you have 36 rolls. Pour a couple of tablespoons of coconut oil into baking dish and swirl to coat. Place the rolls in the pans cut-side up, being careful not to overcrowd. Use 2 pans if you need to. 

Preheat the oven to 375 degrees F. Cover each pan with a kitchen towel and let rise on the countertop for at least 30 minutes before baking. Remove the towels and bake for 11 to 15 minutes, until golden brown. Don't allow the rolls to become overly brown.


For a frosting:
1 package almond cream cheese, softened
3T xylitol
2 tsp vanilla
Pinch of salt
2-4T almond milk

Whip the cream cheese and xylitol until fluffy. Add salt and vanilla and enough almond milk to make a pourable frosting. Pour over the cinnamon rolls as soon as they come out of the oven.