x

Showing posts with label sugar free. Show all posts

Sweet Chipotle Vinaigrette- Phase 3

This is an FMD friendly version of Chipotle's famous Vinaigrette.

Chipotle peppers are jalapenos that are allowed to turn red on the plant. Chipotles in Adobo is used in a lot of Mexican style dishes- they are simply smoked red jalapenos in a sauce. But this sauce always has sugar in it.

In Maintenance, use these canned chipotle peppers and a little of the sauce in this recipe- about 1 pepper and a tsp of the adobo sauce. But when you are actively working on weight loss- just use chipotle powder. This is not chili powder- that is a whole different pepper.  


Sweet Chipotle Vinaigrette
Phase 3

1/4 cup red wine vinegar
2.5T xylitol or stevia equivalent
1 T chipotle powder
2 tsp sea salt
2 T water
1/2 tsp pepper


Blend everything in a blender, then slowly add 1/2 cup grapeseed oil while the blender is running. This will emulsify the dressing. Taste and add more chipotle powder if you want, or sweetener. Pour into a jar, add 1/2 tsp dried oregano and shake to mix. Allow the dressing to sit in the fridge for a few hours before serving. 


No-Bake Chocolate Mint Cups (Vegan and gluten free) - Phase 3

No-Bake Chocolate Mint Cups (V)
Phase 3
Makes 12 standard servings of healthy fat and each is a partial grain


1 cup rolled oats
1 cup pecan halves
1/2 cup unsweetened shredded coconut
3 T cacao powder
pinch of fine sea salt
½ cup melted and cooled coconut oil


Chocolate Filling:

½ cup raw cacao or Hershey’s regular cocoa powder
½ cup coconut milk (from a can)*
½ cup Vegan Butter (recipe on my blog)
½ cup xylitol or stevia/pure monk fruit equivalent
¾ teaspoon peppermint extract

*note about canned coconut milk: If you buy a quality coconut milk, it will be about 2/3 cream and 1/3 watery liquid. This is generally not possible to shake up to blend, so simply pour everything into a blender and blend on low until smooth. Pour into a jar to store leftover in fridge for another recipe


Line a 12-cup nonstick muffin tin with little strips of parchment paper or cupcake liners and set aside.

In the bowl of a food processor, combine the oats, pecans, coconut, cacao powder, and salt. Pulse the mixture until everything is finely chopped.

Add coconut oil to the food processor. Pulse until a sticky “dough” starts to come together. Pinch it between your fingers to make sure that it will hold together. Place the dough in the fridge for about 5 minutes, just to firm up.

In the muffin tin, drop about 3 tablespoons of the dough into each cup. Lightly spread it out with your fingers. Then, with the bottom of a shot glass (or something similarly sized), press an indent into each portion of dough to form a “cup.” Place the prepared cups in the fridge while you make the ganache.

Make the ganache. Put the cacao, milk, vegan butter, sweetener in a sauce pan and whisk until smooth. Put on medium heat and whisk until very smooth and sweetener is dissolved/melted. Carefully taste and adjust sweetener, if you wish. Whisk in the mint extract.

Retrieve the cups from the fridge. Divide the ganache evenly among the cups. Place the peppermint ganache cups in the fridge to set for at least 6 hours- overnight is better. When ready to serve, let the cups sit at room temperature for 30 minutes before carefully running a paring knife around the edges of each cup to release (unless you used a cupcake liner) Keep the ganache cups on a plate in the fridge until ready to serve. Garnish with fresh mint leaves and shredded coconut if you like!


Cherry Paletas- Phases 1 and 3


Paletas are super easy to make and super refreshing on a hot day. This is a perfect p1 snack, or can be your fruit and healthy fat for p3 lunch. You can make them sweet or sour, creamy or not. 


Cherry Paletas
Phases 1 and 3
Makes 2 servings

2 cups pitted fresh or frozen cherries
1/2 water for p1 or coconut cream for p3
1 T lemon juice
1 tsp (or more if you want) vanilla extract
Xylitol or stevia to taste

Throw everything in the blender and blend until smooth. If you would like to have chunks of cherries in your paletas, then blend 1 1/2 cups of the cherries with the other ingredients until smooth. Add remaining half cup and pulse to chop the cherries.

If you want to add sweetener, add a little, taste then add more if you want. You want the blended mixture to taste sweeter than what you want the end product to taste. 

Place your popsicle mold or paper or plastic cups onto a baking sheet. Pour the mixture into the molds, or paper or plastic cups. The molds I use are listed here in this post, Foods and Tools I Use Frequently. If you are using cups, simply cover them with foil or plastic wrap and poke the wooden or silicone sticks into the cup. Place the baking sheet into the freezer and freeze until firm. 


Cucumber Kimchi- All Phases (v)


Add some grilled chicken or steak on the side and this is a perfect and easy p2 meal or snack. You can make this ahead of time to let the flavors come together. I eat this fresh, but you can ferment, if you want. 


Feel free to use radish, or jicama in place of the carrots in p2. Even though they may not be traditional Korean veggies, they are delish in this recipe. 


Cucumber Kimchi
Unlimited portions
All Phases


3-4 small salad cucumbers

1 small carrot, julienned (not for phase 2)
1-2 small spring onion, cut into 1 inch pieces


Sauce:
1T Garlic-minced
1 T tamari
¼ tsp sesame oil (p3 only)
1 T Rice Wine Vinegar (P1) or coconut vinegar (all phases)
1-2 T Gochugaru (Korean red pepper flakes)
1 T xylitol or other FMD sweetener in appropriate amount
½ tsp minced ginger

Slice cucumbers on the bias. Sprinkle with 1T sea salt and stir. Set aside for 20-30 minutes. Rinse and drain well. Lay out on clean tea towel or paper towels and dry thoroughly.


Add to large bowl, with green onions and carrots (if using)


Mix the sauce ingredients together and pour over cucumber mixture. Stir. Top with raw sesame seeds in p3 if you like.


If you want to ferment this, you can- place into a glass jar with a lid. Let sit on the counter for 2 or3 days.   


Easy Cashew Butter Bread - Phase 3


This is adapted from a Depression Era recipe- simple ingredients, easy to make and very delicious.

You can sub almond butter for the cashew butter, if you want. The flavor would be very mild compared to the nuttiness of cashews.

Also- this bread is not super sweet. If you want it to be sweeter, add more sweetener. Sugar was a rare commodity in the Depression.


Easy Cashew Butter Bread
Makes 16 standard grain servings and partial fat
Phase 3

2 cups sprouted wheat flour (for a lighter bread, sub 1/2 cup of this for sorghum flour)
1 tablespoon (yes, tablespoon) baking powder
Healthy pinch of sea salt
1/4 cup xylitol or stevia/monk fruit equivalent
1 1/3 cup cashew milk or almond milk
1/2 cup cashew butter
1 tsp lemon juice
Optional: 1 tsp vanilla

Mix the dry ingredients together in a bowl. Add the milk and lemon juice. Stir to combine. Add nut butter and vanilla if using. Pour into greased loaf pan and bake at 325F for 1 hour and 10-ish minutes. Let cool in the pan for 10 minutes, then remove to a rack to completely cool before slicing.


I highly recommend slicing this into 8 thick slices, then cut each slice in half. This bread will not work to cut into 16 thin slices.


Gingerbread Spice- All Phase (vegan)


Stir up this spice mix and use it in your muffins, pancakes, biscuits, homemade creamer, or wherever you want a warm spicy flavor!

Use the freshest spices for maximum flavor.


Ginger Spice
All Phases

2 T ground allspice
2 T ground cinnamon
2 T ground ginger
1 T ground cloves
1 T ground nutmeg
Pinch ground black pepper


Mix together and store in a jar.

Lime Sorbet - All Phase

 Try this refreshing treat on Phase 2- it is a lovely dessert, especially in the Summer!


Lime Sorbet
All Phases
Unlimited servings

Double this if you want. Use lemons, if you want, or a combo of lemons and limes.

4 limes, zested, then peeled
2-4 T xylitol or stevia or pure monk fruit equivalent
Tiny pinch of sea salt
1/3 cup water
Fresh mint leaves, optional

Chuck everything into a blender and blend until no longer chunky. Taste and add more sweetener if you like. Pour into glass freezer safe bowl and freeze until slushy like.


Dairy Free Cinnamon Creamer - Phase 3 (vegan)

 In the fall and winter, cinnamon is one of my favorite flavors. There is nothing like a cup of hot chocolate or Dandy Blend (coffee substitute compliant with FMD- there are a few others including Pero and some Teechino varieties) with comforting cinnamon.

This creamer is easy to whip up. Add this to a mug of warm almond milk for a perfect winter nightcap! 

You can also use this in your pancakes, waffles- any recipe that calls for almond milk and you want a light cinnamon taste!


Dairy Free Cinnamon Creamer
Phase 3
Makes 5 standard servings of healthy fat (although you will likely use way less than a serving in a cup of Dandy Blend)

1 cup homemade almond milk (this is generally thicker than store bought)
1 cup coconut cream
1-2 T xylitol or stevia/monk fruit equivalent - or to taste
1/2 tsp alcohol free vanilla extract
4 cinnamon sticks, 3" long each
1 tsp really good cinnamon

Add the almond milk and cinnamon sticks to a sauce pan and warm over medium low heat, stirring occasionally. Add the sweetener of your choice (if using stevia liquid, wait until the creamer cools to add it). Make sure the almond milk gets pretty hot but do not boil and ensure the sweetener is dissolved. 

Remove from heat and allow to sit until it cools completely. This will allow the cinnamon sticks to infuse their flavor into the milk.

Once cooled, remove the sticks and discard them. Whisk in the remaining ingredients. Taste and adjust any flavors you want. Pour into a jar with a lid and store in fridge for 5-7 days.


Coconut Lime Muffins with Vegan Cream Cheese Frosting- Phase 3


Pretty easy to whip up. Very tasty for part of your p3 breakfast, or as part of your p3 dinner as a dessert!

I make my own almond cream cheese but you can buy it in the store- make sure it is sugar free and compliant.

Coconut Lime Muffins
Phase 3
Makes 14 standard servings of grain and half a healthy fat serving each

1 cup sprouted wheat flour 
3/4 cup sorghum flour 
1 cup xylitol, or the equivalent in pure monk fruit or stevia
1/4 tsp sea salt
1 tsp baking powder
1/2 tsp baking soda
1 whole egg, lightly beaten
1/2 cup coconut milk
1/4 cup unrefined coconut oil
2 large fresh limes


Heat oven to 425 degrees. Line muffin pan with papers


Zest the 2 limes and add zest to a blender. Peel the limes with a knife, and add peeled limes to blender. Add in the sweetener, coconut milk and coconut oil. Blend until smooth.

In a large bowl, lightly beat the egg. Add the liquid from the blender and whisk. Add the remaining ingredients to a small bowl and stir well to combine. Add to large bowl and stir just until the flour is incorporated.
Fill muffin cups to 3/4 full.
Place into the oven, close the door and immediately reduce temp to 350


Bake 15-20 minutes, until a toothpick comes out clean. Let cool.


Vegan Cream Cheese Frosting
Phase 3
Makes 4 standard servings of healthy fat

1 cup almond or cashew cream cheese
1/4 cup powdered xylitol (whiz up in blender) or equivalent of another sweetener
Tiny pinch of sea salt
1-2 T unrefined coconut oil
1-2 T canned coconut cream

Whisk everything together. Liquid stevia works best here. Taste and add more sweetener if you need. 
Spread onto muffins as you like- just before serving. 


Pumpkin Donuts- Phases 1 & 3 (Can be GF)


I love me a cake donut! There is a local place that makes seasonal cake donuts and they are SO good- but not so good for my tummy. While I have a few donut varieties on the blog, I have a whole bunch more in the works. Some, though, will have to wait until next Spring- I will need fresh berries for those! 

In the meantime- it is fall and everything pumpkin is in order. 
Make these up in just a few minutes! 

In Phase 3, you can melt a little bit of my Coconut Cashew Butter and drizzle on top- then sprinkle with a few chopped pecans. 
Or you can use my Donut Drizzle recipe here on the blog. 

For best results, use homemade oat milk or homemade cashew milk

For extra flavor- add some orange zest- about half a teaspoon. Fresh or dried.


Pumpkin Donuts
Makes 14 standard grain servings for p3, 8 grain servings for p1
Phase 1 and 3

1 3/4 cups sprouted wheat flour or spelt for p1 (or my GF Flour Mix)
¼ tsp xanthan gum (omit if using GG Flour Mix)
1 tsp baking powder
1 tsp baking soda
1/2 tsp salt
1 tsp ground cinnamon
1 tsp pumpkin pie spice (my recipe on the blog)
1/2 cup grapeseed oil for p3, oat milk for p1
3/4 cup xylitol or pure monk fruit equivalent (check your package for measurement)
2 large eggs, at room temp, p3 only. Use 3 beaten egg whites for p1
1 cup fresh or canned pumpkin puree
1/3 cup cashew milk for p3 or oat milk for p1
1 tsp pure alcohol-free vanilla extract


Preheat oven to 375°F


Use non stick donut pan. Or in p3, grease the pan with grapeseed oil

Whisk the flour, xanthan gum, baking powder, baking soda, salt, cinnamon, and pumpkin pie spice together in a large bowl until combined. Set aside. In a medium bowl, whisk the oil, sweetener, eggs, pumpkin puree, milk, and vanilla extract together until combined. Pour the wet ingredients into the dry ingredients, then fold everything together gently just until combined and no flour pockets remain.

Spoon the batter into the donut pan. You can alternatively, fill a large zipped-top bag with the batter. Cut a corner off the bottom of the bag and pipe the batter into each donut cup, filling about 2/3 full. Do not over fill.

Place in oven on middle rack. Close door and immediately reduce temp to 350.

Bake for 10-11 minutes or until the edges and tops are lightly browned. To test, pat your finger on the top of the donut. If the donut bounces back, they’re done. Your donuts may take another 5-7 minutes to completely bake- it depends on the size of your donuts. 

Cool donuts in the pan for 2 minutes then transfer to a wire rack.

Cover leftover donuts tightly and store at room temperature for 1-2 days or in the refrigerator for up to 1 week.


Bang Bang Chicken- Phase 3 - (Sauce can be Vegan)


 If you have been paying ANY attention to me on social media, you should know by now how much I LOVE my Sweet Chili Sauce.

Well- I have used it to make this BANGIN' sauce-
I put chicken on the recipe- use it on anything. Cauliflower. Pork. Salad. Roasted veggies. Whatever you want. 

This is totally customizable- mix the recipe then taste and add to it if you want. 

Cook the chicken however you want. I have grilled it, then diced it. I have cut it into cubes and cooked in a skillet. You could bake some chicken breasts- whatever you want. Just add the sauce AFTER the chicken is cooked- you don't want to cook the chicken in this. 

Note: You can find compliant sriracha in the store- read ingredients. Some brands add SUGAR. Same with the mayo- check ingredients.

If you want to make this Vegan, you can- just use my Vegan Mayo recipe. 


Bang Bang Chicken
Phase 3
Makes 4 servings

Sauce:

1/2 cup my Sweet Chili Sauce (recipe HERE)
1 cup homemade mayo (recipe MAYO)
Couple squirts of compliant sriracha (recipe SRIRACHA)


Whisk everything together in a bowl. Pour into a jar and cover. Let this sit for an hour before using.

1lb chicken breast or thighs
Salt
Pepper
Garlic powder

Season both sides of the chicken generously with the seasonings. Feel free to add others if you want, like chili powder. Cook chicken on the grill or in a skillet with some olive oil. Cook just until done. Let rest for 5 minutes. Cut chicken into chunks if you have not already and toss in the Bang Bang Sauce. Serve over my Spicy Fried Cauliflower Rice, or Fried Quinoa, or in a lettuce wrap. Be sure to make enough for lunch tomorrow, because you WILL want it!


Sweet Chili Sauce- All Phases


This is my favorite sauce ever. I use it ALL the time!!! It really saves the day in Phase 2! This is my favorite snack or meal:


Sweet Chili Sauce
All Phases
Use this as a condiment, any time in Hormone Rx or FMD


Here is my video: https://youtu.be/nghdKAohkh8


2 tsp red pepper flakes (use less if you don't want it hot)
2T Tamari
2 garlic cloves, minced
2 tsp minced fresh ginger
1 tsp black pepper
1 cup water
1 cup xylitol or stevia equivalent    
1 tsp arrowroot powder mixed with 2 tsp COLD water to make a slurry


Put everything except arrowroot slurry in a sauce pan and bring to low boil. Whisk in slurry until the sauce thickens. Taste and adjust seasoning. Store in covered jar.

 Use as dip for veggies or meat or in lettuce wraps.

Fermented Sour Pickles - All Phases

Fermented Sour Pickles

All Phases


These are super easy to put together and the fermentation is so good for the gut! You will use salt to preserve them, rather than vinegar. 

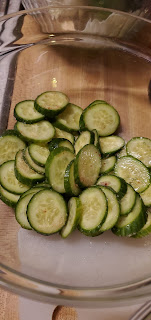
Choose pickling cucumbers- regular cucumbers will work but could end up mushy. 

Do not skip the bay leaves (or other leaves listed)- these are very necessary. The tannins in the leaves are necessary to keep the skin from getting soggy.

Use sea salt- not table salt (that usually contains sugar and iodine)- you want pure salt

Feel free to adjust the spices- these are totally customizable!

You can also drink the brine! Full of electrolytes- think of it as a natural Gatorade! 

Don’t like cucumbers? Use some carrots, or fresh green beans, or cauliflower. 


Equipment:

2 quart jars that have been sanitized (or 1 gallon jar if you have it)

Lids for the jars

Weight- a sterilized river rock, a pickle weight, a zip top bag with some water in it. This is crucial because you want to keep the cucumbers submerged or they will mold. 


Fermented Sour Pickles

2lbs pickling cucumbers- super fresh, free from blemishes or bruises

6 cups chlorine free, filtered water (you may have extra brine after you fill the jars)

6 tablespoons sea salt (DO NOT use table salt)

4-6 bay leaves (or grape leaves or horseradish leaves)

8-12 peeled garlic cloves, sliced

1 tsp each: fennel seeds, coriander seeds, whole allspice, black peppercorns, dill seed, mustard seed, celery seed)- or use any amount of these you want. 

A large handful fresh dill

1-3 fresh chilies if you like heat- these are optional


Mix the dried spices together in a bowl- set aside.

Dissolve the salt in the water. 

Wash the cucumbers thoroughly. 

Put 1/3 of the spice mix and fresh dill in the bottom of the gallon jar or divide evenly between the 2 quart jars. Do the same with 1/3 of the bay leaves.

Place half the cucumbers in the jar(s). Add another 1/3 spice mix and dill and bay leaves. Pack the remaining half of the cucumbers in the jar. Top with remaining spices, dill and bay leaves. 

Pour the salt water over the cucumbers and leave 1-2 inches headspace at the top. Place your weight on to keep the cucumbers in the brine. Put the lid on loosely. Set the jar(s) in a bowl, and place in a dark, cool place (68-72 degrees) and leave to ferment for 3 days. Check on day 2 for bubbles. Once you see the bubbles, you can taste the pickles to see if they are to your liking. If they are, you can put them in the fridge. If there are no bubbles, let them sit and ferment. Check them daily. The longer you leave them, the stronger the sour will be. 


Cilantro Lime Dressing - All Phases

Whiz this dressing up and use in all phases- especially phase 2!

This will keep for a few days in the fridge. I would not freeze this.


Cilantro Lime Dressing
All Phases

Juice and Zest of 2 limes
2-3 garlic cloves, peeled
½ tsp black pepper
2 green onions, rough chopped
1/2 cup fresh cilantro leaves and stems
½ tsp salt
1 tsp xylitol or stevia equivalent
Water as needed to thin- start with 1T


Whiz everything up- taste and adjust sweetener. Let sit for a couple hours for best flavor.


Fermented Salsa - All Phases

Fermented foods are really good for your gut. And since tacos are the best thing on the planet- why not make them even better?

All you need is a glass jar that seals, the ingredients, a weight and 2 days. This is super easy.

Double this recipe if you want. Heck- triple it. It will keep for a couple of months.   

All of these salsas can be fermented. 

Note that jalapeno will get milder as it ferments. If you like hot salsa, just add chopped fresh jalapeno to some before serving. 

Cilantro- some folks prefer to add this fresh just before serving. 

PRO TIP: Use a food processor to quickly chop--but the fermentation may happen quicker. Just keep an eye on your jar. 

Fermented Salsa
All Phases


Phase 1 and 3
4-5 large tomatoes, chopped
2 minced garlic cloves
1/2 cup diced onion
1-2 diced lemon drop peppers, or jalapenos
Juice of 1 lime
1/4 cup chopped cilantro
1/2 tablespoon sea salt (not table salt)

Phase 2 Salsa

1 red bell pepper, chopped
1 yellow bell pepper, chopped
1 red onion, chopped
2 green onions, chopped
2 cloves garlic, minced
1 jalapeno, minced (remove seeds and membranes if you want it mild)
1/4 cup chopped fresh cilantro
Zest of 1/2 lime
Juice of 1 lime
1/2 tablespoon sea salt

Salsa Verde
Phase 1 and 3

8-10 tomatillos
2 minced garlic cloves
1/2 cup diced onion
1-2 diced lemon drop peppers, or jalapenos
Juice of 2 limes
1/4 cup chopped cilantro
1/2 tablespoon sea salt (not table salt)


Chop everything to the chunkiness you prefer. Add to a bowl and mix. Start with half the salt. You want to taste the salt but do not make it too salty. You need a salt taste, because that is what keeps the bad bacteria away (rot).

Using clean hands, scoop your salsa into your jar. You can use a couple small jars or one big one. You will need a weight for each jar.

Add the liquid (brine) from your bowl to the jar- press the veggies down- you want them covered in liquid. 
Add half a bell pepper or a cabbage leaf (this will be discarded later) to weight the salsa down. Cover tightly and set on a shelf, away from direct sun.  

Let the salsa sit for 2 days. You should see air pockets or a few bubbles. That means it is fermented. Remove the weight and move jar to the fridge. Store in fridge for around 2 months. If it lasts that long. 

GLUTEN FREE Blueberry Muffins- Phase 1


Gluten free does not have to be scary. Here are some muffins to prove it!

Simply mix up the flour mix in a large container you can seal. Then measure it just like flour and use in this and other recipes on the blog.


Gluten Free Flour Mix
Phase 1

3.5 cups brown rice flour
2 cups gluten free oat flour
1.5 cups sorghum flour
1.5 cups arrowroot
1.5 cups tapioca flour
1T xanthan gum
1T cream of tartar

Mix well and store in airtight container.


Blueberry Muffins
Phase 1
Makes 6 standard p1 servings

1 1/2 cups Gluten Free Flour Mix from recipe above
3/4 cup xylitol- or stevia/pure monk fruit equivalent
1/2 tsp salt
2 tsp baking powder
1/2 tsp baking soda
1 tsp vanilla
2 egg whites, lightly beaten
1/3 cup unsweetened oat milk
1 1/4 cup blueberries


Preheat oven to 425 F

Mix dry ingredients together. Add wet ingredients, stir just until combined. If the batter is super duper thick, add in a tablespoon of water at a time, until you get a very thick pancake batter consistency. Fold in blueberries. Pour into silicone muffin pan, filling the cups 90% full.

Put into the hot oven quickly, close door and immediately reduce temp to 400 degrees. Bake for 18-23 minutes until toothpick comes out clean. Cool in the pan 10 minutes, then remove to cooling rack. When completely cooled, transfer to airtight container.


Makes 6 standard p1 servings for breakfast or lunch. If you get 12 muffins from the batch, each serving is 2 muffins.


Oil Free Asian Dressing- All Phases

There are never enough sauces or dressings for phase 2! Keeping a stash of a few good sauces makes the phase that most people dread so tasty!

Add this to your arsenal and you will love Phase 2 of FMD!


Oil Free Asian Dressing
All Phases

1/3 cup tamari
1/4 cup water
2 T vinegar or lime juice
4 cloves garlic
1/2 inch fresh ginger,  peeled
2 T xylitol or stevia equivalent    
2 T TCS Sweet Chili Sauce recipe on the blog)
1 T TCS sriracha (optional) (recipe on the blog)
1 tsp red pepper flakes (optional)

Put everything in a blender and blend until smooth.
Store in fridge. Will keep for a while in fridge

Ketchup Phases 1 & 3

Ketchup

Phases 1 & 3

2 (28 ounce) cans crushed tomatoes

1/2 cup water, divided

2/3 cup xylitol

3/4 cup apple cider vinegar

1 teaspoon onion powder

1/2 teaspoon garlic powder

1 3/4 teaspoons salt

1/8 teaspoon celery salt

1/8 teaspoon mustard powder

1/4 teaspoon finely ground black pepper

1 whole clove


Pour tomatoes into slow cooker. Swirl 1/4 cup 

water in each emptied can and pour into slow 

cooker. Add remaining ingredients, whisk to 

combine.

Cook on high, uncovered, until mixture is 

reduced by half and very thick, 10 to 12 hours. 

Stir every hour or so.

Smooth the texture of the ketchup using an 

immersion blender, about 20 seconds. Or cool 

and put into blender and process on high for 10 

seconds.

Ladle the ketchup into a fine strainer and press 

mixture with the back of a ladle to strain out 

any skin and seeds.

Transfer the strained ketchup to a bowl. Cool 

completely before tasting to adjust salt

Roasted Garlic Salad Dressing - All Phases


Roasted garlic is one of the easiest things to make and it is SO versatile! It add SO much flavor to so many dishes. And when you roast the garlic, it makes the flavor a bit sweeter, and more mild than raw garlic.

To make roast garlic, simply wrap 2-3 (or more) whole heads of garlic in foil and place in 350 degree oven for 30 minutes. Let it cool completely before handling. Then, cut the top off and squeeze the softened, roasty garlic into a container.


Roasted Garlic Salad Dressing
All Phases

1 head of garlic, roasted per instructions above
2 T vinegar
1 T mustard- yellow, spicy, whole grain (make sure it is sugar free and compliant)
Pinch of salt
Pinch of black pepper
Pinch of stevia (optional)
Chicken, veggie or beef stock- or water


Put everything but the stock into a blender and blend until smooth. Add as much stock or water as you need to get the consistency you prefer. Pour into a jar and keep the fridge for about a week or so.


Hard Pretzels- Phase 1 and Phase 3

Hard Pretzel Rods
Phase 1 and Phase 3
Makes 16 phase 1 standard portions
Makes 32 phase 3 standard portions

There are quite a few steps to this process but you can make your own pretzels for a crunchy snack. If you want to roll them into standard pretzel shapes- there are videos on You Tube showing that process. Rods are easiest- just make sure you cut them to a size that will fit into your pan of boiling water.

Please note- these pretzels may not reach the dark brown color of store bought pretzels as brown sugar is used to create that color. Since brown sugar is not FMD, it is not included in this recipe. 

1 1/2 cups warm water
1 package yeast
1/2 tsp xanthan gum
3T olive oil
2 1/2 tsp sea salt
3 cups sprouted wheat flour for p1/p3 OR spelt flour for p1 only
1 cup sorghum flour


3 quarts water
1/2 cup baking soda

1 whole egg beaten with 1T water (use egg white only for p1)

Coarse salt

Heat oven to 250 degrees F. Spread the baking soda out over the baking sheet and bake at 250 for 1 hour. 

Dissolve yeast in warm water for 10 minutes. Add flours and stir a few times. Add xanthan gum, olive oil, salt and mix for 5-7 minutes. Cover damp towel and place bowl in warm place until dough doubles- 1 1/2 to 2 hours. 

Put water in large shallow pan and bring to boil. Slowly add BAKED baking soda- a little at a time. It will bubble up if you dump it all in at once.

Divide dough into 16 balls. Roll each ball into a rope about 22 inches long. Cut each rope into 8 pieces. Place a few pieces at a time into the water, and cook for 30 seconds. Remove with slotted spoon and place on baking sheet lined with parchment or silicone mat. Do not let them touch. Continue on until all dough is rolled and cut and cooked in water. 

Preheat the oven to 325 F.

Brush each pretzel with egg wash, sprinkle with coarse salt and bake in 325 degree oven for 25 minutes until golden brown. Check to see if they are hard throughout- if not bake a bit longer, rotating the pan. Check every 10 minutes until hard throughout. These could take another 25 minutes to become hard and crunchy. Remove from oven and let cool. Store in airtight container.