x

Showing posts with label phase 4. Show all posts

Chai Spiced Apples- Phase 1 and Maintenance


This compote is good on toast, pancakes, biscuits, oats. Or just to eat with a spoon. In maintenance, add a spoon full of my Coconut Cashew Butter under the warm apples on you pancakes and enjoy the best breakfast ever!

Be sure to use a cooking apple and not a snacking apple. Granny Smith, Honeycrisp, Gala are good choices, among others, to cook. Red Delicious are not a good cooking/baking apple- save those to eat fresh. 
I like to use 2 kinds of apples- my favorite blend in Granny Smith and Honeycrisp. 


Chai Spiced Apples
Phase 1 and 4
Makes 2 standard servings of fruit

2 cups of diced apples
1-2 tsp Chai Spice Blend (recipe on the blog)
1-2 whole star anise
1 tsp vanilla paste or extract
Pinch of sea salt
Stevia or pure monk fruit
2T Vegan Butter (phase 4 only)

Heat a non stick skillet over medium heat until very warm. Add the spice blend and whole star anise. Stir with rubber spatula for 15020 seconds, to toast, then scrape into small bowl. 

Add the diced apples and return the pan to the heat. If you are in maintenance, add the vegan butter. Add the pinch of salt. Let the apples sit for a minute or so- you want the apple to start to caramelize but not burn. Stir or toss the apples in the pan and allow to lighly brown some more. Add the spices, stir to coat. Then add a splash of water. Stir and cook the apples just until soft. Do not cook to reduce the size/amount of apples. Add vanilla and stir. If you want to sweeten the apples, add as much sweetener as you like. Remove star anise before serving. 

Chai - Phase 1 & 3


Chai is a hug in a mug. I'm not a fan of tea leaves, so I'm kinda glad they aren't part of FMD. 

This is technically a Masala Chai, since it is spiced. 

This is highly customizable, also. There is no one Chai recipe. Change spices to please your palate. This is my favorite blend at the moment. Some folks like 1 part water to 2 parts milk, others for 1 to 1. You do want a thick and creamy milk. 

I prefer to use whole spices, as the ground spices will not dissolve. 

I think this fall, this will be simmering on my stove all day! 


Chai

Phases 1 & 3

Makes 2 mugs of tea


3-4 slices fresh ginger

10 green cardamom pods, smashed

1 tsp black peppercorns

1 tsp whole cloves

2-3 whole star anise

1-2 cinnamon sticks 

1/2 whole nutmeg, broken

Sweetener to taste

1 1/2 cups water

1 cup unsweetened plant based milk


Optional spices: split vanilla bean, fennel seeds, whole coriander seeds, holy basil leaves, lemongrass.


Place all the spices in a pot. Break the cinnamon sticks if they're too long to fit. Add 1 1/2 cups spring water. Bring to a simmer, stirring occasionally. Simmer for 10-15 minutes. You need it to reduce to about a cup. 


Add the milk and sweetener. Bring to gentle boil while stirring for 1 minute. Remove from heat. Stir. You can repeat this process if you like. I think it adds more flavor to cook the milk a bit.

Strain the tea. If you want it thicker, use a milk frother or whisk for a minute or so. 


Fall Spice Creamer and Cold Foam- Phases 1 and 3 (v)


Fall Spice Creamer
Phases 1 and 3 versions

Use your favorite plant based milk for this. Homemade or store bought. I prefer but milks for this creamer but oat and brown rice milks should work just fine

Phase 1- unsweetened oat or brown rice milk
Phase 3- unsweetened almond, coconut, cashew or oat

I do not use ground spices in this as they will not dissolve and leave the creamer with a gritty feel.

2 cups plant based milk 
3-4 cinnamon sticks
1 vanilla bean
3-4 star anise
10 whole cloves
1 whole nutmeg, crushed
2 inch piece of fresh ginger, sliced
sweetener to taste (birch xylitol, pure monk fruit or pure stevia)

Split the vanilla bean lengthwise. No need to scrape as most flavor comes from the pod and not the caviar inside. 
Place everything into a pot over medium heat and bring to a very gentle simmer. Do not boil. Reduce heat if there are lots of bubbles. Stir often. Simmer slowly for about 30 minutes. Allow to cool. Strain. 
Keep in fridge

Pro Tip. If the flavor ends up stronger than you prefer, simply add more milk to get to the intensity you prefer. 

To make cold foam:
Place 3-4 tablespoons of the creamer into a tall jar or glass. Use a milk frother (you can get the link to purchase HERE) for 20-30 seconds until foamy. Pour over your iced coffee sub or herbal tea. 

Alternatively you can use a blender or shake in a jar for 1 minute


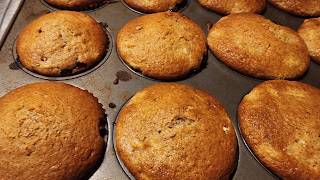
Apple Pie Muffins- Phase 1 and Phase 4


Apple PieMuffins
Phase 1 and Phase 4

For the muffin batter (phase 4 version):
1 1/2 cups sprouted wheat or spelt flour
3/4 cup xylitol- or stevia/pure monk fruit equivalent
1/2 tsp salt
2 tsp baking powder
1/2 tsp baking soda
1/3 cup olive oil 
1 tsp lemon juice
2 tsp vanilla
1/2 tsp cinnamon
1 egg
1/3 cup almond milk
1 large Honeycrisp or Granny Smith apple, finely diced (I leave the peel on)
1 tablespoon uncooked rolled oats (optional)


For the Apple Pie Filling:

2 apples- one Granny Smith and one Gala or Honeycrisp, peeled and finely diced
1 1/2 tsp pumpkin pie spice (recipe on my blog)
1/2 cup xylitol or stevia/pure monk fruit equivalent
Pinch of sea salt
1 tsp arrowroot mixed with 2 tsp cold water for a slurry


Preheat oven to 425 degrees. (you will turn down later)

Filling:

Add the apples to a non stick pan over medium heat. Add the pinch of salt and cook the apples until just soft. Add a splash of water if they start to stick or start to brown. Once the apples are soft, add the sweetener and spices, and about 1/4 cup water. Bring this to a simmer, then add the slurry. Stir until thick and remove from heat,

Muffins:

Add wet ingredients to a large bowl and whisk together. Add half the flour, stir just until combined. Allow to sit for 10-15 minutes. Mix or sift the remaining flour, baking powder, baking soda and salt together. Gently combine with the batter. Fold in diced apple. 

Spoon a small amount of batter into muffin tin lined with papers, about a tablespoon of batter. Divide the apple pie filling between each muffin cup evenly. Top with remaining batter until muffin cups are almost full. Sprinkle the raw oats on top of each muffin (optional) 

Place pan in oven, and reduce heat to 400 degrees F. 

Bake for 18-20 minutes until toothpick comes out clean. Cool.

Makes 12 standard servings of grain and partial fat for Maintenance (p4)


**P1 Modifications

In place of the oil, use pureed raw apple. 

Replace the whole egg with 2 egg whites, lightly beaten until frothy

Use unsweetened oat milk instead of almond milk

Makes 6 standard phase 1 servings of grain and partial fruit, for breakfast or lunch

(if you make 12 muffins, you will eat 2 for under 20lbs. For over 20lb goal you will eat 3)


Rhubarb Blackberry Crisp (v) - Phase 3 breakfast

Rhubarb Blackberry Crisp (v)
Phase 3
Makes 2 servings

4 cups chopped rhubarb- fresh or frozen
2 cups blackberries, fresh or frozen
3T arrowroot
½-1/2 cup xylitol or stevia/pure monk fruit equivalent
¼ tsp ground ginger
Tiny pinch of sea salt


1 cup rolled oats
½ cup chopped pecans, walnuts or almonds (raw)
¼ cups xylitol or stevia/pure monk fruit equivalent
¼ cup Vegan Butter, or raw nut butter*
½ tsp cinnamon
Pinch of sea salt

Preheat oven to 350F

Mix the first 6 ingredients in a bowl until well combined. Dump into a cast iron skillet or baking dish.

In a food processor- pulse the remaining ingredients until crumbly- sprinkle evenly over the fruit.
Bake for 30-40 minutes until bubbly. Allow to cool a bit, then enjoy.


*If you use raw nut butter in place of vegan butter, this is an all inclusive phase 3 breakfast.

If you use vegan butter in the topping, you will need to add a protein on the side.

Steak Fajitas- All Phases


Steak Fajitas
All Phases
Makes 4 servings


1lb lean steak, cut into thin strips
4 bell peppers, sliced thin
2 large onions, peeled and sliced
2 garlic cloves, smashed and minced
1 tsp chipotle powder
1/2 tsp ground cumin
1/2 tsp Mexican oregano
1 tsp chili powder
1 tsp sea salt
1 1/2 tsp black pepper
2 limes, halved
1/4 cup chopped fresh cilantro
1-2 T olive oil (p3 only)

You can add mushrooms if you like, or zucchini strips on p1 and p3. Simply add them with the veggies


Mix the spices in a small bowl.

Heat a large skillet over medium high heat. Add the oil if using. Add steak and half the spices. Stir to cook and coat with spice. It will cook quickly, so stir or flip continuously. Remove to a plate. Squeeze the juice of 1 lime over the meat.

Add the peppers and peppers to the skillet. Sprinkle on the spices. Squeeze the juice of the other lime over the veggies and add all four halves of the limes to the skillet. Crank the heat to high and sear the veggies- you want to let them sit in the hot skillet without stirring, for about a minute at a time to get a bit of char on them. Then stir and let sit. Repeat until done to your likeness. Add the steak, remove the lime peels. Stir together and add cilantro. Serve immediately.


Swedish Meatballs- Phase 3

 Swedish Meatballs

Phase 3
Makes 8 standard servings

2 lbs grass-fed ground beef
2 tsp fine sea salt
1 T coconut flour
1 tsp dried parsley
1 tsp onion powder
1 tsp garlic powder
1 tsp black pepper
1/2 tsp allspice
1/2 tsp nutmeg
1/2 cup onion, minced
1 large egg
2 T coconut oil, for cooking

FOR THE SAUCE:
3 T dairy-free butter
1 T coconut flour
1 1/2 cups bone broth
1 T Dijon mustard
2-inch piece of lemon peel
2 sprigs fresh thyme
2 T coconut aminos or tamari
splash of fish sauce (optional)
1 T arrowroot
1 cup coconut cream

Heat a large, 16-inch skillet over medium-low heat.

In a large bowl combine all of the meatball ingredients and roll them into 32 meatballs.

Add the coconut oil to the skillet.

Add the meatballs to the skillet and cook for 15 minutes turning them over every couple minutes until they are browned all over.

Transfer the meatballs to a plate and cover with foil. Quickly add the dairy free butter to the skillet, the coconut flour. Stir until lightly browned and smells toasty.

Stir arrowroot into 2T of the broth and set aside. Add the remaining broth to the skillet and whisk until fully incorporated. Add in the Dijon, coconut aminos, fish sauce, lemon and thyme. Simmer for 15-20 minutes until reduced by one third. Remove lemon peel. Whisk in the arrowroot slurry and stir until thick. Add coconut cream and stir, then add the meatballs back to the skillet. Simmer for just a couple of minutes to re-heat the meatballs. Serve over sprouted wheat noodles, zoodles or cauliflower rice.

Tangy White Bean Dressing - Phases 1 and 3

 This tangy dressing will zip up your salads and it counts as protein! Now while you may not need a full protein portion for a salad, having a little extra in your day is just fine. 


Tangy White Bean Dressing
Phases 1 and 3
Makes 6 standard servings of protein

15 ounce can white beans drained & rinsed or 1.5 cups cooked beans
¼ cup nutritional yeast
¼ cup apple cider vinegar
2 T tamari
1 tsp onion powder
1 tsp grated fresh garlic
1 tsp dried dill weed
Pinch of sea salt
¼ cup water - or more if you want it thinner

Put everything in the blender and blend until smooth. Taste the dressing and adjust the seasonings. 

Buffalo Chicken Dip- Phase 3

This is a quintessential dip for parties, like your Super Bowl Party, or Graduation Party, or Baby Shower. Check out the Cracker recipes I have on the blog for easy and compliant crackers that would taste great with this dip!
You can use any compliant hot sauce in place of the Frank's but I prefer the taste of Frank's for real Buffalo flavor. 
If you want to make this spicy- add some cayenne to the spices! 


Buffalo Chicken Dip
Phase 3
Makes 6 standard servings protein and healthy fat

1.5 pounds boneless, skinless chicken breast
1 T olive oil
Sea salt and Black Pepper
1 cup FMD compliant Mayo
¼ cup canned full fat coconut milk
1 cup Frank’s Hot Sauce- regular
1 T vinegar- any type except white
1 T lemon juice
1 tsp garlic powder
1 tsp onion powder
1 tsp smoked or sweet paprika
1 tsp sea salt
Green onions, for garnish
Carrot sticks, celery sticks, crackers for serving


Preheat the oven to 375 degrees. Add the chicken breast to a baking dish and drizzle with olive oil, salt, and pepper. Bake for 20-25 minutes or until the chicken is cooked to 160 degrees on instant read thermometer. When the chicken is fully cooked, remove it from the oven shred.

Put the mayo, coconut milk, hot sauce, vinegar, lemon juice, garlic powder, onion powder, paprika, and salt to a mixing bowl. Whisk all of the ingredients together until well combined.

Add the shredded chicken to the buffalo sauce mixture and stir until well combined.


Pour the dip into a 9-inch baking dish and bake at 425 degrees for 20-25 minutes until the dip is bubbly. Remove the dip from the oven. Top with chopped green onions. Let cool for a few minutes before serving with your favorite veggies and crackers. 


Italian Dressing- Phase 3


Throw everything in a jar, pop on the lid and shake this dressing up for super easy flavor on your Phase 3 salads or veggies!

This will keep a couple weeks in the fridge. Adjust the herbs to your liking. I usually add the tiniest amount of sweetener... not much at all. It balances out the vinegar, but you can omit the sweetener if you want.

Dried herbs work best here- just let the dressing sit a couple hours before drizzling.


Italian Dressing
Phase 3

¼ cup extra-virgin olive oil
2 T apple cider vinegar
2 T fresh lemon juice
1 T finely dried parsley
Tiny pinch xylitol or stevia powder
1 tsp dried oregano
1-2 garlic clove, grated
½ tsp Dijon mustard
½ tsp dried ground thyme
¼ tsp sea salt
¼ tsp freshly ground black pepper
1/8 tsp red pepper flakes (optional)

Put everything into a jar with a lid and shake well. Let sit for a couple hours before eating. 

Gingerbread Spice- All Phase (vegan)


Stir up this spice mix and use it in your muffins, pancakes, biscuits, homemade creamer, or wherever you want a warm spicy flavor!

Use the freshest spices for maximum flavor.


Ginger Spice
All Phases

2 T ground allspice
2 T ground cinnamon
2 T ground ginger
1 T ground cloves
1 T ground nutmeg
Pinch ground black pepper


Mix together and store in a jar.

Lime Sorbet - All Phase

 Try this refreshing treat on Phase 2- it is a lovely dessert, especially in the Summer!


Lime Sorbet
All Phases
Unlimited servings

Double this if you want. Use lemons, if you want, or a combo of lemons and limes.

4 limes, zested, then peeled
2-4 T xylitol or stevia or pure monk fruit equivalent
Tiny pinch of sea salt
1/3 cup water
Fresh mint leaves, optional

Chuck everything into a blender and blend until no longer chunky. Taste and add more sweetener if you like. Pour into glass freezer safe bowl and freeze until slushy like.


Apple Spice Cookies- Phase 1


This recipe is pretty easy to whip up and who doesn't want cookies for breakfast?

The recipe makes 8 standard servings. Make the cookies however large you want, and divide the total number by 8. That is how many per serving you will have.

You will need to add a fruit to this for FMD. The apple is not enough for a full serving. 
**Pro Tip: if using Granny Smith or other tart cooking apple, use the full amount of xylitol. If you use a sweeter apple like Gala, cut the amount down to 1 cup or so.

If you are on maintenance, use almond milk and 1 whole egg instead of the egg whites. You can also add walnuts or pecans. 

I hope you try these- they are delicious!


Apple Spice Cookies
Phase 1
Makes 8 standard grain servings and 1/4 fruit serving

2 Granny Smith apples
½ lemon
2 cups spelt flour
1 1/2 tsp ground cinnamon
1/2 tsp baking powder
1/2 tsp baking soda
1/4 tsp salt
1/8 tsp ground cloves
1/8 tsp grated nutmeg
1 1/4 cup xylitol
3/4 cup oat milk
2 large egg whites
1 tsp vanilla extract


Heat oven to 375 F. Line 3 large cookie sheets with parchment. 

If making homemade oat milk- put 1/4 cup raw oats in your blender with 3/4 cup spring water. Let set while you prep the other ingredients.


Grate 1 apple on large holes of box grater. Chop remaining apple. Squeeze the lemon half over the apples. 


In a small bowl, whisk flour, sweetener, cinnamon, baking powder, baking soda, salt, cloves, and nutmeg. 

Whiz up the oat milk, if making it homemade. 


In a large bowl, beat egg whites, oat milk and vanilla. Stir in flour mixture just until blended (dough will be thick). Stir in apples.


Drop dough by heaping tablespoons. onto prepared cookie sheets, 2-inches apart. 


Bake 10-12 minutes, until tops spring back when pressed. Transfer cookies to wire rack to cool.


Dairy Free Cinnamon Creamer - Phase 3 (vegan)

 In the fall and winter, cinnamon is one of my favorite flavors. There is nothing like a cup of hot chocolate or Dandy Blend (coffee substitute compliant with FMD- there are a few others including Pero and some Teechino varieties) with comforting cinnamon.

This creamer is easy to whip up. Add this to a mug of warm almond milk for a perfect winter nightcap! 

You can also use this in your pancakes, waffles- any recipe that calls for almond milk and you want a light cinnamon taste!


Dairy Free Cinnamon Creamer
Phase 3
Makes 5 standard servings of healthy fat (although you will likely use way less than a serving in a cup of Dandy Blend)

1 cup homemade almond milk (this is generally thicker than store bought)
1 cup coconut cream
1-2 T xylitol or stevia/monk fruit equivalent - or to taste
1/2 tsp alcohol free vanilla extract
4 cinnamon sticks, 3" long each
1 tsp really good cinnamon

Add the almond milk and cinnamon sticks to a sauce pan and warm over medium low heat, stirring occasionally. Add the sweetener of your choice (if using stevia liquid, wait until the creamer cools to add it). Make sure the almond milk gets pretty hot but do not boil and ensure the sweetener is dissolved. 

Remove from heat and allow to sit until it cools completely. This will allow the cinnamon sticks to infuse their flavor into the milk.

Once cooled, remove the sticks and discard them. Whisk in the remaining ingredients. Taste and adjust any flavors you want. Pour into a jar with a lid and store in fridge for 5-7 days.


Coconut Lime Muffins with Vegan Cream Cheese Frosting- Phase 3


Pretty easy to whip up. Very tasty for part of your p3 breakfast, or as part of your p3 dinner as a dessert!

I make my own almond cream cheese but you can buy it in the store- make sure it is sugar free and compliant.

Coconut Lime Muffins
Phase 3
Makes 14 standard servings of grain and half a healthy fat serving each

1 cup sprouted wheat flour 
3/4 cup sorghum flour 
1 cup xylitol, or the equivalent in pure monk fruit or stevia
1/4 tsp sea salt
1 tsp baking powder
1/2 tsp baking soda
1 whole egg, lightly beaten
1/2 cup coconut milk
1/4 cup unrefined coconut oil
2 large fresh limes


Heat oven to 425 degrees. Line muffin pan with papers


Zest the 2 limes and add zest to a blender. Peel the limes with a knife, and add peeled limes to blender. Add in the sweetener, coconut milk and coconut oil. Blend until smooth.

In a large bowl, lightly beat the egg. Add the liquid from the blender and whisk. Add the remaining ingredients to a small bowl and stir well to combine. Add to large bowl and stir just until the flour is incorporated.
Fill muffin cups to 3/4 full.
Place into the oven, close the door and immediately reduce temp to 350


Bake 15-20 minutes, until a toothpick comes out clean. Let cool.


Vegan Cream Cheese Frosting
Phase 3
Makes 4 standard servings of healthy fat

1 cup almond or cashew cream cheese
1/4 cup powdered xylitol (whiz up in blender) or equivalent of another sweetener
Tiny pinch of sea salt
1-2 T unrefined coconut oil
1-2 T canned coconut cream

Whisk everything together. Liquid stevia works best here. Taste and add more sweetener if you need. 
Spread onto muffins as you like- just before serving. 


Pumpkin Donuts- Phases 1 & 3 (Can be GF)


I love me a cake donut! There is a local place that makes seasonal cake donuts and they are SO good- but not so good for my tummy. While I have a few donut varieties on the blog, I have a whole bunch more in the works. Some, though, will have to wait until next Spring- I will need fresh berries for those! 

In the meantime- it is fall and everything pumpkin is in order. 
Make these up in just a few minutes! 

In Phase 3, you can melt a little bit of my Coconut Cashew Butter and drizzle on top- then sprinkle with a few chopped pecans. 
Or you can use my Donut Drizzle recipe here on the blog. 

For best results, use homemade oat milk or homemade cashew milk

For extra flavor- add some orange zest- about half a teaspoon. Fresh or dried.


Pumpkin Donuts
Makes 14 standard grain servings for p3, 8 grain servings for p1
Phase 1 and 3

1 3/4 cups sprouted wheat flour or spelt for p1 (or my GF Flour Mix)
¼ tsp xanthan gum (omit if using GG Flour Mix)
1 tsp baking powder
1 tsp baking soda
1/2 tsp salt
1 tsp ground cinnamon
1 tsp pumpkin pie spice (my recipe on the blog)
1/2 cup grapeseed oil for p3, oat milk for p1
3/4 cup xylitol or pure monk fruit equivalent (check your package for measurement)
2 large eggs, at room temp, p3 only. Use 3 beaten egg whites for p1
1 cup fresh or canned pumpkin puree
1/3 cup cashew milk for p3 or oat milk for p1
1 tsp pure alcohol-free vanilla extract


Preheat oven to 375°F


Use non stick donut pan. Or in p3, grease the pan with grapeseed oil

Whisk the flour, xanthan gum, baking powder, baking soda, salt, cinnamon, and pumpkin pie spice together in a large bowl until combined. Set aside. In a medium bowl, whisk the oil, sweetener, eggs, pumpkin puree, milk, and vanilla extract together until combined. Pour the wet ingredients into the dry ingredients, then fold everything together gently just until combined and no flour pockets remain.

Spoon the batter into the donut pan. You can alternatively, fill a large zipped-top bag with the batter. Cut a corner off the bottom of the bag and pipe the batter into each donut cup, filling about 2/3 full. Do not over fill.

Place in oven on middle rack. Close door and immediately reduce temp to 350.

Bake for 10-11 minutes or until the edges and tops are lightly browned. To test, pat your finger on the top of the donut. If the donut bounces back, they’re done. Your donuts may take another 5-7 minutes to completely bake- it depends on the size of your donuts. 

Cool donuts in the pan for 2 minutes then transfer to a wire rack.

Cover leftover donuts tightly and store at room temperature for 1-2 days or in the refrigerator for up to 1 week.


Bang Bang Chicken- Phase 3 - (Sauce can be Vegan)


 If you have been paying ANY attention to me on social media, you should know by now how much I LOVE my Sweet Chili Sauce.

Well- I have used it to make this BANGIN' sauce-
I put chicken on the recipe- use it on anything. Cauliflower. Pork. Salad. Roasted veggies. Whatever you want. 

This is totally customizable- mix the recipe then taste and add to it if you want. 

Cook the chicken however you want. I have grilled it, then diced it. I have cut it into cubes and cooked in a skillet. You could bake some chicken breasts- whatever you want. Just add the sauce AFTER the chicken is cooked- you don't want to cook the chicken in this. 

Note: You can find compliant sriracha in the store- read ingredients. Some brands add SUGAR. Same with the mayo- check ingredients.

If you want to make this Vegan, you can- just use my Vegan Mayo recipe. 


Bang Bang Chicken
Phase 3
Makes 4 servings

Sauce:

1/2 cup my Sweet Chili Sauce (recipe HERE)
1 cup homemade mayo (recipe MAYO)
Couple squirts of compliant sriracha (recipe SRIRACHA)


Whisk everything together in a bowl. Pour into a jar and cover. Let this sit for an hour before using.

1lb chicken breast or thighs
Salt
Pepper
Garlic powder

Season both sides of the chicken generously with the seasonings. Feel free to add others if you want, like chili powder. Cook chicken on the grill or in a skillet with some olive oil. Cook just until done. Let rest for 5 minutes. Cut chicken into chunks if you have not already and toss in the Bang Bang Sauce. Serve over my Spicy Fried Cauliflower Rice, or Fried Quinoa, or in a lettuce wrap. Be sure to make enough for lunch tomorrow, because you WILL want it!


Sweet Chili Sauce- All Phases


This is my favorite sauce ever. I use it ALL the time!!! It really saves the day in Phase 2! This is my favorite snack or meal:


Sweet Chili Sauce
All Phases
Use this as a condiment, any time in Hormone Rx or FMD


Here is my video: https://youtu.be/nghdKAohkh8


2 tsp red pepper flakes (use less if you don't want it hot)
2T Tamari
2 garlic cloves, minced
2 tsp minced fresh ginger
1 tsp black pepper
1 cup water
1 cup xylitol or stevia equivalent    
1 tsp arrowroot powder mixed with 2 tsp COLD water to make a slurry


Put everything except arrowroot slurry in a sauce pan and bring to low boil. Whisk in slurry until the sauce thickens. Taste and adjust seasoning. Store in covered jar.

 Use as dip for veggies or meat or in lettuce wraps.

Fire Chicken- All Phases


We love spicy, of all kinds. This chicken has SO much flavor. You can buy the Korean red pepper, Gochugaru at Asian markets or check my post for links to Product I Love, here.


If you are in maintenance or not following FMD strictly, you can add some Gochujang to the mix- it is a fermented red pepper paste. It really adds a depth of flavor but the Fire Chicken is great without it. 


Feel free to adjust the gochugaru- add more for more heat. You can cook this stovetop or on the grill, or in a crockpot. Very versatile. 


Fire Chicken

All Phases (see mods)

Makes 4 standard servings


1lb chicken breast (all phases) or chicken thigh (p3)

2T Gochugaru

2T Vegan Butter (see my recipe) (P3 only)

2 garlic cloves, minced

1 tsp fresh ginger, grated

1 tsp sea salt

1 tsp black pepper

2T tamari

2T Gochujang (optional for maintenance or non FMD folk)


If you are grilling, mix everything but the chicken together in a small saucepan. Add a couple tablespoons of water and cook over medium heat for 5 minutes, stirring. Set aside half the sauce. Grill chicken and brush mixture on, the last 5 minutes of cooking. Toss the chicken in remaining sauce.

If you are cooking in a crockpot- mix everything but the chicken together in the crock pot. Add 1/4 cup water or stock. Add chicken, and stir. Cook on low for 6 hours or high for 4 (depending on the size of your chicken pieces)

For stovetop- cut chicken into bite size pieces. Cook in the vegan butter (p3 only) for 5 minutes. Add remaining ingredients, a splash of water and finish cooking. Serve immediately. 


Fermented Salsa - All Phases

Fermented foods are really good for your gut. And since tacos are the best thing on the planet- why not make them even better?

All you need is a glass jar that seals, the ingredients, a weight and 2 days. This is super easy.

Double this recipe if you want. Heck- triple it. It will keep for a couple of months.   

All of these salsas can be fermented. 

Note that jalapeno will get milder as it ferments. If you like hot salsa, just add chopped fresh jalapeno to some before serving. 

Cilantro- some folks prefer to add this fresh just before serving. 

PRO TIP: Use a food processor to quickly chop--but the fermentation may happen quicker. Just keep an eye on your jar. 

Fermented Salsa
All Phases


Phase 1 and 3
4-5 large tomatoes, chopped
2 minced garlic cloves
1/2 cup diced onion
1-2 diced lemon drop peppers, or jalapenos
Juice of 1 lime
1/4 cup chopped cilantro
1/2 tablespoon sea salt (not table salt)

Phase 2 Salsa

1 red bell pepper, chopped
1 yellow bell pepper, chopped
1 red onion, chopped
2 green onions, chopped
2 cloves garlic, minced
1 jalapeno, minced (remove seeds and membranes if you want it mild)
1/4 cup chopped fresh cilantro
Zest of 1/2 lime
Juice of 1 lime
1/2 tablespoon sea salt

Salsa Verde
Phase 1 and 3

8-10 tomatillos
2 minced garlic cloves
1/2 cup diced onion
1-2 diced lemon drop peppers, or jalapenos
Juice of 2 limes
1/4 cup chopped cilantro
1/2 tablespoon sea salt (not table salt)


Chop everything to the chunkiness you prefer. Add to a bowl and mix. Start with half the salt. You want to taste the salt but do not make it too salty. You need a salt taste, because that is what keeps the bad bacteria away (rot).

Using clean hands, scoop your salsa into your jar. You can use a couple small jars or one big one. You will need a weight for each jar.

Add the liquid (brine) from your bowl to the jar- press the veggies down- you want them covered in liquid. 
Add half a bell pepper or a cabbage leaf (this will be discarded later) to weight the salsa down. Cover tightly and set on a shelf, away from direct sun.  

Let the salsa sit for 2 days. You should see air pockets or a few bubbles. That means it is fermented. Remove the weight and move jar to the fridge. Store in fridge for around 2 months. If it lasts that long.