x

Showing posts with label healthy. Show all posts

Fermented Salsa - All Phases

Fermented foods are really good for your gut. And since tacos are the best thing on the planet- why not make them even better?

All you need is a glass jar that seals, the ingredients, a weight and 2 days. This is super easy.

Double this recipe if you want. Heck- triple it. It will keep for a couple of months.   

All of these salsas can be fermented. 

Note that jalapeno will get milder as it ferments. If you like hot salsa, just add chopped fresh jalapeno to some before serving. 

Cilantro- some folks prefer to add this fresh just before serving. 

PRO TIP: Use a food processor to quickly chop--but the fermentation may happen quicker. Just keep an eye on your jar. 

Fermented Salsa
All Phases


Phase 1 and 3
4-5 large tomatoes, chopped
2 minced garlic cloves
1/2 cup diced onion
1-2 diced lemon drop peppers, or jalapenos
Juice of 1 lime
1/4 cup chopped cilantro
1/2 tablespoon sea salt (not table salt)

Phase 2 Salsa

1 red bell pepper, chopped
1 yellow bell pepper, chopped
1 red onion, chopped
2 green onions, chopped
2 cloves garlic, minced
1 jalapeno, minced (remove seeds and membranes if you want it mild)
1/4 cup chopped fresh cilantro
Zest of 1/2 lime
Juice of 1 lime
1/2 tablespoon sea salt

Salsa Verde
Phase 1 and 3

8-10 tomatillos
2 minced garlic cloves
1/2 cup diced onion
1-2 diced lemon drop peppers, or jalapenos
Juice of 2 limes
1/4 cup chopped cilantro
1/2 tablespoon sea salt (not table salt)


Chop everything to the chunkiness you prefer. Add to a bowl and mix. Start with half the salt. You want to taste the salt but do not make it too salty. You need a salt taste, because that is what keeps the bad bacteria away (rot).

Using clean hands, scoop your salsa into your jar. You can use a couple small jars or one big one. You will need a weight for each jar.

Add the liquid (brine) from your bowl to the jar- press the veggies down- you want them covered in liquid. 
Add half a bell pepper or a cabbage leaf (this will be discarded later) to weight the salsa down. Cover tightly and set on a shelf, away from direct sun.  

Let the salsa sit for 2 days. You should see air pockets or a few bubbles. That means it is fermented. Remove the weight and move jar to the fridge. Store in fridge for around 2 months. If it lasts that long. 

Black Bean Tacos- Phase 1 and Phase 3 - vegetarian, vegan


This is super easy to whip up. You can use canned beans but I prefer to save money and have better flavor with beans I cook myself. 

You can also add whatever veggies you like. Jicama, radish, bell pepper, onion, carrot...clean out your crisper and make some tacos!

If you don't want the heat, be sure to take out the seeds and membranes in the jalapeno. If you want it hotter, add another one. 

You can serve this on chopped lettuce for a salad, or in spelt tortillas for tacos. You could even put this over brown rice to make a taco bowl. 


Black Bean Tacos
Phase 1 and Phase 3
Makes 4 standard servings of protein

2 cups cooked black beans
1 jalapeno, chopped
1 yellow or orange bell pepper, chopped
2 Roma tomatoes, chopped
1 purple onion, chopped
1/4 cup shredded carrot
1/4 cup sliced radish
1/4 cup chopped fresh cilantro
1 lime, juiced (add zest for extra zing)
Sea salt and fresh ground black pepper
2 garlic cloves, minced

Mix everything in a large bowl and allow to sit in the fridge for at least an hour before eating. 


Ketchup Phases 1 & 3

Ketchup

Phases 1 & 3

2 (28 ounce) cans crushed tomatoes

1/2 cup water, divided

2/3 cup xylitol

3/4 cup apple cider vinegar

1 teaspoon onion powder

1/2 teaspoon garlic powder

1 3/4 teaspoons salt

1/8 teaspoon celery salt

1/8 teaspoon mustard powder

1/4 teaspoon finely ground black pepper

1 whole clove


Pour tomatoes into slow cooker. Swirl 1/4 cup 

water in each emptied can and pour into slow 

cooker. Add remaining ingredients, whisk to 

combine.

Cook on high, uncovered, until mixture is 

reduced by half and very thick, 10 to 12 hours. 

Stir every hour or so.

Smooth the texture of the ketchup using an 

immersion blender, about 20 seconds. Or cool 

and put into blender and process on high for 10 

seconds.

Ladle the ketchup into a fine strainer and press 

mixture with the back of a ladle to strain out 

any skin and seeds.

Transfer the strained ketchup to a bowl. Cool 

completely before tasting to adjust salt

Crackers - Italian Herb, Sea Salt, Rosemary Garlic, "Cheese" - Phase 1 and Phase 3


This is a super versatile recipe. You can add whatever herbs and spices you like. 

Here are 3 of my favorite.

I have not tried this with other flours. I did use whole egg as the wash but egg white would be better.


Crackers
Phase 1 and Phase 3
Makes 5 phase 1 and 10 phase 3 standard servings

1 1/2 cups sprouted wheat flour
1 1/2 tsp yeast
1/2 tsp salt
1 T olive oil
1/2 tsp vinegar
3/4 cup warm spring water (105-110 degrees)
Flaky sea salt or coarse sea salt for sprinkling
1 egg white, whipped until frothy

For "cheese" crackers, add 1/2 cup nutritional yeast
For Italian Herb, add 2T each dried oregano, dried basil, dried parsley and 1T garlic powder
For Rosemary Garlic, add 3T fresh chopped rosemary and 4 cloves minced garlic


Put warm water, yeast, olive oil in bowl of a stand mixer. Combine using dough hook, until yeast is dissolved. Add in flour and mix on low for a bit. Just before the flour in incorporated to the water, add in the salt and vinegar and whatever flavors (not flaky salt) you are adding. Turn speed up a bit and continue to mix until the dough forms a ball. You want all the flour incorporated, and the dough should be a ball. Add a little more flour if you need to keep the dough from being sticky. If it is very humid, you may need to add more flour. Let the mixer knead the dough for 5 minutes. 

Cover with a towel that you have soaked in hot water and rung out very well. Put the bowl in a warm place until it has doubled in size. 


Punch the dough down. Divide dough into 4 equal pieces. Rolling one piece at a time, and using as little flour as possible to keep dough from sticking, roll out very thin into a rectangle. Brush the dough with egg white and sprinkle with sea salt.


Using a pizza cutter, cut the dough into 3 inch wide strips. Then cut into triangles or squares. Carefully transfer to parchment lined baking sheets, leaving 1/4 inch between each. 


Bake at 350 F for 12-16 minutes, until light brown and crisp. Your oven make take a bit more or less time so check at 8 minutes and every couple minutes until done. Allow to cool. 


Pumpkin Muffins Phases 1 & 3 (GF)

 ****Updated Instructions to improve the muffin experience****

You can make these GF with my flour mix here on the blog


These muffins are what everyone needs on a crisp fall morning. You can make them either Phase 1 or Phase 3- both versions are equally delicious!


Pumpkin Muffins
Phase 1 and 3
Makes 5 standard grain servings for p1
Makes 10 standard grain servings for p3


3/4 cup pureed pumpkin, either fresh roasted or canned
1 whole egg for p3, or 3 egg whites lightly whipped for p1
1/3 cup olive oil, grapeseed or safflower oil (p3 only-OMIT for P1)
1/2 c almond milk for p3 or unsweetened oat milk for p1
1 c xylitol, or stevia/pure monk fruit equivalent
1 1/4 c sprouted wheat flour, or spelt flour for p1 only, or my GF flour mix
1 1/2 tsp ground cinnamon
1/2 tsp fresh ground nutmeg
1/8 tsp ground cloves
1/8 tsp ground ginger
1 tsp alcohol free vanilla, or half a vanilla bean, scraped
1 tsp lemon juice
3/4 tsp baking soda
1/2 tsp sea salt
1T orange zest (ok to use in p3)
1/2 cup chopped pecans or walnuts- optional for p3 only

Heat oven to 420F degrees
Line 8-10 muffin cups with liners

***updated instructions for perfect muffins***

Whisk together the first 5 ingredients. Add spices, vanilla, lemon juice, baking soda, salt and orange zest if using- whisk. You should get a thick mixture.

Gently mix in the flour (and nuts if using)- just until you see no dry flour bits. Do not over mix. The batter should be thick, but not a dough. If there is not enough liquid, add spring water, a tablespoon at a time. 

Allow the batter to sit for 15 minutes. This allows the flour to fully hydrate. 

Fill your muffin cups evenly.

Bake for 7 minutes.

Without opening the oven door- reduce heat to 375F.

Bake another 13-18 minutes, until done. A knife should slide into a muffin with no resistance and come out clean. Do not over bake. 

Allow to cool. 


Beef Pho- All Phases

There is not one single food on the planet that makes me feel as good as a bowl of pho. The deep, rich broth. The crunchy vegetables. The lovely noodles. 

Start with a good beef bone broth. If you want to use store bought- get one without sugar or soy or other non FMD ingredients.

Use Miracle Noodles in all phases. You can also use brown rice Pad Thai noodles in P1. 

Make a giant batch of the broth and freeze some so you can have Pho whenever you want. You can halve this recipe if you need to. 

For a homemade bone broth:

Beef Bone Broth

5lbs beef bones- knuckle bones, short rib bones, oxtail or combo 
Splash of vinegar

Put the bones in a very large stock pot and cover with water. Bring to boil and let cook for 1-2 minutes. Remove the bones and rinse in fresh water. Clean out the stock pot. Add the bones back in, along with 20 cups of fresh water and the vinegar. Bring to a simmer and let cook for 24 hours. Do not boil. Just a gentle simmer is all you need. Remove any scum that floats to the surface. Allow to cool and strain the broth. Discard bones. 

Now for the good stuff.

Beef Pho

10 cups of bone broth
1 large onion
1 4 inch piece of ginger, unpeeled
5 star anise
5 whole cloves
1 large or 2 small cinnamon stick
5 green cardamom pods
1T whole coriander seeds
1T xylitol or stevia equivalent
1/4 cup Red Boat fish sauce
Sea Salt to taste

Cut the onion in half and smash the ginger with a knife to mash it just a bit. Place on a rack on a baking sheet under a broiler for about 5-8 minutes, until thoroughly charred. Be sure to turn over and char all sides. Let cool. Scrape off the charred bits and rinse. Place into the stock pot with the beef broth.

In a non stick skillet, heated over medium high heat, place the anise, cinnamon, cloves, cardamom and coriander. Toss and cook for just about 1 minute to toast- do not allow to burn. Put these into the pot. Bring the broth to a simmer and allow to cook for 2 hours. Strain and discard the aromatics. Add fish sauce, sweetener, and a bit of salt. Stir and taste. Add more salt as needed, or fish sauce. 

Place your steak in the freezer for 20-30 minutes to make slicing easier. Slice very very thin. You can also use cooked meatballs for pho.

For the toppings:
4oz lean steak per serving
Prepared noodles
Bean sprouts (P1 and P3 only)
Cilantro
Thai Basil
Thinly slices radish
Lime wedges or lemon wedges
Fresh mint
Thinly slices onions (let these sit in some vinegar for a few minutes, if you want)
Spring onion
Thin sliced jalapeno or Thai chile
Sugar free Sriracha
Tamari
Chili Sauce (see my recipe)
Black pepper
Fish Sauce

If you want a compliant hoisin style sauce:

FMD Hoisin
4T tamari
2T raw cashew or almond butter
1T xylitol mixed with 1tsp hot water until dissolved
2 tsp rice vinegar or coconut vinegar

Whisk together. Serve with pho. 


Yum Yum Sauce - Phase 3


If you like Hibachi as much as I do, you probably like the sauce they serve with it. I don't know why this weird combo of ingredients tastes so good, but it does. It is fast to whip up and it will keep a couple of weeks in the fridge. You can make this vegan just by using vegan mayo- I have a recipe here on the blog. 


This makes a good salad dressing, dip for veggies, or, if you make a fried rice with quinoa or black rice in p3, slap some of this in it and your mouth will be very happy! 


Yum Yum Sauce

Phase 3
2-4 T is a standard portion

1 cup Mayo- I use my Perfect Mayo
2 T sugar free ketchup
1 T xylitol or stevia/monk fruit equivalent
1/2 T paprika
2 tsp vinegar
2 tsp garlic powder
1-4 T water

Whisk everything except water in a bowl until smooth. This takes just a second or two. Add enough water to thin to how you like it. 

Scrape into a glass jar with a lid and label it. Keep refrigerated. 


Butternut Squash Dip- Phase 3


Roasting the garlic makes the flavor milder and sweeter. For the squash, you can peel and steam, or peel, cut into chunks and roast, or even cook on the grill! 

This dip is perfect for phase 3 snack! 


Butternut Squash Dip
Phase 3
Makes 2 servings of healthy fat

1 butternut squash, halved and seeds scooped
3 T extra-virgin olive oil, plus more for drizzling
Coarse sea salt
1 large head garlic, halved crosswise
Juice of 1/2 lemon
3 T tahini
1 tsp turmeric
Cayenne pepper, to taste

Optional: 1/4 tsp curry powder


Preheat oven to 400 degrees. Drizzle cut sides of squash with oil and season with salt. Arrange cut side down on a baking sheet, if you do not want any char on it. I do mine cut side up. 


Arrange garlic head halves in the center of parchment-lined foil. Drizzle with oil, sandwich, and wrap tightly. 


Transfer to baking sheet with squash and roast until squash and garlic are tender, about 45-60 minutes.


When cool enough to handle, scoop squash flesh and squeeze each clove of roasted garlic. Transfer to a food processor with oil, lemon juice, tahini, and turmeric and process until smooth. Season with salt and cayenne. 


Store dip in an airtight container up to five days.

Orange Muffins - Phase 1


I have an abundance of oranges right now... apparently they were on sale. And, they were part of my Misfits box (see here for info on this great service- you can get a percentage of your first box with my code) so I have been stocking up on citrus!

I was going to make a cake. 


Then I thought about cookies. 

Maybe some marmalade? 


I settled on muffins. Super easy to whip up and can be totally compliant for FMD!! 


I use the zest and the fruit in this recipe. I peel the oranges with a knife and be sure to get all the white pith off- it is bitter. And be extra sure to get the pithy core out of the middle. Oh, and remove the seeds, too!

You can use any oranges you like- I used Cara Cara Oranges today, along with 2 lonely clementines. You need 1/2 cup puree, any extras you can freeze in ice cube tray for use in smoothies.

I hope you love these as much as I do. 


Orange Muffins
Phase 1
Makes 6 standard servings of grain

1 1/2 cups sprouted wheat flour (for gluten free, see below)
3/4 - 1 cup xylitol, or the equivalent
1/4 tsp salt
1 tsp baking powder
1/2 tsp baking soda
2 tsp vanilla
2 egg whites, lightly whipped
1/4 cup oat or brown rice (unsweetened) milk
2 tsp orange zest (fresh is best)
1/2 cup pureed, peeled, no pith orange(s)

**for Gluten Free- use 1/2 cup each of brown rice flour, oat flour and sorghum flour

Heat oven to 425 degrees.

In a small bowl, mix the dry ingredients together.
In a large bowl, whisk together the vanilla, milk, orange zest, orange puree and egg whites. 


Add the dry ingredients to the wet and stir just until mixed. Do not over-work.

Divide into lined muffin tins. 


Put the pan into the hot oven, close the door and IMMEDIATELY reduce temp to 375 degrees.

Bake 15-20 minutes, until a toothpick comes out clean. Let cool. 


Lemon Vinaigrette- Phase 3 and I Burn


You can whip this salad dressing up in no time, with just a clean jar with a tight fitting lid.

This will keep a few days in the fridge, if it lasts that long!

For FMD, add fresh herbs. 

Lemon Vinaigrette 

Juice and zest of 1 lemon
Juice of another lemon
1/4 cup extra virgin olive oil
3-4 garlic cloves, minced or pressed
Pinch of fresh ground black pepper
1/4 tsp sea salt
1 tsp dried parsley
Pinch red pepper flakes
Stevia, to taste, optional

Put everything in the jar, tighten lid and shake for 1 minute. 
Let sit an hour before serving. 

Slow Cooker Carne Asada - Phase 1 and Phase 3


Slow Cooker Carne Asada
Phase 1 and 3
Serves 8

2lbs sirloin steaks, boneless
2 onions diced
3 garlic cloves, minced
1 jalapeno, seeded and diced
1 red bell pepper, diced
3 tomatoes, roughly chopped
1 4oz can of green chiles, diced
1/3 cup beef broth
2T chili powder
1T cumin
1/4 tsp cayenne
1/4 tsp red pepper flake
1 tsp each salt and pepper
8-10 Romaine leaves or sprouted wheat tortillas

Season the steak with salt and pepper.


Add ½ the onion and half the bell pepper to the bottom of the slow cooker. Add the chopped jalapeno. 


Place the steak on top of the onion mixture. 

Put half the tomato, the spices, garlic, the chiles, and beef broth into a blender and pulse to combine. Pour over the meat. 


Put the remaining onion, pepper and tomato on top. Sprinkle with a bit of salt and pepper. 


Set the slow cooker for 6-7 hour on low. 

About 30-45 minutes before the slow cooker is done. Remove the steak, shred with two forks and return to the slow cooker for remainder of cook time.

Serve in a romaine lettuce leaf with a side or topping of guacamole in p3 only.

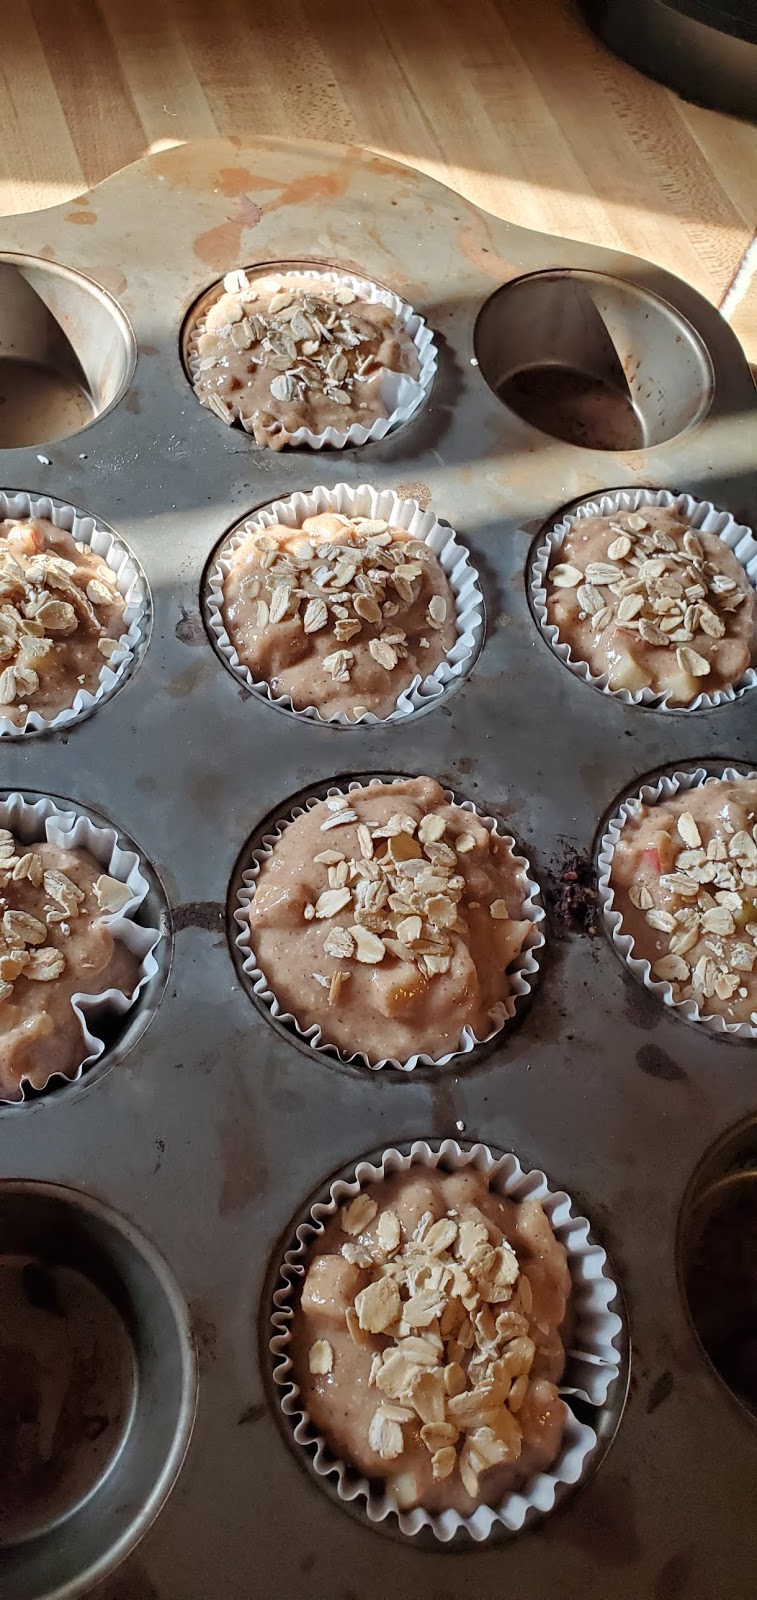
Apple Cinnamon Muffins - Phase 1 or Maintenance


Delicious and moist- great fall breakfast. Just add more fruit on the side! 

I buy my flours on Vitacost.com
They have great prices and fast shipping. (not sponsored)


If you are on FMD, follow the Phase 1 mods for this recipe. 
If you are not on FMD or on Maintenance, follow the Phase 3 recipe.


Apple Cinnamon Muffins
Phase 1 and Phase 4

1 1/2 cups sprouted wheat flour
3/4 cup xylitol
1/2 tsp salt
2 tsp baking powder
1/2 tsp baking soda
1/3 cup olive oil
1 tsp lemon juice
1 tsp vanilla
1 tsp ground cinnamon
1/4 tsp ground nutmeg
1/8 tsp ground ginger
1 egg
1/3 cup almond milk
1 large Honeycrisp or Granny Smith apple, finely diced (I leave the peel on)
1 tablespoon uncooked rolled oats

Preheat oven to 425 degrees. (you will turn down later)

Mix dry ingredients together. Add wet ingredients, stir just until combined. Fold in diced apple. 


Pour into muffin tin lined with papers. Sprinkle the raw oats on top of each muffin. Place pan in oven, and reduce heat to 375 degrees. 


Bake at 375 degrees for 18-20 minutes until toothpick comes out clean. Cool.


Makes 12 standard servings of grain and partial fat for Maintenance (p4)


**P1 Modifications
skip oil
use 2 egg whites, lightly beaten until frothy
use oat milk instead of almond milk
Makes 6 standard p1 servings for breakfast or lunch

(if you make 12 muffins, you will eat 2 for under 20lbs. For over 20lb goal you will eat 3)


Citrus Marinade- Two Ways - All Phases


Citrus Ginger Chicken and Citrus Rosemary Pork


I love marinades. Easy to whip up and they make meat taste SO good! And with so many herb and spice combos- there is a marinade out there for everyone. 

Here is one marinade you can flavor 2 different ways. Or you can leave it as is, for a 3rd option!

These work great with pork or chicken. 

Citrus Marinade
All Phases

Zest of one lemon
Zest of one lime
Zest of half an orange
2 garlic cloves
1 tsp salt
1 tsp black pepper (or less if you want)
2 green onions (or 1/4 tsp onion powder)
1 peeled lemon
1 peeled lime
1/4 cup water

Throw everything in the blender and blend until smooth. Marinate meat in this for 3-4 hours.


Citrus Rosemary
All Phases

Take half the marinade above and add 4-5 sprigs of fresh rosemary. Blend. 


Citrus Ginger
All Phases

Take the other half of the marinade above and add 2T tamari and 1T fresh grated ginger. Throw in some red pepper flakes if you want. Blend and marinate your meat. 


French Bread - Phase 1 and Phase 3


This bread is pretty easy to make- it just takes a while for both rises. The oil is minimal so I do not worry about it in phase 1- the recipe makes 26 phase 1 servings. 

I have not tried this with other flours- but from experience, I am not sure others flours would work.

This bread makes fantastic French Toast!!


French Bread
P1 and P3
Makes 26 p1 servings

2 1/4 cups warm water
1T instant yeast
3 tsp sea salt
5 1/2 cups spelt or sprouted wheat flour
1/4 cup tapioca flour
1/2 tsp xanthan gum

Stir together the yeast and the warm water in a large mixing bowl. Add 5 cups flour, the tapioca flour and the xanthan gum and mix well. Once everything is mixed together, add the salt by sprinkling it around the dough and mixing in. (Do not just dump it in one spot) 
You want a pretty smooth ball of dough, so add enough of the remaining half cup flour to get this. If you have a stand mixer, use the dough hook and let it do the kneading. 
Cover the bowl with a damp towel and put in a warm place until doubled in size. 


Punch it down and let it rest 10 minutes. 

Put the dough on a well floured counter and knead a couple times. Divide into 4 equal portions. 
Roll each piece into a rectangle. Starting on the long side, roll tightly and place the log with the seam side down on a baking sheet lined with parchment or silicone mat. Repeat for the other 3 pieces of dough. Use 2 baking sheets- 2 loaves per sheet.

Cover with damp cloth and let rise again until double. 

Preheat oven to 375.


Just before baking, score the tops of the loaves with a very sharp knife. Do not cut too deep or you will deflate the loaf.

Baking option 1: Put the sheets in the hot oven, and immediately toss a couple ice cubes into the bottom of your oven and quickly close the door. The steam is needed to help form the crust.

Baking option 2: Bake one sheet at a time, placing on the top rack. On the bottom rack place an empty baking sheet and put the ice cubes on it. Repeat for the 2nd pan with the other 2 loaves.

Bake 15-20 minutes, until golden brown. Brush the top with olive oil or my vegan butter (p3 only) if you like. Let cool before slicing. 


Jerky - All Phases

Jerky
All Phases
Makes 10 standard servings

You can use chicken breast, or turkey breast, or beef.

2.5 lbs lean beef such as skirt, flank, brisket, top round or sirloin - the leaner the meat, the better- or turkey breast or chicken breast

Marinade:
2T sea salt
1 tsp black pepper
1T garlic powder
1 T chili powder
1/2 cup coconut aminos or tamari
1T coconut vinegar or apple cider vinegar 
2 tsp onion powder
2T xylitol (optional)
1T chili pepper flakes or 1/2 tsp cayenne pepper (optional)

Preheat oven to 225 degrees F. Line two large baking sheets with parchment paper or foil and place baking racks on each sheet.
Put the meat in the freezer for 2 hours. It is easier to slice when it is partially frozen. Alternatively, you can ask your butcher at the meat counter if they can cut it super thin for you. 

On a cutting board, using a sharp knife, cut the beef crosswise, against the grain -so that you sever the tough, thin fibers that you can see on the steak.
Use a meat pounder to pound the strips so they are more consistent in thickness.

Mix the spices and tamari and vinegar in a large bowl. 

Place the beef strips in the marinade. Cover and place in fridge for 8-12 hours.

Pull the meat from the marinade and discard the marinade. Arrange the strips on baking racks, not touching each other. Bake for 3 hours, rotating the position of the baking sheets midway, until jerky is browned and dry.

Remove and cool. Divide into 10 equal portions. Refrigerate any leftovers. 

Peach Coffee Cake - Phase 1 and Phase 3


I have the last 2 bags of The Peach Truck peaches for this season. It is a sad day as I use them up.

If you live on the East side of the country, check out their website, www.thepeachtruck.com and see if they come to your part of the woods. They have THE BEST peaches I have ever eaten. I am fortunate and grateful that the entire season, they are in Nashville- slinging peaches on the daily. I can get them whenever I want. 

Here is what I did with some of my last peaches...

Peach Coffee Cake
Phase 1 and Phase 3
Serves 12 in phase 3, 6 in phase 1

3/4 cup sprouted wheat flour
1/2 cup sorghum flour
1/4 cup tapioca flour
3/4 cup xylitol
1/2 tsp salt
2 tsp baking powder
1/2 tsp baking soda
1/3 cup grapeseed oil (or oat milk in p1)
1 tsp lemon juice
2 tsps vanilla
1 egg, slightly beaten for p3 or 2 egg whites in p1
1/3 cup almond milk for p3 or oat milk for p1
3-4 very ripe peaches, peeled and diced
Preheat oven to 400 degrees.
Grease an 8x8 or 9x9 pan with grapeseed oil- or use parchment paper in p1.


In your blender, add the milk and xylitol. Blend on medium or high for 1 minute. Pour into a large bowl. Add beaten egg, vanilla, salt, lemon juice, baking sods and powder and oil. Whisk to combine. Add flours and stir just until combined.  Pour into greased pan or use silicone pan. Add diced peaches on top. 


Put in oven and reduce temp to 375 degrees. Bake for 30-40 minutes until toothpick comes out clean. Cool in the pan, invert and slice. 
If the cake is browning too fast, cover with aluminum foil.

Sourdough Waffles - Phase 3


You will want to follow this link (Sourdough) and get your starter started right away, because you will need these waffles!

I have been following Mad Hungry's Lucinda Scala-Quinn for years and she is now on a quest on Instagram to make the perfect sourdough waffle. While she has not released her perfected recipe, I have taken what she has done and flipped it to FMD and made some damn fine waffles from it!

If you bake bread often, you may have lots of wild yeast in your kitchen and your starter may take off and be ready in just a few days. Otherwise, it could take 7-10 or maybe even 14 before it gets to the SOUR stage. After that you can make my Sourdough Bread or Biscuits or the WAFFLES!!

Look at those air pockets! And crisp crust!


You also need a good waffle iron. I have a basic round one that works great for regular waffles, and works ok for these. I bought this one (https://amzn.to/2Kkxg3q this is an affiliate link) and I LOVE IT. These waffles come out so crispy an delicious AND it takes less time to cook them!
If you use this waffle maker or one similar, be sure to use about 1 3/4 cup batter or they will not cook properly (see pictures below).


Save your discard in a jar in the fridge until you have 1 3/4 cups starter (you need some left over to keep going). At night, about 12 hours before you are going to make waffles, make the sponge:


Sourdough Waffles
Phase 3
Makes 16 servings


Sponge:
1 1/2 cups sourdough starter
2 cups sprouted wheat flour
2 cups almond milk
2T lemon juice
1T xylitol (I have not tried this with stevia or monk fruit) (if you are on Maintenance, use honey)

Mix lemon juice with almond milk and let sit a few minutes. Stir in the starter and flour. Cover with plastic wrap or a towel and leave sit on the counter for 8-12 hours.

This is the sponge, first thing in the morning


In the morning, stir in:

2 beaten eggs (make sure they are lightly beaten)
1/4 cup my Vegan Butter, melted OR use olive oil
1/2 tsp baking soda
1/2 tsp baking powder
Pinch of salt
2 tsp vanilla


You can see the sponge gets puffy after adding the baking soda. Lots of bubbles!

Cook in waffle iron right away, following manufacturer's instructions.