x

Showing posts sorted by date for query flour mix. Sort by relevance Show all posts

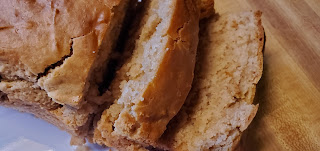
French Baguette- Phase 1 and Phase 3


French Baguette
Phase 1 and 3

Weighing the flour on a scale is more accurate but I included approximate measurements in cups
You can use spelt flour for a p1 only version.


540 grams (4 1/3 cups) sprouted wheat flour
11 grams (2 ¼ tsp) dry yeast
2 tsp sea salt
500 ml (2 cups plus 2T) warm spring water

Splash of apple cider vinegar

Heat oven to 460F

Mix flour and salt in a large bowl. Add vinegar to the water and then add the water to the flour. Stir with your hands until you get a very wet dough. Make sure all flour is mixed in. You may need to add more flour to get a sticky dough. 


Cover with damp towel for 90 minutes.

Sprinkle some sprouted wheat flout on our counter and gently pour the dough out of the bowl. Handle gently as to not break any bubbles in the dough. Sprinkle more flour on top of the dough. Use a knife or bench scraper to cut the dough into 2 long pieces. Any sticky spots- sprinkle with flour.

Gently twist the dough, then place in a French bread pan or on a parchment lined baking sheet. Repeat with the other dough. Tuck the ends under and try to make the loaves the same thickness throughout for even baking. 

Place the pan in the oven and throw 3-4 ice cubes into the bottom of the oven.

Bake for 25 minutes- or until the loaves are 200F in the middle. 

Allow to cool before cutting.

Bread will keep for 2-3 days, freeze for longer storage. 


Spelt Bagels- Phase 1


Spelt Bagels

Phase 1
Makes 14 standard servings of grain

2 tsp instant dry yeast
1 ¼ cups warm water 110-120F- you may need more
2 ½ cups spelt flour
1 cup sorghum flour
1 ½ tsp sea salt


Mix the flour, yeast and salt in a large bowl. Add1 ¼ cups warm water. Mix well.

If you have a stand mixer, let the mixer knead with the dough hook for 10 minutes. You may need to add more water, but do not add until the machine has been mixing/kneading for at least 5 minutes.

If you are mixing by hand, stir everything together until you get a ball of dough. Knead on floured counter for 15 minutes.

You want a stiff dough.

Cover with damp towel and let rest for15 minutes.

Divide the dough into 7 (for standard servings. For over 20lb goal, divide into 5 equal pieces.)

Roll each piece into a tight ball by rolling in a circle on the counter with a cupped hand, tucking your fingers slightly. I usually do about 20 circles to get a tight smooth ball of dough. Do this with each dough piece.

Dip your finger into flour and poke into the middle of one dough ball. Keeping your fingertip on the counter, move it in small circles to widen the hole. Pick up the dough ball and put both forefingers in through the hole, one from each side and roll your fingers over each other to widen the hole. 


Place the dough ball on a parchment lined baking sheet and repeat with the remaining dough balls. Cover and let rest 15-20 minutes.


Heat oven to 425F

Bring a large pot or wok ¾ full of water to a boil. Once the bagels have rested, place into the boiling water. Do not crowd them, you may need to work in batches. Boil for 90 seconds on each side. Remove with slotted spoon or spider to baking tray.

Bake for 20-25 minutes, checking at 20. Allow to cool then slice.


Half a bagel is a serving of grain in phase 1, whether you make 7 or 5 bagels.


  •  You can use sprouted wheat flour, if you prefer. To eat in Phase 3, it would be ¼ of a bagel (slice bagel in half normally then cut the slice in half)

  •  If you want to add toppings to your bagels, do this as you take them out of the water and place onto the tray

  • If you have only a small pot to boil the bagels and can only do a couple at a time, use smaller baking sheets or multiple baking sheets and put them into the oven as soon as they come out of the water. They can shrink and wrinkle quite a bit if left to cool too long.


Apple Pie Muffins- Phase 1 and Phase 4


Apple PieMuffins
Phase 1 and Phase 4

For the muffin batter (phase 4 version):
1 1/2 cups sprouted wheat or spelt flour
3/4 cup xylitol- or stevia/pure monk fruit equivalent
1/2 tsp salt
2 tsp baking powder
1/2 tsp baking soda
1/3 cup olive oil 
1 tsp lemon juice
2 tsp vanilla
1/2 tsp cinnamon
1 egg
1/3 cup almond milk
1 large Honeycrisp or Granny Smith apple, finely diced (I leave the peel on)
1 tablespoon uncooked rolled oats (optional)


For the Apple Pie Filling:

2 apples- one Granny Smith and one Gala or Honeycrisp, peeled and finely diced
1 1/2 tsp pumpkin pie spice (recipe on my blog)
1/2 cup xylitol or stevia/pure monk fruit equivalent
Pinch of sea salt
1 tsp arrowroot mixed with 2 tsp cold water for a slurry


Preheat oven to 425 degrees. (you will turn down later)

Filling:

Add the apples to a non stick pan over medium heat. Add the pinch of salt and cook the apples until just soft. Add a splash of water if they start to stick or start to brown. Once the apples are soft, add the sweetener and spices, and about 1/4 cup water. Bring this to a simmer, then add the slurry. Stir until thick and remove from heat,

Muffins:

Add wet ingredients to a large bowl and whisk together. Add half the flour, stir just until combined. Allow to sit for 10-15 minutes. Mix or sift the remaining flour, baking powder, baking soda and salt together. Gently combine with the batter. Fold in diced apple. 

Spoon a small amount of batter into muffin tin lined with papers, about a tablespoon of batter. Divide the apple pie filling between each muffin cup evenly. Top with remaining batter until muffin cups are almost full. Sprinkle the raw oats on top of each muffin (optional) 

Place pan in oven, and reduce heat to 400 degrees F. 

Bake for 18-20 minutes until toothpick comes out clean. Cool.

Makes 12 standard servings of grain and partial fat for Maintenance (p4)


**P1 Modifications

In place of the oil, use pureed raw apple. 

Replace the whole egg with 2 egg whites, lightly beaten until frothy

Use unsweetened oat milk instead of almond milk

Makes 6 standard phase 1 servings of grain and partial fruit, for breakfast or lunch

(if you make 12 muffins, you will eat 2 for under 20lbs. For over 20lb goal you will eat 3)


Easy Cashew Butter Bread - Phase 3


This is adapted from a Depression Era recipe- simple ingredients, easy to make and very delicious.

You can sub almond butter for the cashew butter, if you want. The flavor would be very mild compared to the nuttiness of cashews.

Also- this bread is not super sweet. If you want it to be sweeter, add more sweetener. Sugar was a rare commodity in the Depression.


Easy Cashew Butter Bread
Makes 16 standard grain servings and partial fat
Phase 3

2 cups sprouted wheat flour (for a lighter bread, sub 1/2 cup of this for sorghum flour)
1 tablespoon (yes, tablespoon) baking powder
Healthy pinch of sea salt
1/4 cup xylitol or stevia/monk fruit equivalent
1 1/3 cup cashew milk or almond milk
1/2 cup cashew butter
1 tsp lemon juice
Optional: 1 tsp vanilla

Mix the dry ingredients together in a bowl. Add the milk and lemon juice. Stir to combine. Add nut butter and vanilla if using. Pour into greased loaf pan and bake at 325F for 1 hour and 10-ish minutes. Let cool in the pan for 10 minutes, then remove to a rack to completely cool before slicing.


I highly recommend slicing this into 8 thick slices, then cut each slice in half. This bread will not work to cut into 16 thin slices.


Creamy Fire Roasted Chicken Skillet- Phase 3


Creamy Fire Roasted Chicken Skillet
Phase 3
Makes 4 standard servings

1 lb boneless skinless chicken breasts or thighs
2 cans fire roasted tomatoes (drained)- sugar free
1 small onion, sliced
1 T arrowroot flour
2T cold water
1/2 cup tomato sauce- sugar free
1/2 cup full fat canned coconut milk
1/2 cup chicken broth
3 cloves garlic, minced
1 T olive oil
2 handfuls fresh spinach
4 basil leaves, rolled and thinly sliced
Sea salt and black pepper to taste

Heat a skillet with 1 T of olive oil over medium high heat.

Season chicken on both sides with salt and pepper. Add the chicken to a hot skillet. Brown and cook on each side 4-5 mins. Once the chicken is cooked though, remove from the skillet.

Add the garlic and the onions to the hot skillet. Sprinkle with a pinch of salt. Stir and cook together for 2 to 3 minutes.

To the onions and garlic, add the tomato sauce, fire roasted tomatoes, coconut milk and chicken broth. Mix together and bring to a simmer. Taste and add more salt and pepper to your taste. Once it is bubbling, add the arrowroot mixed with the cold water- whisk until thickened. Stir in the spinach and cook until wilted- place the cooked chicken back into the skillet and allow to simmer together for just a minute. Top with fresh chopped basil.

Serve over steamed cauliflower rice.

Sweet Potato Latkes- Phase 3


Crispy and delicious- these are super easy to make. Use a food processor with a shredding blade for quick shred of the potatoes. You can add spices to the mix, also. Chili powder is especially delicious!
Pair these with a grass fed burger on a homemade bun and you have a delicious gourmet meal!


Grapeseed oil is perfect for frying these. You can strain the oil and keep for another fry- I use my oil 3-4 times. Be sure to dispose of the oil in a proper manner when you do need to toss it.

Dip these in a garlic aoli or homemade Ranch dressing. 

Sweet Potato Latkes
Phase 3
Makes 5-6 servings

2 large sweet potatoes, peeled and coarsely grated
2 scallions, very finely chopped
1/3 cup sprouted wheat flour
2 large eggs, lightly beaten
1 tsp salt
1/2 tsp black pepper
3/4 cup grape seed oil

Stir together potatoes, scallions, flour, eggs, salt, and pepper.

Heat oil in a deep 12-inch nonstick skillet over moderately high heat until hot but not smoking. Working in batches of 4, spoon 1/8 cup potato mixture per latke into oil and flatten to 3-inch diameter with a slotted spatula. Reduce heat to moderate and cook until golden, about 1 1/2 minutes on each side. Transfer latkes with spatula to paper towels to drain.

Pumpkin Donuts- Phases 1 & 3 (Can be GF)


I love me a cake donut! There is a local place that makes seasonal cake donuts and they are SO good- but not so good for my tummy. While I have a few donut varieties on the blog, I have a whole bunch more in the works. Some, though, will have to wait until next Spring- I will need fresh berries for those! 

In the meantime- it is fall and everything pumpkin is in order. 
Make these up in just a few minutes! 

In Phase 3, you can melt a little bit of my Coconut Cashew Butter and drizzle on top- then sprinkle with a few chopped pecans. 
Or you can use my Donut Drizzle recipe here on the blog. 

For best results, use homemade oat milk or homemade cashew milk

For extra flavor- add some orange zest- about half a teaspoon. Fresh or dried.


Pumpkin Donuts
Makes 14 standard grain servings for p3, 8 grain servings for p1
Phase 1 and 3

1 3/4 cups sprouted wheat flour or spelt for p1 (or my GF Flour Mix)
¼ tsp xanthan gum (omit if using GG Flour Mix)
1 tsp baking powder
1 tsp baking soda
1/2 tsp salt
1 tsp ground cinnamon
1 tsp pumpkin pie spice (my recipe on the blog)
1/2 cup grapeseed oil for p3, oat milk for p1
3/4 cup xylitol or pure monk fruit equivalent (check your package for measurement)
2 large eggs, at room temp, p3 only. Use 3 beaten egg whites for p1
1 cup fresh or canned pumpkin puree
1/3 cup cashew milk for p3 or oat milk for p1
1 tsp pure alcohol-free vanilla extract


Preheat oven to 375°F


Use non stick donut pan. Or in p3, grease the pan with grapeseed oil

Whisk the flour, xanthan gum, baking powder, baking soda, salt, cinnamon, and pumpkin pie spice together in a large bowl until combined. Set aside. In a medium bowl, whisk the oil, sweetener, eggs, pumpkin puree, milk, and vanilla extract together until combined. Pour the wet ingredients into the dry ingredients, then fold everything together gently just until combined and no flour pockets remain.

Spoon the batter into the donut pan. You can alternatively, fill a large zipped-top bag with the batter. Cut a corner off the bottom of the bag and pipe the batter into each donut cup, filling about 2/3 full. Do not over fill.

Place in oven on middle rack. Close door and immediately reduce temp to 350.

Bake for 10-11 minutes or until the edges and tops are lightly browned. To test, pat your finger on the top of the donut. If the donut bounces back, they’re done. Your donuts may take another 5-7 minutes to completely bake- it depends on the size of your donuts. 

Cool donuts in the pan for 2 minutes then transfer to a wire rack.

Cover leftover donuts tightly and store at room temperature for 1-2 days or in the refrigerator for up to 1 week.


Gluten Free Bread- Phase 1 and Maintenance

 This bread is super easy to mix up. You can mix the flours and store in an airtight container for baking any time. Just sub this mix 1:1 for the flour mix in your favorite recipe (You will still need to add yeast or baking powder the recipe calls for)

Pro Tip: Save your egg yolks to make my Coconut Pudding in Phase 3, or to make my Perfect Mayo. You can also use carton egg whites in this recipe


Gluten Free Mix- Phase 1 or Maintenance


3.5 cups brown rice flour
2 cups gluten free oat flour
1.5 cups sorghum flour
1.5 cups arrowroot
1.5 cups tapioca flour
1T xanthan gum
1T cream of tartar

Mix together well and store in airtight container.


Gluten Free Bread
Makes 12 standard servings of grain

1 1/2 cups warm water (110 degrees)
1 packet of yeast or 1 T
4 egg whites, lightly beaten
1 1/2 tsp sea salt
3 cups Gluten Free Flour Mix from recipe above


Heat oven to 150 degrees

Put everything in the bowl in the order listed. Mix for 5-8 with the paddle attachment if using a stand mixer. Scrape down the sides of the bowl if you need. Batter should be thick and smooth but too thick to pour. It will not be a ball of dough but a batter. If stirring by hand, stir for about 5 minutes or so. 

Line your loaf pan with parchment paper or use a silicone loaf pan. 

Spread batter in loaf pan. Put pan in the oven and turn off the oven. Let it rise for 30-45 minutes, or until the batter reaches the top of the pan or just over. Remove pan (keep drafts from the kitchen while the oven heats up), and heat oven again to 350 degrees. Bake bread for 35-40 minutes, until it looks firm and lightly brown on top. Let cool for 5 minutes, remove from pan, slice when completely cool.


GLUTEN FREE Blueberry Muffins- Phase 1


Gluten free does not have to be scary. Here are some muffins to prove it!

Simply mix up the flour mix in a large container you can seal. Then measure it just like flour and use in this and other recipes on the blog.


Gluten Free Flour Mix
Phase 1

3.5 cups brown rice flour
2 cups gluten free oat flour
1.5 cups sorghum flour
1.5 cups arrowroot
1.5 cups tapioca flour
1T xanthan gum
1T cream of tartar

Mix well and store in airtight container.


Blueberry Muffins
Phase 1
Makes 6 standard p1 servings

1 1/2 cups Gluten Free Flour Mix from recipe above
3/4 cup xylitol- or stevia/pure monk fruit equivalent
1/2 tsp salt
2 tsp baking powder
1/2 tsp baking soda
1 tsp vanilla
2 egg whites, lightly beaten
1/3 cup unsweetened oat milk
1 1/4 cup blueberries


Preheat oven to 425 F

Mix dry ingredients together. Add wet ingredients, stir just until combined. If the batter is super duper thick, add in a tablespoon of water at a time, until you get a very thick pancake batter consistency. Fold in blueberries. Pour into silicone muffin pan, filling the cups 90% full.

Put into the hot oven quickly, close door and immediately reduce temp to 400 degrees. Bake for 18-23 minutes until toothpick comes out clean. Cool in the pan 10 minutes, then remove to cooling rack. When completely cooled, transfer to airtight container.


Makes 6 standard p1 servings for breakfast or lunch. If you get 12 muffins from the batch, each serving is 2 muffins.


Sourdough Focaccia - Phase 3


Make sure your starter is nice and strong for this. Super easy recipe that makes great bread. You can make this thicker in a round 9" pan, or thin on a baking sheet. It is delicious both ways.

All measurements for this one is in grams, so grab your kitchen scale.

I do not have measurements in cups for this one.


Sourdough Focaccia
Phase 3
Makes about 16 standard servings of grain

325 grams cool spring water
65 grams strong starter
11 grams olive oil
11 grams of sea salt


Mix these together with your clean hand until combined


Add 370 grams sprouted wheat flour and mix just until flour is incorporated. It will be a shaggy, sticky dough.


Cover with damp cloth and let sit for 1 hour.

Do 11 turns of the dough with damp fingers. Dough should be noticeably smoother. Tuck seam side under and place back in dough. Rest, covered, for 1 hour

With damp fingers, do 3-4 coil folds. Dough is really smooth now. Be more gentle with the dough with each fold. Let rest 1 hour, covered.

Repeat last step 2 more times, resting an hour between.

Oil your preferred pan and place dough in pan. Cover and let rest overnight.

In the morning, heat oven to 425 F

In a jar, add 2-3 minced cloves of garlic, 3-4T finely chopped fresh rosemary, 1T spring water and 3-4 T olive oil. Cover with lid and shake to emulsify. Pour some of this mixture over your dough and carefully spread it with your fingers. Using your fingers, press them into the dough to dimple and spread the dough. Add more of the olive oil mixture, pressing it down into the dimples.
Bake for 20-25 minute- thicker bread will take a bit longer, thin, will be less time.


Crackers - Italian Herb, Sea Salt, Rosemary Garlic, "Cheese" - Phase 1 and Phase 3


This is a super versatile recipe. You can add whatever herbs and spices you like. 

Here are 3 of my favorite.

I have not tried this with other flours. I did use whole egg as the wash but egg white would be better.


Crackers
Phase 1 and Phase 3
Makes 5 phase 1 and 10 phase 3 standard servings

1 1/2 cups sprouted wheat flour
1 1/2 tsp yeast
1/2 tsp salt
1 T olive oil
1/2 tsp vinegar
3/4 cup warm spring water (105-110 degrees)
Flaky sea salt or coarse sea salt for sprinkling
1 egg white, whipped until frothy

For "cheese" crackers, add 1/2 cup nutritional yeast
For Italian Herb, add 2T each dried oregano, dried basil, dried parsley and 1T garlic powder
For Rosemary Garlic, add 3T fresh chopped rosemary and 4 cloves minced garlic


Put warm water, yeast, olive oil in bowl of a stand mixer. Combine using dough hook, until yeast is dissolved. Add in flour and mix on low for a bit. Just before the flour in incorporated to the water, add in the salt and vinegar and whatever flavors (not flaky salt) you are adding. Turn speed up a bit and continue to mix until the dough forms a ball. You want all the flour incorporated, and the dough should be a ball. Add a little more flour if you need to keep the dough from being sticky. If it is very humid, you may need to add more flour. Let the mixer knead the dough for 5 minutes. 

Cover with a towel that you have soaked in hot water and rung out very well. Put the bowl in a warm place until it has doubled in size. 


Punch the dough down. Divide dough into 4 equal pieces. Rolling one piece at a time, and using as little flour as possible to keep dough from sticking, roll out very thin into a rectangle. Brush the dough with egg white and sprinkle with sea salt.


Using a pizza cutter, cut the dough into 3 inch wide strips. Then cut into triangles or squares. Carefully transfer to parchment lined baking sheets, leaving 1/4 inch between each. 


Bake at 350 F for 12-16 minutes, until light brown and crisp. Your oven make take a bit more or less time so check at 8 minutes and every couple minutes until done. Allow to cool. 


Hard Pretzels- Phase 1 and Phase 3

Hard Pretzel Rods
Phase 1 and Phase 3
Makes 16 phase 1 standard portions
Makes 32 phase 3 standard portions

There are quite a few steps to this process but you can make your own pretzels for a crunchy snack. If you want to roll them into standard pretzel shapes- there are videos on You Tube showing that process. Rods are easiest- just make sure you cut them to a size that will fit into your pan of boiling water.

Please note- these pretzels may not reach the dark brown color of store bought pretzels as brown sugar is used to create that color. Since brown sugar is not FMD, it is not included in this recipe. 

1 1/2 cups warm water
1 package yeast
1/2 tsp xanthan gum
3T olive oil
2 1/2 tsp sea salt
3 cups sprouted wheat flour for p1/p3 OR spelt flour for p1 only
1 cup sorghum flour


3 quarts water
1/2 cup baking soda

1 whole egg beaten with 1T water (use egg white only for p1)

Coarse salt

Heat oven to 250 degrees F. Spread the baking soda out over the baking sheet and bake at 250 for 1 hour. 

Dissolve yeast in warm water for 10 minutes. Add flours and stir a few times. Add xanthan gum, olive oil, salt and mix for 5-7 minutes. Cover damp towel and place bowl in warm place until dough doubles- 1 1/2 to 2 hours. 

Put water in large shallow pan and bring to boil. Slowly add BAKED baking soda- a little at a time. It will bubble up if you dump it all in at once.

Divide dough into 16 balls. Roll each ball into a rope about 22 inches long. Cut each rope into 8 pieces. Place a few pieces at a time into the water, and cook for 30 seconds. Remove with slotted spoon and place on baking sheet lined with parchment or silicone mat. Do not let them touch. Continue on until all dough is rolled and cut and cooked in water. 

Preheat the oven to 325 F.

Brush each pretzel with egg wash, sprinkle with coarse salt and bake in 325 degree oven for 25 minutes until golden brown. Check to see if they are hard throughout- if not bake a bit longer, rotating the pan. Check every 10 minutes until hard throughout. These could take another 25 minutes to become hard and crunchy. Remove from oven and let cool. Store in airtight container.


Classic Rye Bread- Phase 3

If you have a stand mixer, use it to knead. If not, stir by hand and spend at least 10 minutes kneading this dough. You can get some frustration out. Put on some music and dance in place while you push and pull and fold the dough. Try not to use too much flour to knead. If the dough is sticky, oil your counter, and use oiled hands or an oiled bench scraper to fold the dough over. The more you knead it, the less sticky it will be.

For the first rise- do not let it double. Just let it get puffy. Take a picture of the dough when you set it to proof, if you need a reference. You want it about halfway between freshly mixed and doubled.


Be sure to follow the tenting instructions, or the bread will brown too much. 

If you on maintenance, add 3T honey to the warm water and yeast. 


Classic Rye Bread
Phase 3
Makes 14 standard slices

1 1/4 cup warm spring water (105-110 degrees)
1/4 cup olive oil
3 1/2 cups rye flour
2 1/2 tsp yeast (or 1 packet)
1 1/2 tsp salt

Put the water and yeast in a bowl for the stand mixer and stir to dissolve. If you are using the honey- add it now and let the yeast get bubbly. Add everything else except the salt. Turn the mixer on low and let it go for 2 minutes. Once the dough is stirred, add the salt and turn mixer to a medium speed. Let it knead and mix the dough for 5 minutes.

Alternatively you can stir everything but the salt together in a large bowl using your hands or wooden spoon. Add the salt when the dough ball starts to form. Mix then turn onto oiled counter. Keep a plate with a tablespoon of olive oil on it nearby. Oil your hands and knead the dough for 10 minutes. Fold it over towards you, push it away with the heels of your hands, rotate and pull the far side over the top, push with the heel of your hands. Oil you hands and counter as needed.


Place the dough in an oiled bowl and cover with damp towel. Let get puffy but not double in size. Turn dough out onto counter. Press into a circle, then roll up into log. Tuck ends under and place seem side down in oiled loaf pan. Cover with damp towel and place in warm spot until the dough has risen 1-2 inches above the pan. Place in preheated 350 degree oven for 20 minutes. Take a piece of foil, crease the middle and place tent over the bread and bake another 10-12 minutes, until an instant read thermometer reaches 190 degrees in the middle of the loaf.

Remove from pan and set on cooling rack. Cool completely before slicing.


Pumpkin Muffins Phases 1 & 3 (GF)

 ****Updated Instructions to improve the muffin experience****

You can make these GF with my flour mix here on the blog


These muffins are what everyone needs on a crisp fall morning. You can make them either Phase 1 or Phase 3- both versions are equally delicious!


Pumpkin Muffins
Phase 1 and 3
Makes 5 standard grain servings for p1
Makes 10 standard grain servings for p3


3/4 cup pureed pumpkin, either fresh roasted or canned
1 whole egg for p3, or 3 egg whites lightly whipped for p1
1/3 cup olive oil, grapeseed or safflower oil (p3 only-OMIT for P1)
1/2 c almond milk for p3 or unsweetened oat milk for p1
1 c xylitol, or stevia/pure monk fruit equivalent
1 1/4 c sprouted wheat flour, or spelt flour for p1 only, or my GF flour mix
1 1/2 tsp ground cinnamon
1/2 tsp fresh ground nutmeg
1/8 tsp ground cloves
1/8 tsp ground ginger
1 tsp alcohol free vanilla, or half a vanilla bean, scraped
1 tsp lemon juice
3/4 tsp baking soda
1/2 tsp sea salt
1T orange zest (ok to use in p3)
1/2 cup chopped pecans or walnuts- optional for p3 only

Heat oven to 420F degrees
Line 8-10 muffin cups with liners

***updated instructions for perfect muffins***

Whisk together the first 5 ingredients. Add spices, vanilla, lemon juice, baking soda, salt and orange zest if using- whisk. You should get a thick mixture.

Gently mix in the flour (and nuts if using)- just until you see no dry flour bits. Do not over mix. The batter should be thick, but not a dough. If there is not enough liquid, add spring water, a tablespoon at a time. 

Allow the batter to sit for 15 minutes. This allows the flour to fully hydrate. 

Fill your muffin cups evenly.

Bake for 7 minutes.

Without opening the oven door- reduce heat to 375F.

Bake another 13-18 minutes, until done. A knife should slide into a muffin with no resistance and come out clean. Do not over bake. 

Allow to cool. 


Coconut Cream Pie- Phase 3

Here is a decadent pie for your holiday table! Creamy and coconutty. Serve this chilled. You can make the day before and keep in the fridge. 
To make it extra decadent, whip some coconut cream with some sweetener and vanilla extract and spoon or pipe over the top. 

Use a good quality canned coconut milk for this. 


Pro tip- If you are serving guests, use pure monk fruit or stevia instead of xylitol.


Coconut Cream Pie
Phase 3
Makes 16 standard servings of healthy fat


Almond Meal Pie Crust
Phase 3

1 cup almond meal
3/4 cup oat flour
2T xylitol or ¼ tsp stevia powder
¼ tsp baking soda
¼ tsp sea salt
3T coconut oil
1 egg
1 tsp alcohol free vanilla extract


Grease a 9” pie plate. Heat oven to 350 degrees

Place flour, sweetener, baking soda and salt in food processor- pulse several times. Or mix with fork in a large bowl.
Add egg, vanilla and coconut oil. Pulse several time or mash together with the fork, until you get a ball of dough. If you need, add tiny amounts of ice water to help form the ball.

Press dough evenly in the pie plate- across the bottom and up the sides. Prick the dough with a fork all around.

Bake at 350 for 8 minutes if you are using with cold filling. If you are using a fruit filling, bake about 4 minutes.

Let cool before filling.

Filling:


1 ¾ cups shredded raw coconut
1 cups coconut milk (full fat in a can)
1 ¾ cup almond milk
4 large egg yolks
¾ cup xylitol or 2 tsp stevia
1/3 cup arrowroot
1 tsp vanilla extract
½ tsp salt
2T coconut oil


In a small saucepan, whisk milks, sweetener, arrowroot and salt. Cook over medium heat, whisking constantly, until it thickens, about 5 minutes.

In a bowl, whisk the egg whites until they lighten in color. Add ¼ cup of the hot milk mixture into the egg yolks to temper. Once incorporated, add another ¼ cup, whisk. Add the egg mixture to the pan and cook over medium heat for 2-3 minutes, while whisking. If the mixture is lumpy, press through a fine sieve. Add vanilla, and coconut oil. Whisk for another minute. Stir in 1 ¼ cups of the coconut. Pour into cooled crust. Refrigerate until set- at least 2 hours. Sprinkle top with remaining coconut.

If filling will not set, you can freeze for an hour or so before serving to help with cutting.


Peasant Bread- Sourdough- Phase 1 and Phase 3


Follow the instructions here if you need a starter.


Peasant Bread- Sourdough

Phase 1 and Phase 3

3 cups sprouted wheat flour (or spelt for p1 only)
** if using sprouted wheat, replace 2T of the flour with tapioca flour**
1/2 tsp xanthan gum
1/3 cup very strong sourdough starter that has been fed within the last 8-12 hours, and is very bubbly and yeasty smelling
1 3/4 tsp sea salt

1 1/2 cups warm spring water (around 105 degrees) (may need more, depending)

Mix the starter with the water, using your hands. Add the salt and stir around. Add your flour and xanthan gum. Stir until you have a shaggy ball. Cover with damp towel and leave on the counter for 1 hour.

Do 4 turns, waiting an hour between turns.

To do a turn, wet fingers with a bit of water- not dripping wet, just damp. Pinch the dough at the 1 o'clock position and pull over to the 7 o'clock position. Turn the bowl 1/8 turn and repeat. Do this stretch and pull 10 times. Flip dough over to put seams down. Cover bowl with damp towel and rest 1 hour. Repeat the turn and 1 hour rest between.

After last turn, flip dough over and smooth the top by pulling the edges to the bottom and place on a square of parchment. Let rest 1 hour.

Place Dutch oven with lid on in your oven and turn heat to 475F. If you can leave both racks in your oven, place a baking sheet on the lower rack under the Dutch oven.

After 1 hour, sprinkle dough with flour, lightly spread over the top with gentle touch. Make 3-4 slices in dough with very, very sharp knife or bread lame. Carefully place the parchment with the dough into the hot Dutch oven. Put lid on. Bake in heated Dutch for 30 minutes. Remove lid and bake for another 10 minutes, until deep golden brown. Let cool 1 hour before slicing.


***optional baking instructions*** preheat oven to 425 F. Place the parchment with the dough on a baking sheet. Cover with an oven proof bowl that is just larger than the loaf. Place as high in the oven as you can. If you have a second baking sheet, place it on the bottom rack to keep the direct heat from cooking the bottom of the loaf too much. Bake for 20 minutes. Remove the bowl (carefully, and away from you, as there will be steam inside. Use a knife or spatula to lift the bowl and handle with potholders) and bake for another 10-15 minutes until golden brown and internal temp is 200 F. Allow to cool for 1 hour before slicing. This baking method yields a much softer crust. 


Cashew Butter Jam Bars - Phase 3

This is a spin in the classic PBJ that everyone loves- only made with FMD ingredients.

You can use almond butter and chopped almonds in this if you like.

My Vegan Butter works, but you can use a compliant store bought one if you want. 


Use any Phase 3 berries

Cashew Butter Jam Bars
Phase 3
Makes 10 healthy fat servings that are partial grain servings

½ cup Vegan Butter
3/4 cups xylitol or stevia or monk fruit equivalent
1 tsp alcohol free vanilla extract
1 extra-large egg, at room temperature
1 cup Coconut Cashew Butter or raw cashew butter
1 cup sprouted wheat flour
1/2 cup oat flour
1 tsp baking powder
3/4 tsp sea salt
Jam (see below)
1/4 cup raw cashews, chopped

Preheat the oven to 350 degrees.  Grease a 9x9 baking pan. 

Using a stand mixer or a hand held mixer, cream the vegan butter and sweetener on medium speed for 3 minutes. Add the vanilla, egg, and cashew butter and mix until well combined.

In another bowl, stir flours, baking powder, and salt together. Add the flour mix to the wet ingredients and stir to combine. Do not over mix- just incorporate the flours. 

Evenly spread two thirds of the dough in the prepared pan with a spatula. Spread the jam evenly over the dough. Use a spoon and drop bits of remaining dough over the jam- don’t worry if all the jam is not covered. The dough will spread as it bakes. Bake for 35-40 minutes, until golden brown. Check on it half way through and if it is getting too brown, cover loosely with a piece of foil. Remove from oven when done and immediately sprinkle raw chopped cashews on top. Lightly press them into the top. Cool and cut into small squares.


Jam

3/4 cup raspberries or blackberries or blueberries
1 tsp arrowroot
2 tsp cold water
Sweetener to taste

In a sauce pan, smash the berries a bit to break them up. Add sweetener if your fruit is not sweet enough. Bring just to a boil. While waiting for the fruit to come up to temp, mix arrowroot with cold water. Once fruit boils, add arrowroot. Stir and reduce temp to medium. Once the mixture is thick, remove from heat and let cool before spreading over the cashew butter crust. 

Classic Sprouted Wheat Bread - Phase 3


This is the bread of my dreams. The crumb and texture. The softness. The rounded top and golden crust. The yeasty homemade taste. 


If you have a stand mixer, use it to knead. If not, stir by hand and spend at least 10 minutes kneading this dough. You can get some frustration out. Put on some music and dance in place while you push and pull and fold the dough. Try not to use too much flour to knead. If the dough is sticky, oil your counter, and use oiled hands or an oiled bench scraper to fold the dough over. The more you knead it, the less sticky it will be.

I have not made this without xanthan gum. I am guessing you could sub a couple tablespoons of tapioca flour for the xanthan gum but I am not sure of the outcome. 


I do not have a p1 option for this. If you want a p1 bread, use my other bread recipe and make those mods. 

I have not tried this with other flours. There are no phase 3 general purpose flours that will work by themselves.

For the first rise- do not let it double. Just let it get puffy. Take a picture of the dough when you set it to proof, if you need a reference. You want it about halfway between freshly mixed and doubled.

Be sure to follow the tenting instructions, or the bread will brown too much. 


If you on maintenance, add 3T honey to the warm water and yeast. 


Classic Sprouted Wheat Bread
Phase 3
Makes 14 standard slices

1 1/4 cup warm spring water (110 degrees)
1/4 cup olive oil
3 1/2 cups sprouted wheat flour
2 1/2 tsp yeast (or 1 packet)
1/2 tsp xanthan gum
1 1/2 tsp salt

Put the water and yeast in a bowl for the stand mixer and stir to dissolve. If you are using the honey- add it now and let the yeast get bubbly. Add everything else except the salt. Turn the mixer on low and let it go for 2 minutes. Once the dough is stirred, add the salt and turn mixer to a medium speed. Let it knead and mix the dough for 5 minutes.
Alternatively you can stir everything but the salt together in a large bowl using your hands or wooden spoon. Add the salt when the dough ball starts to form. Mix then turn onto oiled counter. Keep a plate with a tablespoon of olive oil on it nearby. Oil your hands and knead the dough for 10 minutes. Fold it over towards you, push it away with the heels of your hands, rotate and pull the far side over the top, push with the heel of your hands. Oil you hands and counter as needed.

Place the dough in an oiled bowl and cover with damp towel. Let get puffy but not double in size. Turn dough out onto counter. Press into a circle, then roll up into log. Tuck ends under and place seem side down in oiled loaf pan. Cover with damp towel and place in warm spot until the dough has risen 1 inch above the pan. Place in preheated 350 degree oven for 20 minutes. Take a piece of foil, crease the middle and place tent over the bread and bake another 10-12 minutes, until an instant read thermometer reaches 190 degrees in the middle of the loaf.
Remove from pan and set on cooling rack. Cool completely before slicing. 


Easy Buns- Phase 3


You can whip these buns up quickly and they freeze nicely.

If you are not super strict with FMD or not following it, you can sub spelt flour or one of my flour mixes for the sprouted wheat flour.

I do not have a phase 1 modification for this recipe. 


You can make these into hamburger or hoagie buns- whatever shape you wish. 

For hot dog buns, shape a golf ball sized dough ball into a log shape about the size of a hot dog.
For hamburger buns, roll a golf ball sized dough ball on the counter under a cupped hand until smooth and round. 

For a hoagie bun, use a larger ball of dough and form into a log shape about 2x the size of a hot dog. 


Easy Buns
Phase 3
Makes 24 standard portions if you are being strict


2 cups water- 115-110 degrees
2T baker's yeast
3 cups sprouted wheat flour
1 tsp xanthan gum OR 4T tapioca flour
1 egg, lightly beaten
2T olive oil
2 tsp sea salt

Mix the yeast and warm water until yeast is dissolved. Add the egg, oil, flour and xanthan gum and mix with dough hook or stir by hand until a stiff dough is starting to form. Stir in salt. If you do not have a stand mixer, knead dough on floured counter for 3 minutes. If you are using a stand mixer, let it run for about 6 minutes. Dough should pull away from sides of the bowl.

Place dough in oiled bowl and cover with a damp cloth. Place bowl in a warm spot until dough is just doubled. 


Punch down the dough and form into buns. Place on parchment lined or silicone mat lined baking sheet. Cover with damp cloth and put back into the warm spot - let rise until doubled.

Bake in preheated 375 degree oven for 12-15 minutes. You want them golden brown. Brush with olive oil. 


Let cool before freezing. 

Orange Muffins - Phase 1


I have an abundance of oranges right now... apparently they were on sale. And, they were part of my Misfits box (see here for info on this great service- you can get a percentage of your first box with my code) so I have been stocking up on citrus!

I was going to make a cake. 


Then I thought about cookies. 

Maybe some marmalade? 


I settled on muffins. Super easy to whip up and can be totally compliant for FMD!! 


I use the zest and the fruit in this recipe. I peel the oranges with a knife and be sure to get all the white pith off- it is bitter. And be extra sure to get the pithy core out of the middle. Oh, and remove the seeds, too!

You can use any oranges you like- I used Cara Cara Oranges today, along with 2 lonely clementines. You need 1/2 cup puree, any extras you can freeze in ice cube tray for use in smoothies.

I hope you love these as much as I do. 


Orange Muffins
Phase 1
Makes 6 standard servings of grain

1 1/2 cups sprouted wheat flour (for gluten free, see below)
3/4 - 1 cup xylitol, or the equivalent
1/4 tsp salt
1 tsp baking powder
1/2 tsp baking soda
2 tsp vanilla
2 egg whites, lightly whipped
1/4 cup oat or brown rice (unsweetened) milk
2 tsp orange zest (fresh is best)
1/2 cup pureed, peeled, no pith orange(s)

**for Gluten Free- use 1/2 cup each of brown rice flour, oat flour and sorghum flour

Heat oven to 425 degrees.

In a small bowl, mix the dry ingredients together.
In a large bowl, whisk together the vanilla, milk, orange zest, orange puree and egg whites. 


Add the dry ingredients to the wet and stir just until mixed. Do not over-work.

Divide into lined muffin tins. 


Put the pan into the hot oven, close the door and IMMEDIATELY reduce temp to 375 degrees.

Bake 15-20 minutes, until a toothpick comes out clean. Let cool.