x

French Baguette- Phase 1 and Phase 3


French Baguette
Phase 1 and 3

Weighing the flour on a scale is more accurate but I included approximate measurements in cups
You can use spelt flour for a p1 only version.


540 grams (4 1/3 cups) sprouted wheat flour
11 grams (2 ¼ tsp) dry yeast
2 tsp sea salt
500 ml (2 cups plus 2T) warm spring water

Splash of apple cider vinegar

Heat oven to 460F

Mix flour and salt in a large bowl. Add vinegar to the water and then add the water to the flour. Stir with your hands until you get a very wet dough. Make sure all flour is mixed in. You may need to add more flour to get a sticky dough. 


Cover with damp towel for 90 minutes.

Sprinkle some sprouted wheat flout on our counter and gently pour the dough out of the bowl. Handle gently as to not break any bubbles in the dough. Sprinkle more flour on top of the dough. Use a knife or bench scraper to cut the dough into 2 long pieces. Any sticky spots- sprinkle with flour.

Gently twist the dough, then place in a French bread pan or on a parchment lined baking sheet. Repeat with the other dough. Tuck the ends under and try to make the loaves the same thickness throughout for even baking. 

Place the pan in the oven and throw 3-4 ice cubes into the bottom of the oven.

Bake for 25 minutes- or until the loaves are 200F in the middle. 

Allow to cool before cutting.

Bread will keep for 2-3 days, freeze for longer storage. 


Raisin Cane Sauce Dupe (phase 3)

 This sauce is so easy to whip up. It does require an extra step of making worcestershire sauce- but that is super east to make, too. You can have both done and sorted in 5 minutes. 

Both sauces will taste better if left overnight in the fridge.

You can find the recipe for the FMD friendly worcestershire sauce here in this link

This sauce is really good on chicken sandwiches, to dip sweet potato fries in, or dunk your FMD friendly chicken nuggies in it. 


Raisin Cane Sauce
Phase 3
Makes 4 servings healthy fat


1 cup FMD friendly mayo
1/2 cup FMD friendly ketchup
1.5 T worcestershire sauce (FMD friendly recipe here)
3-4 cloves of garlic, finely minced
1 tsp sea salt
1 tsp black pepper
1 tsp smoked paprika

Mix all the ingredients really well. Taste and adjust salt and pepper. Pour into a jar with a lid. Keep in fridge. 


Oven Fried Chicken- Phase 3


Once you have the panko breadcrumbs made up, the chicken part is pretty quick to get together. You can make lots of the panko and keep in an airtight container. 

Use whatever spices and herbs you like to season your chicken. 

If you have an oil sprayer, you can spray the breaded chicken with grapeseed or avocado oil before baking but this step is ok to skip. Do not use the store bought oil sprays. 


Oven Fried Chicken
Phase 3
Makes 4 standard servings protein and grain for p3 dinner


Panko

1 loaf of sprouted wheat bread

Cut the loaf into 4 chunks. Slice off the crust and keep to make regular breadcrumbs if you like.
Place the chunks on a rack on a baking sheet and place into a 300 degree oven for 15-30 minutes. You do not want the bread to brown too much, just dry out a bit so you can grate it.
Using a food processor with a grater blade is easiest but you can use a box grater. Grate the bread. If the middle of the chunk of bread is too soft to grate, throw it back into a low oven to toast. 

Once you have the load grated, spread onto a baking sheet and either allow to air dry or put into a 200 F oven for a few minutes until the crumbs are dried. Cool and store in an air tight container. 


Oven Fried Chicken

1lb boneless skinless chicken breasts or thighs
1T prepared mustard (sugar free)
1.5T compliant mayo
Sea salt and black pepper
1 egg

Herbs and Spices- garlic powder, onion powder, dried oregano, chili powder, chipotle powder, cayenne, dried parsley, dried basil, dried thyme, ground cumin, celery salt, Tony's Cajun seasoning- or your favorites.


Cut the chicken into strips or chunks if you wish. Season well with salt and pepper.

In a large bowl, mix the egg, mayo, mustard and whatever spices you like. If you want a simple fried chicken, add a tsp or more of onion powder, garlic powder, salt and pepper. Mix thoroughly. Add the chicken and stir to coat the chicken well. If the egg mix is too thick, add a tablespoon of water at a time and mix. You want this mixter to be pretty thick but not globby. Allow to sit to marinate for 15 minutes while you prep your sides. 

Preheat oven to 400F

Spread some of the panko onto a clean baking tray or a pie dish, or other shallow dish. I put about a cup in to start and add more as I need so I do not contaminate all of the breadcrumbs in my jar.
Put the chicken into the pank a piece at a time, and press the panko into the egg mixture. Turn the chicken and coat both sides. Place each piece onto a baking rack on a baking sheet. Coat all chicken in panko. Throw away any pank left in your pie plate or shallow dish since it was in contact with raw chicken. 

Spritz each piece of chicken with your oil sprayer, if you have one.

Bake the chicken for 10-15 minutes for strips or chunks, until the internal temp is 165F.


Spelt Bagels- Phase 1


Spelt Bagels

Phase 1
Makes 14 standard servings of grain

2 tsp instant dry yeast
1 ¼ cups warm water 110-120F- you may need more
2 ½ cups spelt flour
1 cup sorghum flour
1 ½ tsp sea salt


Mix the flour, yeast and salt in a large bowl. Add1 ¼ cups warm water. Mix well.

If you have a stand mixer, let the mixer knead with the dough hook for 10 minutes. You may need to add more water, but do not add until the machine has been mixing/kneading for at least 5 minutes.

If you are mixing by hand, stir everything together until you get a ball of dough. Knead on floured counter for 15 minutes.

You want a stiff dough.

Cover with damp towel and let rest for15 minutes.

Divide the dough into 7 (for standard servings. For over 20lb goal, divide into 5 equal pieces.)

Roll each piece into a tight ball by rolling in a circle on the counter with a cupped hand, tucking your fingers slightly. I usually do about 20 circles to get a tight smooth ball of dough. Do this with each dough piece.

Dip your finger into flour and poke into the middle of one dough ball. Keeping your fingertip on the counter, move it in small circles to widen the hole. Pick up the dough ball and put both forefingers in through the hole, one from each side and roll your fingers over each other to widen the hole. 


Place the dough ball on a parchment lined baking sheet and repeat with the remaining dough balls. Cover and let rest 15-20 minutes.


Heat oven to 425F

Bring a large pot or wok ¾ full of water to a boil. Once the bagels have rested, place into the boiling water. Do not crowd them, you may need to work in batches. Boil for 90 seconds on each side. Remove with slotted spoon or spider to baking tray.

Bake for 20-25 minutes, checking at 20. Allow to cool then slice.


Half a bagel is a serving of grain in phase 1, whether you make 7 or 5 bagels.


  •  You can use sprouted wheat flour, if you prefer. To eat in Phase 3, it would be ¼ of a bagel (slice bagel in half normally then cut the slice in half)

  •  If you want to add toppings to your bagels, do this as you take them out of the water and place onto the tray

  • If you have only a small pot to boil the bagels and can only do a couple at a time, use smaller baking sheets or multiple baking sheets and put them into the oven as soon as they come out of the water. They can shrink and wrinkle quite a bit if left to cool too long.


Bulk Deluxe Ranch Mix


If your family eats ranch dressing like it is going out of style, like mine, you need to make the mix in bulk.
I have done the math for you- this is 4x my Deluxe Ranch Mix recipe. This will fill a pint jar.
And to be honest, we go through so much ranch, I double this and keep it in a quart jar.

My son's favorite is 2 heaping tablespoons of this mix, with 1 1/2 cups homemade mayo and 1 1/2 cups or so of full fat coconut milk (you do not taste the coconut). You can also use homemade almond milk and add a tiny pinch of xanthan gum if you like your ranch thick. Homemade almond milk is thicker than store bought, so in my opinion, it works best. 


Bulk Deluxe Ranch Mix

¾ cup dried chives
1 T + 1 tsp dried dill
½ cup dried chopped onion
¼ cup onion powder
¼ cup + 2T garlic powder
¾ cup dried parsley
1 ½ T sea salt
2 ½ T fresh ground black pepper

Put everything into a blender and pulse until all herbs and spices are an even size. If you like your ranch chunky, then do not whiz up in the blender, just mix in the jar you are going to store it in. If you do not blend, the finer spices will sink to the bottom, so be sure to scoop even amounts of fine and course when mixing your batch of dressing. 

Birria- All Phases and Metabolism Revolution


Birria is a traditioanal Mexican stew usually prepared from beef, goat or lamb. It can be served as a stew, with fresh chopped onion and cilantro, or in tacos. While the traditional quesobirria tacos are not FMD compliant, the meat is still very tasty in a sprouted wheat or spelt tortilla, or even a lettuce wrap. Be sure to dunk either in the rich consomme as it is SO good!

This dish is relatively easy to make, even with the long ingredient list. There are two steps- start the beef cooking, and make the flavorful broth with the peppers, then cook it all together until the beef is super tender and easy to shread. 

I used a chuck roast from Costco, as it was the best price and relatively lean. 


Birria
All Phases
Makes 20 standard servings of protein


5 pound lean chuck roast, cut into 3 inch cubes
8 cups spring water
1/2 large white onion
1 whole head of garlic, cut in half
2T salt
4 bay leaves

Add all to a pot and bring to a boil. Reduce to a simmer, skimming off any foam that rises to the top every 30 minutes or so. Simmer for 1 hour.


For the adobo: (dried peppers can be found here: peppers)

12 guajillo peppers
3 ancho peppers
8 chilies de arbol
6 garlic cloves, peeled
8 peppercorns
5 whole cloves
2 roma tomatoes


Add the peppers and tomatoes to a pot and add 2 cups water. Simmer until the peppers and tomatoes are soft. Add to a blender with the peppercorns, garlic, cloves. Add the onion and garlic from the beef pot. Blend on high until smooth.

Strain the peppers mixer into the pot with the beef, using a rubber spatula to push the liquid through a fine mesh strainer. You may have to do this in batches. Discard the pulp.

Add to the pot:

1 tsp Mexican oregano
1/2 tsp dried thyme
2 tsp ground cumin
2-3 T beef bouillon (homemade)

Stir and simmer for about 1 1/2 to 2 hours, until the meat is very tender. Shred the meat if you are using for tacos.

Serve as a stew with chopped onion and cilantro, or use for tacos with your favorite toppings. Be sure to dip your tacos in the consomme, as it is very rich and flavorful! You can also make a ramen with this, just add some brown rice ramen noodles to the stew (phase 1 only)


Tips:

On phase 3, brown the beef in 2 T olive oil before adding the other (first) list of ingredients.

Also in phase 3, toast the peppers in 1T olive oil before adding water and spices and simmering until soft

If you have a lot of left over broth, freeze and use to make birria next time- just add to beef and cook until the beef is tender. 


Never Miss A Post Again!

 New Email Sign Up! 


Be sure to submit your email address to get an email when I post a recipe or tip or blog post!

Go over to the right hand column and subscribe! 

I used to have this feature but it was disabled by Blogger (the host of this blog). I added a new option. Sign up today!!


(I promise to never use your email address, or share it. In fact, I am not even sure how to see what email address you enter :) )

Moving to Social Media App Bluesky

 Hello!

Please note that I am moving to Bluesky for social media starting January 20, 2025.

Thank you so very much for following me there. I appreciate you so very much. 

I am deleting my Facebook page on Feb 1st, and my Instagram on Jan 20th.


Please join me if you can on Bluesky.

You can search THECLEVERSPOON (all 3 words) to find me, and here is my official name: @thecleverspoon.bsky.social


Bluesky is a social media app you can download from the app store. It is easy to sign up. 

I completely understand if you do not want another social media. Thank you for following me on Meta apps. 

I am deleting the Meta apps due to them becoming less user friendly as time goes on. They do not push my content to followers unless I pay to boost and since I do this all for free, I cannot pay. I have felt for quite some time that I am wasting my engery posting on social media when no one sees it or engages in it. 


This blog will remain and I will continue to post new stuff when I have it. 


Thank you

Carolyn

TCS


Almond Cream Cheese- Phase 3 (V)

Make this ahead of time and keep in the fridge- will last about 3-4 days. Use on pancakes, toast, crackers. Or you can add fresh herbs to make a dip for veggie crudite. Swap oil for olive oil and add garlic when blending for savory dip.


Almond Cream Cheese
Phase 3
1/4 cup is a healthy far serving


2 cups blanched peeled almonds
1/4 cup grapeseed oil
1 1/2 tsp sea salt
1/2 cup lemon juice
1/4 to 1/3 cup spring water

Soak the almonds overnight in spring water that covers the almonds by 1-2 inches.

Drain the almonds and rinse under cold water

Add to blender or food processor along with oil, salt, lemon juice. Blend, adding water 2 tablespoons at a time to get to the consistency you want. Scrape down sides as needed.Taste and add more lemon juice or salt if needed.
Pour into a container with a tight lid. Cover and place in fridge overnight for best flavor. It will firm up a bit when chilled. 

If you want a firmer cheese that crumbles, place into a oiled baking dish and bake at 300F for 30 minutes. Cool then chill overnight. 


Almond Flour Shortbread Cookies- Phase 3

Almond Flour Shortbread Cookies
Phase 3
Makes 6 standard servings of healthy fat


1 cup blanched almond flour 
2.5 T xylitol or stevia/monk fruit equivalent
2 T virgin coconut oil, melted
1 T water
1/8 tsp fine sea salt
1/4 tsp alcohol free vanilla or almond extract OR 1/2 tsp lemon/orange/lime zest

Preheat oven to 350F. Line a large baking sheet with parchment paper.
In a bowl, combine all of the ingredients, and stir to combine well.
Shape dough into twelve 1-inch (2.5 cm) balls. Space the cookie balls 2 inches apart on prepared baking sheet. Flatten to about 1/2 inch thickness with a fork or bottom of a glass.

Bake in the preheated oven for 10 to 12 minutes until golden. Cookies will seem soft while they are hot but will firm up as they cool.
Remove from oven and cool on the baking sheet for 10 minutes. 
Transfer to a wire cooling rack and allow to cool completely

Store in the fridge
2 cookies are a standard serving of healthy fat in p3

Stuffed Bell Peppers - Phases 1 & 3 (can be made vegan)

Stuffed Bell Peppers
Phases 1 & 3
Makes 4 standard servings of protein and a serving of grain each

If your peppers are large enough, you can cut the top off, core and stand them up in your baking dish. They will need to be big enough to hold 1 cups of rice, plus the protein and veggies in the filling. Dice up the tops, and add to the onion and carrots to cook. 

For Phase 3 breakfast or dinner, use quinoa and use half the amount. Top with compliant vegan cheese, if you want, for a healthy fat. 

For another variation, use half homemade sausage and half ground beef

1 lb lean ground beef or turkey or ground chicken OR 2 cups cooked black beans
Sea salt
4 large red, yellow, or orange bell peppers, cut in half from the stem to the bottom and cored
1 medium yellow onion, finely chopped
1/2 cup shredded carrot
3 cloves garlic, minced
1 1/2 tsp Italian seasoning (more if you like)
1/8 tsp red pepper flakes (optional)
1/4 cup nutritional yeast
1 tsp black pepper
1 tsp sea salt
1 cup tomato sauce
1 cup finely diced tomatoes, canned or fresh
4 cups cooked brown rice or quinoa

Preheat oven to 425F

Line a 9x13-inch baking dish with parchment (8x8 pan if you are not cutting the peppers). Place the peppers, cut side up, in the baking dish. Sprinkle with sea salt and some black pepper, if you like. Roast the peppers for about 10 minutes, until slightly browned and starting to get tender-crisp. A bit of liquid will accumulate in the bottom of the peppers; that's okay

Cook onion and carrot in a non stick skillet, adding a splash of water and pinch of salt, until onions are  transluscent. Add the garlic and cook 1 minute more; do not brown. Add the protein you are using, spices, and a healthy pinch of salt and black pepper. Increase the heat to medium high. Cook, breaking the meat up, until the meat is browned and almost cooked through, 4 to 5 minutes. If using black beans, just stir to mix in spices and warm the beans. Add the tomato sauce, diced tomatoes, and nutritional yeast and bring to a simmer. Cook, uncovered, until the meat is cooked through, 2 to 3 minutes. Add the cooked rice. Remove the skillet from the heat. Taste the filling and adjust any seasoning.

Spoon the filling evenly into the peppers. Roast for 10 to 15 minutes, until the filling is hot and the peppers are the softness you want.

Serving is 2 halves or 1 whole pepper. Add more veggies on the side.

Fruit Compote- Phases 1 & 3 (v)


Fruit Compote is super easy and quick to make, and a great addition to pancakes, waffles, toast, biscuits, oatmeal. Very versatile.
You can use peaches, blackberries, strawberries, blueberries, cherries, apples, raspberries, mango, pear. Keep in mind that apples will take a bit longer to cook to get soft. They key with staying compliant on FMD is not cook the fruit so much that it goes down in volume. For most soft fruits, you only need to heat them enough to release some of their natural juices, and so the arrowroot slurry will take effect and thicken the mixture. 

This does not freeze well, as the arrowroot will not keep it thick, and the fruit will get super mushy.


Fruit Compote
Phases 1 & 3
Makes 1 standard serving of fruit


1 serving of phase appropriate fruit, chopped or pureed, your choice
Splash of spring water
Sweetener to taste, if needed (pure stevia, pure monk fruit or xylitol)
Spices as you desire- cinnamon, nutmeg, cloves, etc (I personally only use these for apples, but use as you like)
Tiny pinch of sea salt
Vanilla extract or paste, optional

Slurry
1 T arrowroot powder
1 T COLD water
Mix together

Place your fruit and water and sweetener and salt in a saucepan or skillet. Heat over high heat until it bubbles. Stir frequently. Add more water if you need- this depends on the fruit, how much juice they release and how much "syrup" you want in the finished product. If you are using water, simmer just until the apples are as soft as you want them. 


Add the spices, if you are using any
Stir in the slurry to the bubbly mixture. Add half, stir and see how thick it gets. Only add more slurry if you want it thicker. Arrowroot does take a minute or so to activate, so gently simmer over medium heat for a minute or two before adding more. 
Once it is where you want it, remove from heat. Stir in vanilla if you are using and serve immediately. 


Avocado Salsa- Phase 3, Metabolism Revolution


This is great on tacos, or to dip veggies in, or try your hand at some garlicky crackers and dip away! In maintenance, this is great on Mexican Rice. 

Avocado Salsa
Phase 3
Makes 2 standard servings of healthy fat

For Metabolism Revolution: 4 servings healthy fat

1 ripe avocado
Half a juicy lime
Pinch of salt
1/2 serano pepper
A few fresh cilantro stems and leaves
Spring water

If you want it to be spicy, use the end closest to the stem. If you want less heat, use the end away from the stem end.

Put everything in your blender and blend until smooth. Start with a splash of water, and add more to blend until smooth. This will not be a thin sauce. Taste and add more salt or cilantro if you need. 


Chai Spiced Apples- Phase 1 and Maintenance


This compote is good on toast, pancakes, biscuits, oats. Or just to eat with a spoon. In maintenance, add a spoon full of my Coconut Cashew Butter under the warm apples on you pancakes and enjoy the best breakfast ever!

Be sure to use a cooking apple and not a snacking apple. Granny Smith, Honeycrisp, Gala are good choices, among others, to cook. Red Delicious are not a good cooking/baking apple- save those to eat fresh. 
I like to use 2 kinds of apples- my favorite blend in Granny Smith and Honeycrisp. 


Chai Spiced Apples
Phase 1 and 4
Makes 2 standard servings of fruit

2 cups of diced apples
1-2 tsp Chai Spice Blend (recipe on the blog)
1-2 whole star anise
1 tsp vanilla paste or extract
Pinch of sea salt
Stevia or pure monk fruit
2T Vegan Butter (phase 4 only)

Heat a non stick skillet over medium heat until very warm. Add the spice blend and whole star anise. Stir with rubber spatula for 15020 seconds, to toast, then scrape into small bowl. 

Add the diced apples and return the pan to the heat. If you are in maintenance, add the vegan butter. Add the pinch of salt. Let the apples sit for a minute or so- you want the apple to start to caramelize but not burn. Stir or toss the apples in the pan and allow to lighly brown some more. Add the spices, stir to coat. Then add a splash of water. Stir and cook the apples just until soft. Do not cook to reduce the size/amount of apples. Add vanilla and stir. If you want to sweeten the apples, add as much sweetener as you like. Remove star anise before serving. 

Chai Spice Blend- All Phases


Use this to flavor your herbal tea, coffee substitute, hot chocolate, apples, pancakes. So many uses!


Chai Spice Blend
All Phases

4 tsp ground cinnamon
2 tsp ground ginger
2 tsp ground cardamom
1 tsp ground cloves
1 tsp ground nutmeg
1/2 tsp ground star anise
1/2 - 1 tsp finely ground black pepper

Measure everything into a bowl and stir well to mix. Move to a jar with a lid and store with your spices. 


Italian Beef Sandwich- All Phases

You can use my Hamburger Bun recipe for P1 or P3 to make delicious sandwiches your whole family will love. In P2, make lettuce wraps, or use thin slices of jicama to make tacos. Or top your salad with this yummy protein!

Italian Beef
All Phases
Makes 12 servings protein

3lb chuck or round roast, trimmed of fat
2 cups beef broth, divided
8 oz pepperoncini pepper slices, plus 1/4 cup juice from the jar
8 oz giardiniera (mild or spicy), chopped variety
1 T Italian seasoning
2 tsp xylitol or stevia equivalent
1-2 tsp garlic powder
1 tsp onion powder
1 tsp sea salt
1 tsp black pepper, ground
1/4 tsp dried thyme, ground


Bring meat to room temp for 30 minutes. Season liberally all sides with salt and pepper. Brown the meat in a hot skillet on all sides. While the meat browns, measure out your spices into a bowl and mix together.

Transfer the beef to a crock pot or slow cooker. Add some of the broth to the skillet and scrape up the bits on the bottom. Pour over the meat in the crock pot. Add half of the spice mixture over the beef. Add in the pepperoncini peppers and juice, giardiniera (no juice from this) and remaining broth. Sprinkle the remaining spice blend over everything. Cook on low for 8-10 hours until the meat is soft and shreds easily. Once the meat is shredded, mix with the juices in the crock pot and cook for 30 additional minutes.

The Clever Spoon Patreon eBook is now available!


This is the compilation of recipes sent to Patreon subscribers during my time on Patreon. 


62 pages, lots of vegan/vegetarian recipes. These recipes have never been shared on my blog or in any other cookbook. They were previously only available to Patrons


This is an e-book. Be sure to download immediately. You can print at home, if you like

https://thecleverspoon.gumroad.com/l/rghnv

All sales are final- no refunds


Carrot Coffee Cake (v)

Mock Potato Salad

Gluten Free Tabouli (v)

Strawberry Salad (v)

Green Goddess Salad Dressing (v)

Chocolate Cashew Butter Fudge (V)

Tomato, Peach, and Basil Salad (v)

Paprika Chicken

Broiled Green Beans with Roasted Lemon Gremolata (v)

Slow-Cooker Caribbean Beef Stew

Chocolate Chunk Cookie Dough Dip (v)

Creamy Herb Dressing (v)

Chewy Pumpkin Blondies

Breakfast Sweet Potato Souffle

Lamb SkewersOlive Tapenade (v)

Alfredo Sauce (v)

Chicken Veggie Casserole

Steak with Porcini Butter

Thai Pork Skewers with Sweet Chile Sauce

Thai Sweet Chile Sauce (v)

Beef Stroganoff

Peach Mousse (v)

Peach Sauce (v)

Roasted Garlic & Caramelized Onion Hummus (v)

Apple Cabbage Slaw (v)

Curry Spiced Salmon Burgers

Taco Pasta Skillet (v)

Gingerbread Pancakes

Salmon Nuggets and Spinach Dip

Roasted Tomatoes and Cannellini Beans (V)

Sheet Pan Steak Fajitas

White Bean Dip (V)

Cherry Mint Sorbet (v)

Tuscan Fish Tray Bake

Lemon Cookies (v)

Roasted Chicken with Brown Rice

Slow Cooker Buffalo Chicken Chowder

Black Bean and Carrot Tacos (V)

Artichoke Hummus (v)

Lemon Chicken with Asparagus and Mushrooms

Loaded Sweet Potatoes (V)

Kale Salad with Raspberry Vinaigrette

Phase 3 Breakfast Bites (v)

BBQ Tofu Tacos with Slaw (V)

Lemon Muffins (v)

Zucchini Pizza Boats

Stuffed Tomatoes (v)

Roasted Kale and Mushrooms (v)

Sauteed Chicory (v)

Vegan Caesar Salad (v)

Roasted Red Pepper Hummus (v)

Vanilla Cake (v)

Roasted Kale and Mushrooms (v)

Pickles Beets (v)

Mixed Bean Salad (V)

Rajma (Kidney Bean Curry)

Chickpea Cauliflower Stew (v)

Nut Clusters (v)

Roasted Whole Cauliflower (V)

Vegan Shepherd’s Pie

Vegetarian BBQ Meatloaf Minis (v)

Fudgy Brownie Cookies (v) (GF)

Orange Cranberry Roast Chicken

Deviled Eggs Deluxe

Braised Cabbage (V)

Mango Peach Lime Smoothie (v)

Red Cabbage Slaw (V)

Granola (v)

Cinnamon Quinoa Breakfast Bowl (v)

Spanish Beans and Tomatoes (v)

Lentil Bolongnese (v)

Adobo Sauce (v)

Sheet Pan Portobello Tacos (v)

The Best Steak Sauce (V)

Szechuan Eggplant (v)

Ginger Cashew Sauce (v)

Sweet Cherry Almond Cake

Classic Butter Beans (v)

Mushroom and Kidney Bean Curry (v)

Easy Garlic & Herb Vegan Cheese

Firecracker Tofu (v)

Sweet Potato Bean Burgers 

Creamy Lemon Salad Dressing (v)

Creamy Mushroom Pasta (v)

Spicy Edamame (v)

Energy Balls (v)

Savory Breakfast Bowl (V)

Teriyaki Sauce (v)

Butternut Squash Quinoa Salad (v)

Sheet Pan Hash (v)

Blueberry BBQ Sauce (v)

Sausage and Peppers

Cabbage Hash Browns (v)

Southern Pinto Beans (v)

Butter Chicken or Chickpeas (v)

Roasted Carrot Hummus (v)

Dill Pickle Dip (v)

Pickled Peaches (v)

Butternut Squash Chips (v)

Baked Avocado Chips (v)

Thai Spice Blend

Thai Vegetable Noodle Soup

Zucchini Rollatini

Red Lentil Soup with Saffron (v)

Vegan Shawarma Bowls

Lemon Poppyseed Muffins (v)

Cucumber Melon Salad (v)

Vanilla Lime Scones (v)

Rhubarb Fool (v)

Blackberry Oat Bars (v)

Peach Bars (v)

Breakfast Bowl (v)

Lentil Walnut Burgers (v)

Watermelon Lemonade (v)

Melon Salsa (v)

Grilled Cantaloupe (v)

Creamy Cucumber Salad (v)

Cabbage & Rice (v)

Cabbage Curry (v)

Cheesy Garlic White Beans (v)

Ratatouille (v)

5 Minute Salad Dressing (v)

Creamy Pasta (v)

Kale and Cauliflower Soup (v)

Waffles- Phase 1


Waffles
Phase 3
Makes 8 standard servings grain

1 1/4 cups sprouted wheat or spelt flour
1/2 cup sorghum flour
2 cups unsweetened oat milk or unsweetened brown rice milk
2 egg whites
2 egg whites, lightly beaten until foamy and loose
1 tsp baking powder
1 tsp baking soda
1/4 tsp xanthan gum
1/8 tsp salt
1 tsp vanilla
1 tsp xylitol or stevia/pure monk fruit equivalent


Heat up your waffle iron

In another bowl, whip the 2 lightly beaten egg whites, milk, baking powder, baking soda, salt, sweetener until very well combined. Add flours and stir just until combined. Allow batter to sit for 10-25 minutes. 

While the batter sits, beat the other 2 egg whites until stiff peaks form.

Fold the stiff egg whites into the batter- you want it to look lumpy and not smooth. Cook in preheated waffle iron, as directed by manufacturer.

Serve with fruit compote and other components of P1 breakfast

Chai - Phase 1 & 3


Chai is a hug in a mug. I'm not a fan of tea leaves, so I'm kinda glad they aren't part of FMD. 

This is technically a Masala Chai, since it is spiced. 

This is highly customizable, also. There is no one Chai recipe. Change spices to please your palate. This is my favorite blend at the moment. Some folks like 1 part water to 2 parts milk, others for 1 to 1. You do want a thick and creamy milk. 

I prefer to use whole spices, as the ground spices will not dissolve. 

I think this fall, this will be simmering on my stove all day! 


Chai

Phases 1 & 3

Makes 2 mugs of tea


3-4 slices fresh ginger

10 green cardamom pods, smashed

1 tsp black peppercorns

1 tsp whole cloves

2-3 whole star anise

1-2 cinnamon sticks 

1/2 whole nutmeg, broken

Sweetener to taste

1 1/2 cups water

1 cup unsweetened plant based milk


Optional spices: split vanilla bean, fennel seeds, whole coriander seeds, holy basil leaves, lemongrass.


Place all the spices in a pot. Break the cinnamon sticks if they're too long to fit. Add 1 1/2 cups spring water. Bring to a simmer, stirring occasionally. Simmer for 10-15 minutes. You need it to reduce to about a cup. 


Add the milk and sweetener. Bring to gentle boil while stirring for 1 minute. Remove from heat. Stir. You can repeat this process if you like. I think it adds more flavor to cook the milk a bit.

Strain the tea. If you want it thicker, use a milk frother or whisk for a minute or so. 


Fall Spice Creamer and Cold Foam- Phases 1 and 3 (v)


Fall Spice Creamer
Phases 1 and 3 versions

Use your favorite plant based milk for this. Homemade or store bought. I prefer but milks for this creamer but oat and brown rice milks should work just fine

Phase 1- unsweetened oat or brown rice milk
Phase 3- unsweetened almond, coconut, cashew or oat

I do not use ground spices in this as they will not dissolve and leave the creamer with a gritty feel.

2 cups plant based milk 
3-4 cinnamon sticks
1 vanilla bean
3-4 star anise
10 whole cloves
1 whole nutmeg, crushed
2 inch piece of fresh ginger, sliced
sweetener to taste (birch xylitol, pure monk fruit or pure stevia)

Split the vanilla bean lengthwise. No need to scrape as most flavor comes from the pod and not the caviar inside. 
Place everything into a pot over medium heat and bring to a very gentle simmer. Do not boil. Reduce heat if there are lots of bubbles. Stir often. Simmer slowly for about 30 minutes. Allow to cool. Strain. 
Keep in fridge

Pro Tip. If the flavor ends up stronger than you prefer, simply add more milk to get to the intensity you prefer. 

To make cold foam:
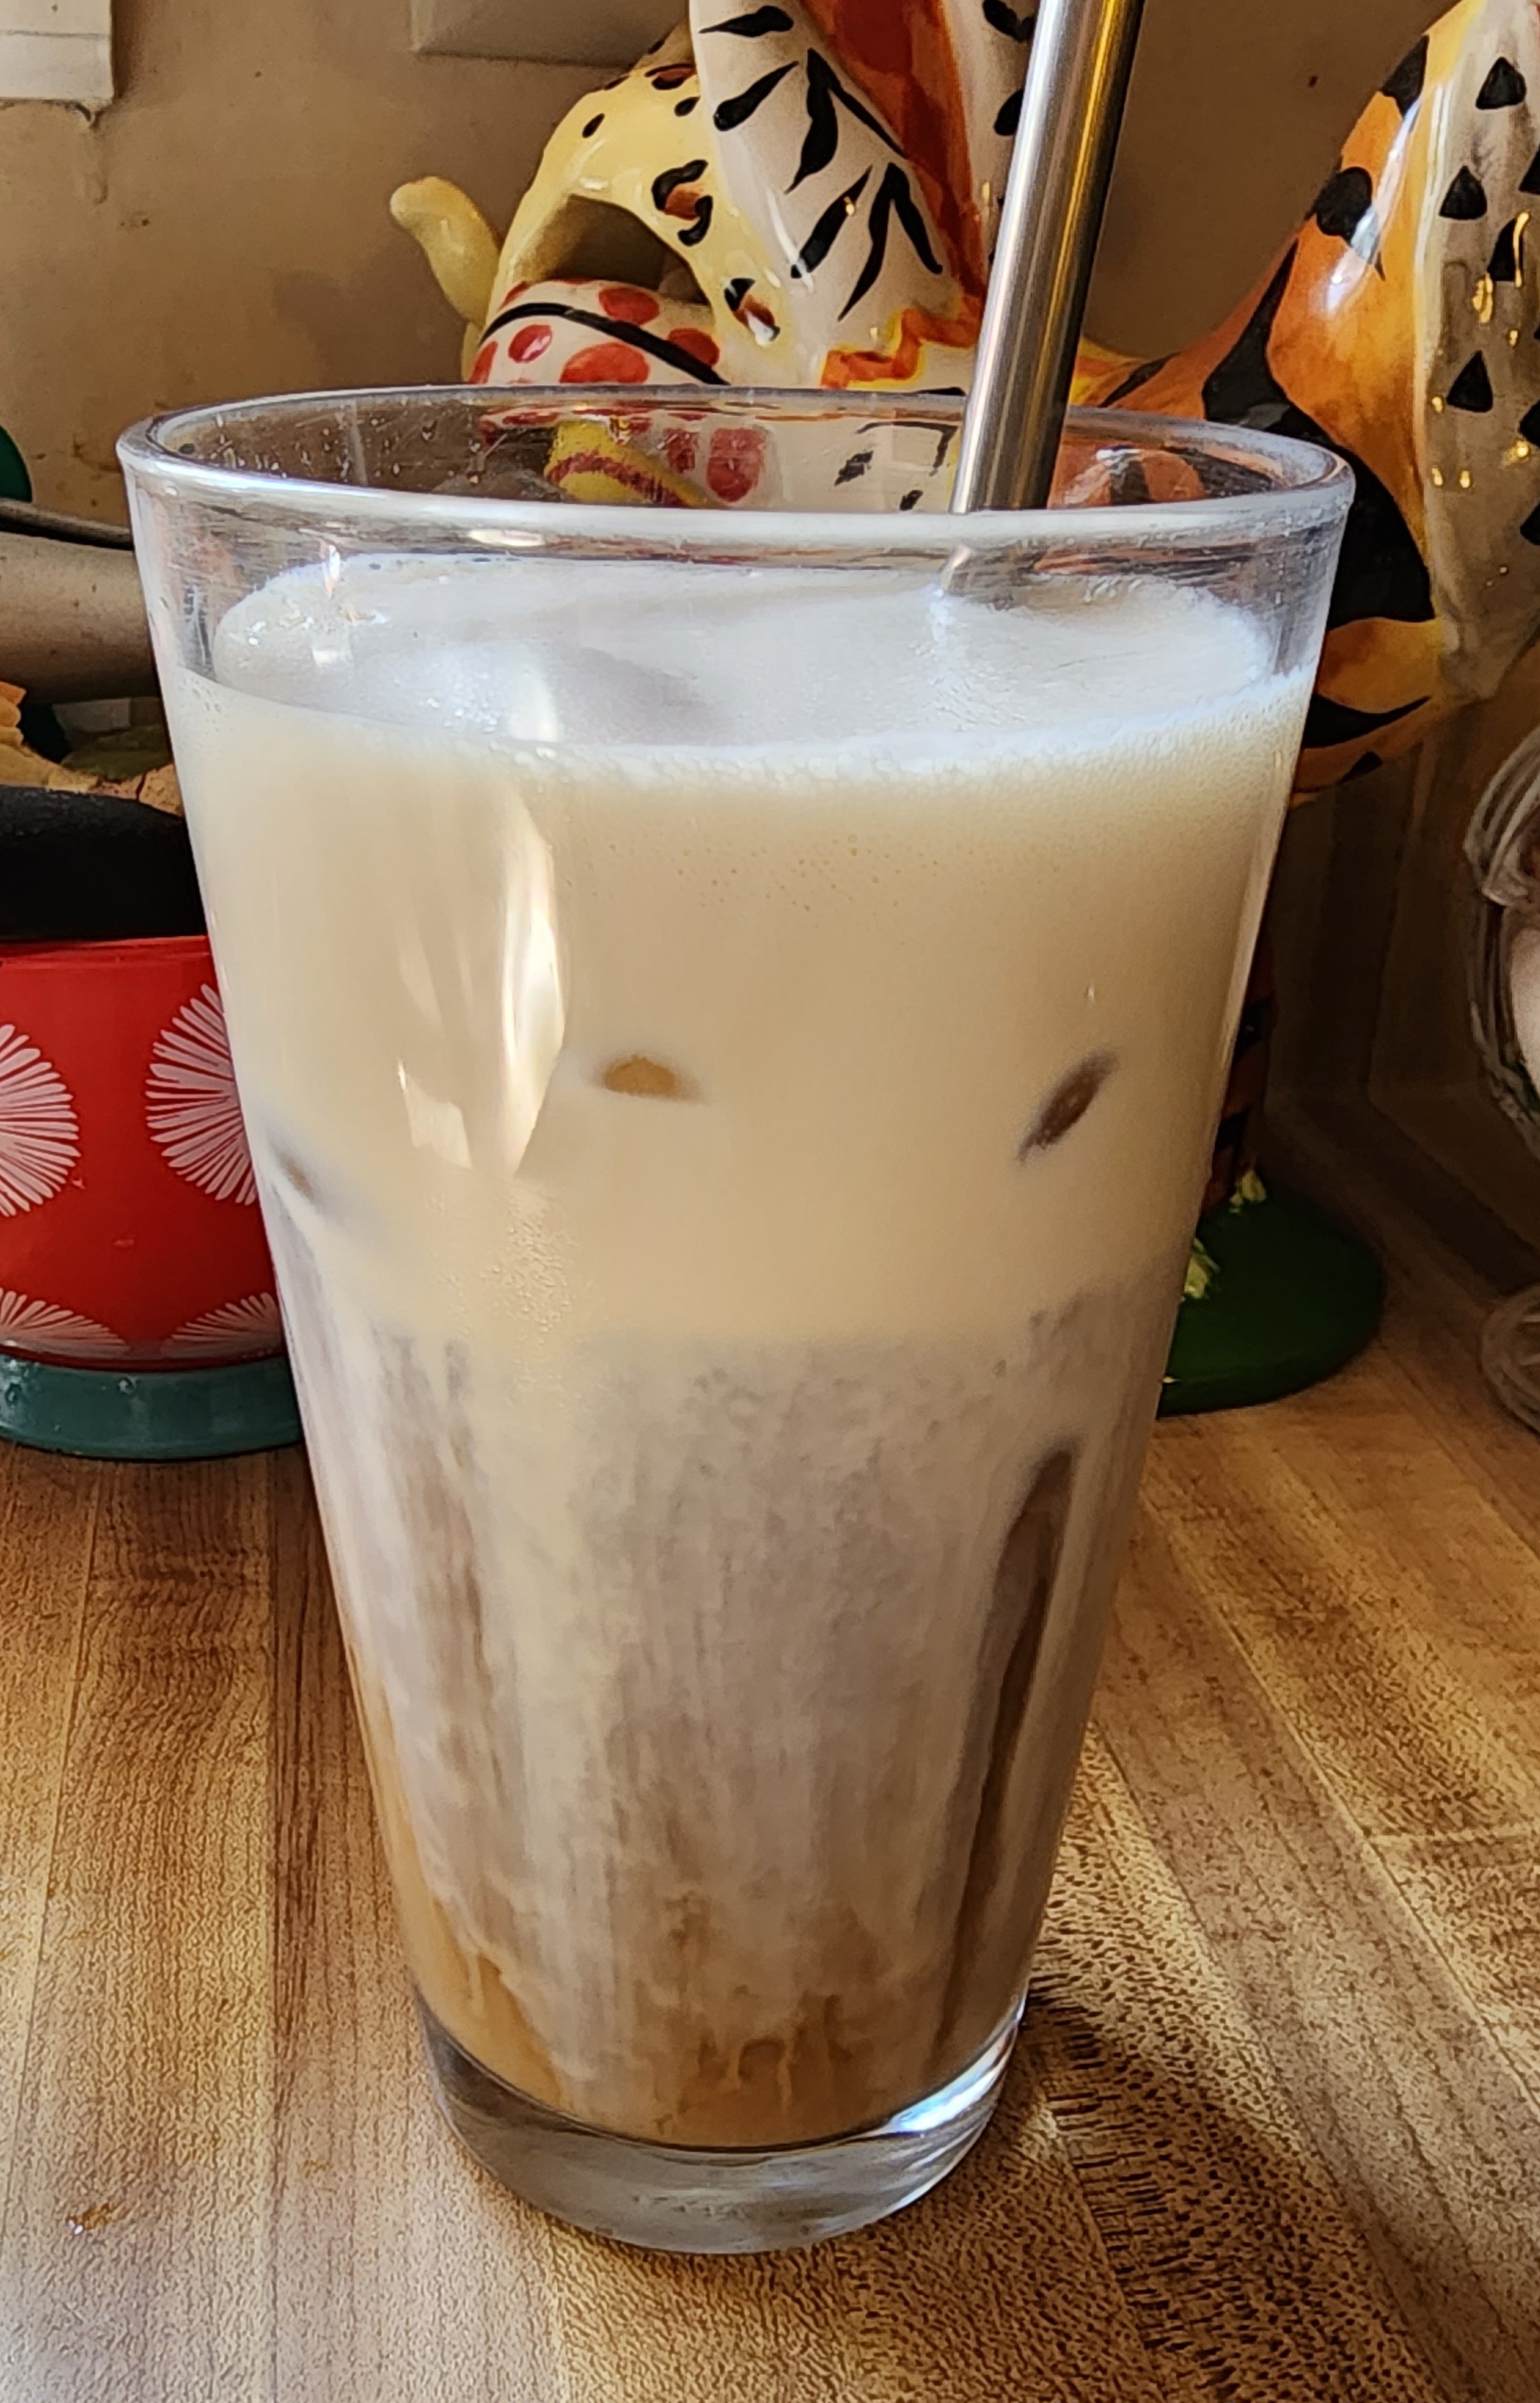
Place 3-4 tablespoons of the creamer into a tall jar or glass. Use a milk frother (you can get the link to purchase HERE) for 20-30 seconds until foamy. Pour over your iced coffee sub or herbal tea. 

Alternatively you can use a blender or shake in a jar for 1 minute